A flue gas analyser is only as good as the routine you run it through. Skip the warm-up or the fresh-air zero and the readings can mislead you — and on a combustion check, a misleading reading is a safety problem. This guide walks through using an electronic combustion gas analyser (ECGA/FGA) properly and reading what it shows. It's study material; only a Gas Safe registered engineer may carry out the work.
Before you start: prepare the instrument
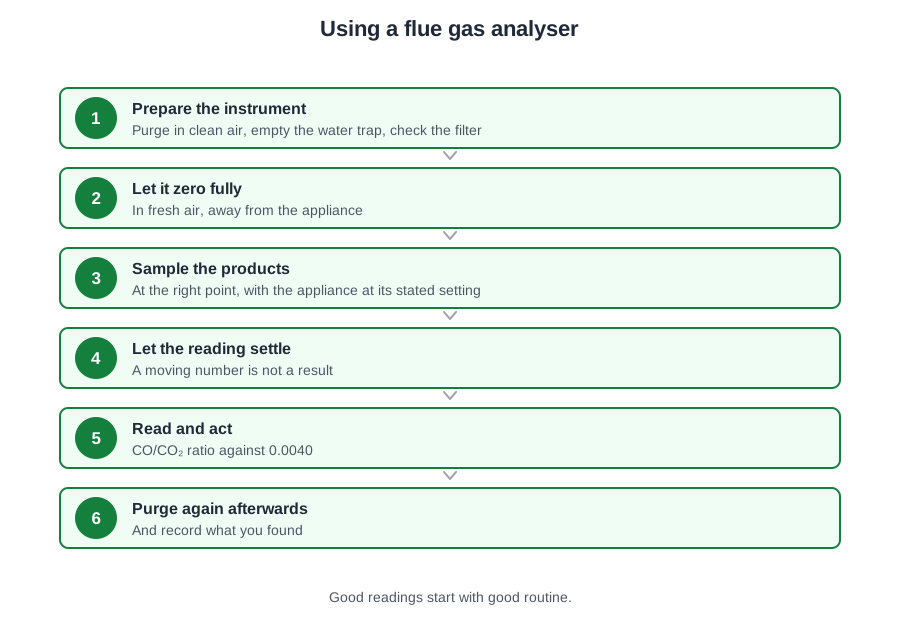
- Zero in fresh air. Switch on and let the analyser zero its sensors in clean outdoor air, away from any flue, vehicle exhaust or your own breath. This sets the baseline everything else is measured from.
- Let it warm up. The sensors need a short stabilisation period before they read accurately — don't rush to the flue.
- Check the consumables. Empty the water trap and check the particulate filter is clean. Moisture or soot reaching the sensors gives false readings and shortens their life.
- Confirm it's in calibration. A reading from an out-of-calibration analyser isn't valid (more on this in the care & calibration guide).
Sampling the products
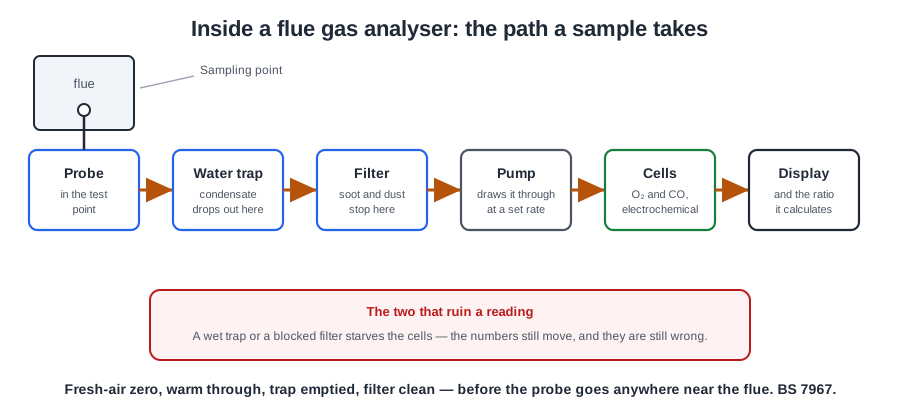
Insert the probe at the appliance's purpose-designed sampling point — not a random hole — to the depth the manufacturer specifies, so you sample the true combustion products and not diluted air. Run the appliance to the test condition (often maximum rate) and let the readings stabilise before recording. Take readings at the rate(s) the manufacturer asks for.
What each reading means
- CO (carbon monoxide) — the safety number. It's the product of incomplete combustion: toxic, colourless, odourless. Measured in ppm.
- CO₂ (carbon dioxide) — a normal product of complete combustion, used as the reference in the ratio. Measured as a percentage.
- O₂ (oxygen) — tells you about excess air. Most domestic appliances run with some excess air for a safety margin; very high O₂ means lots of excess air (and lost efficiency), while too little points to a rich mixture and CO risk.
- Flue gas temperature — used with CO₂ and O₂ to calculate efficiency. An unexpectedly high net temperature on a condensing boiler can flag scaling or fouling.
After the test
When you're finished, run the analyser in fresh air again to purge the sensors of flue gas before switching off — it protects the sensors and leaves the instrument ready for next time. Record your readings (for a boiler, on the Benchmark log) and cap the test point.
- Zero in fresh air, warm up, empty the water trap, check the filter, confirm calibration.
- Sample at the manufacturer's purpose-designed point, to the right depth, at the right rate.
- Let readings stabilise before recording.
- CO = safety (ppm); CO₂ = reference (%); O₂ = excess air; temperature = efficiency.
- Any CO means incomplete combustion — the CO/CO₂ ratio is the key output.
- Purge in fresh air before switching off, then record and cap the test point.
- Manufacturer's instructions set the sampling point and the pass figures.
10-Question Mock Test
Click an option to see whether you got it right. Explanations appear instantly — no submitting at the end.
Zero in clean fresh air so the sensors start from a known baseline — not near a flue, exhaust or your breath.
Sensors need a short stabilisation period before their readings can be trusted.
Flue gas carries water vapour; the trap removes condensate so it can't damage the sensors or skew readings.
Sample at the appliance's purpose-designed test point so you read true products, not diluted air.
Let the figures settle to a steady reading before recording them.
CO is shown in ppm; CO₂ is shown as a percentage.
O₂ indicates excess air — high O₂ means lots of excess air; too little points to a rich mixture and CO risk.
Complete combustion gives CO₂ and water — no CO. Any CO means the reaction was incomplete.
Purge in fresh air to clear flue gas from the sensors — it protects them and readies the instrument.
The manufacturer's instructions give the sampling point and the pass figures and take precedence over generic values.
Good readings start with good routine. Make it second nature.
PlumbMate drills the CPA1 method — zero, warm-up, sample, purge — with quizzes and spaced repetition mapped to the gas ACS tickets.
🔥 Open the gas course →Full ACS revision — CCN1, CPA1, CKR1, HTR1 & CENWAT · £29.99 for 60 days, or every course for a year at £59.99
Prefer to browse first? Back to the Gas Blog →