A customer rings about a dripping tap, banging pipes, or a bathroom where the cold has gone to a trickle. Nothing on that list is a new installation, and all of it is the job.
This outcome is worth 6 questions, 15% of the 505 paper, and it is almost entirely named lists — four defects, four sources of noise, six reasons for poor supply. That makes it some of the cheapest marks available, and it is usually the outcome people run out of time to revise.
For the rest of the unit see the cold water revision guide, and for how the components work in the first place, taps and float operated valves.
The four common defects
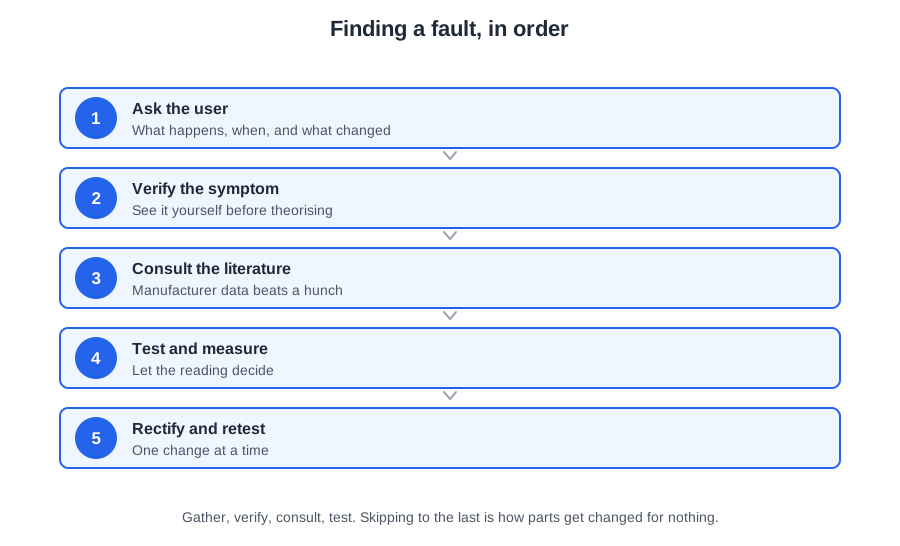
The specification names four, and every one of them is a tap or float valve fault.
1. Worn or broken washer
The commonest fault in plumbing. The rubber washer that seals against the seating hardens, splits or wears away, and the tap drips whether or not you crank it shut.
The tell is that the drip continues no matter how hard the tap is turned off. If anything, over-tightening accelerates it, because the harder the washer is crushed onto a worn seat, the faster it fails.
2. Defective tap seat
The seating is the brass ring the washer presses onto. Water passing between the two — which is what a dripping tap is — slowly erodes it, leaving pits. A new washer pressed onto a pitted seat will not seal evenly, so the tap goes on dripping.
This is why a tap that starts dripping again a fortnight after re-washering usually needs the seat attending to, not another washer.
3. Jammed headgear
The head workings seize, usually from limescale building up on the spindle threads or from corrosion where dissimilar metals meet. The tap becomes stiff, then immovable, and forcing it shears the spindle.
4. Ceramic disc failure
The two ceramic discs chip or become scored, usually by grit in the water, and the tap drips or will not shut off. There is no washer to replace, so the repair is different — see below.
Rectifying them
Re-washering and reseating a rising spindle tap
The course material uses the BS 1010 rising spindle tap, which is the easiest of all taps to maintain. The principle worth carrying is that a tap should be reseated as well as re-washered during maintenance — there is no point putting a new washer onto a pitted seat.
Two things before you start a single screw:
- Isolate the supply, then open the tap to relieve the pressure still in the pipe.
- Put the plug in. Small screws and nuts otherwise disappear down the waste and into the trap.
The sequence:
- Remove the screw holding the tap head to the spindle, and lift the head off. Cross-top heads can be stubborn — take care not to damage the appliance.
- Break the joint between the head workings and the tap body with an adjustable spanner, holding the body with water pump pliers and a cloth to protect the finish.
- Remove the jumper plate and washer from the spindle. Some rubber washers are held on by a small brass nut — replace the washer with the correct size and don't over-tighten the nut, which will break it.
- Wind the spindle out through the packing gland. Check it for wear, clean off any scale with a non-metallic pad, and re-grease with silicone grease.
- Check the packing in the gland; replace with a PTFE grommet if needed.
- Shine a torch into the tap body to inspect the seat. If it's pitted, grind it flat with a tap reseating tool, using the correct size of grinding head.
- Check the fibre sealing washer on the head workings — these often break on removal, and can be made good with PTFE tape.
- Reassemble with the head workings fully open. Tighten the packing gland nut, but not too far or the tap will be stiff to operate.
- Refit the head loosely, turn the water on with the tap open so any grinding debris flushes out, check for drips, then fit the securing screw.
Two of those steps are the ones exams ask about: inspecting the seat with a torch, and flushing the debris out before finally reassembling.
Ceramic disc taps
No washer, and most are not repairable. The head workings are replaced as a like-for-like unit, ordered from the manufacturer or a merchant. State whether it is the hot or the cold when ordering, because they open in opposite directions.
Jammed headgear
Isolate, remove the head, and free the spindle rather than forcing the handle. Descale it, clean the threads, and re-grease with silicone grease before reassembly. If the spindle or the threads are damaged, replace the head workings rather than nursing them.
Float operated valves
A Portsmouth valve is repaired by isolating the supply, unscrewing the union nut to remove the valve, taking off the end cap, withdrawing the cotter pin and float arm, and pulling the piston out. Brass pistons hold the washer behind a retaining cap; nylon pistons let you push the washer out through the side. Check the orifice for cracks while it's apart, and reassemble with the washer towards the spindle.
Sources of noise
Four named sources, and they are not four names for water hammer.
| Source | What you hear, and why |
|---|---|
| Insecure pipework | Knocking and rattling. Pipe that isn't clipped at the right spacing moves when flow starts or stops, and knocks against joists and masonry. It also has nothing to damp a pressure wave, so it makes every other noise worse |
| Air in the system | Gurgling, spitting outlets, and irregular flow. Usually left over from filling, or drawn in through a fault |
| Loose components | A rattle or buzz from a component vibrating in the flow — a loose jumper plate, a float valve not tight in the cistern wall, a badly fixed appliance |
| Defective washer | Whining or singing from a tap in use, or hammering from a float valve. A worn washer flutters against the seat instead of sealing, and the vibration travels down the pipework |
The one to reason about is the last. A defective washer causes noise as well as drips — so a customer describing a singing tap and a customer describing a dripping tap may be describing the same fault.
Reasons for inadequate water supply
Six named reasons. Work them from the outside in, because that is the order that finds the fault fastest.
- Low incoming water pressure. Nothing wrong with the installation at all. Check the time of day and local demand before condemning anything.
- Underground bursts. A leak on the supply pipe between the main and the property. Suspect it where pressure is poor at every outlet and there is damp ground, a soft patch, or unexplained meter movement.
- Partially closed valves. The cheapest fix in plumbing, and remarkably common — a stop valve never fully reopened after previous work.
- Blocked or partially blocked components. Debris, scale or corrosion in a strainer, a float valve orifice, a tap or a check valve.
- Incorrectly sized components. Pipework or a fitting too small for the demand, so the flow is throttled at that point however good the supply is.
- Air locks in low pressure systems. A pocket of trapped air in a gravity-fed run. There is not enough head behind the water to push it out, so flow stops or comes in bursts — which is why air locks affect cistern-fed outlets and rarely mains-fed ones.
The diagnostic shortcut: if every outlet is poor, look outside the property. If one outlet is poor, look at that outlet. Poor flow at one tap is a blockage or a partially closed service valve; poor flow everywhere is supply, a burst, or the main stop valve.
Finding a leak
A leak you can see is easy. The ones that matter are under floors, buried in walls, or underground on the supply pipe.
- Look first. Damp patches, staining on ceilings, verdigris or white deposits at joints, corrosion, a musty smell. Follow the pipe run rather than the damp — water tracks along joists before it drops.
- Use the meter. Turn off every outlet and appliance, then watch the water meter. If it still moves, water is going somewhere — and if it stops when you close the internal stop valve, the leak is inside; if it keeps moving, it is on the supply pipe outside.
- Isolate and narrow. Close service valves section by section, watching the meter or a pressure gauge after each, until the movement stops. The last section you isolated contains the leak.
- Pressure test. Isolate the suspect section, connect a hydraulic test kit and watch for the pressure to fall. A steady drop confirms a leak in that section.
- Listen. Acoustic listening equipment locates a buried leak by the sound of escaping water, and is what specialist detection companies use before anyone digs.
Repairing leaks
Whatever the joint, the first three steps are the same: isolate, drain the section, and dry it. Then the repair depends on the joint type.
- Compression. Try a small nip — a quarter turn — first, since a weeping compression joint is often just undertightened. If that doesn't stop it, isolate, dismantle, and replace the olive. A distorted or over-compressed olive will not reseal.
- Soldered. The section must be completely drained and dry — a capillary joint will not take solder with water in the pipe, because the water carries the heat away. Clean the fitting and the tube, re-flux, and resolder.
- Push-fit. Usually the pipe was not inserted to full depth, or the O-ring is damaged or has been cut by a burr. Remake the joint using the correct release collar, checking the insertion mark and that the pipe end is clean and deburred.
- Threaded. Dismantle, clean the threads, and remake with fresh PTFE tape or jointing compound. Tape that has been disturbed will not reseal.
Afterwards, refill slowly, vent the air, and check the joint under full pressure before closing anything back up. A joint that holds at low pressure while the system fills can still weep once it is up to mains pressure, and by then the floor is usually back down.
Common exam traps
Trap 1: re-washering alone often isn't the fix. A pitted seat needs reseating too, or the new washer drips within weeks.
Trap 2: ceramic disc taps have no washer. The repair is a replacement head workings unit, and you must specify hot or cold.
Trap 3: a defective washer is a source of noise as well as drips. It appears in both named lists.
Trap 4: air locks affect low pressure systems. There isn't enough head to push the air pocket through. Mains-fed outlets rarely suffer them.
Trap 5: a soldered repair needs the pipe bone dry. Water in the tube carries away the heat and the joint will not take.
Trap 6: check the obvious first. A partially closed stop valve from previous work explains a surprising number of poor-flow callouts.
Quick revision summary
Before the mock test, six things you need to be able to produce from memory:
- Four defects: worn or broken washer, defective tap seat, jammed headgear, ceramic disc failure
- Four sources of noise: insecure pipework, air in the system, loose components, defective washer
- Six reasons for inadequate supply: underground bursts, blocked or partially blocked components, incorrectly sized components, partially closed valves, air locks to low pressure systems, low incoming water pressure
- Re-washer and reseat together — inspect the seat with a torch, grind it with a reseating tool, and flush the debris out before final reassembly
- Leak identification: look, use the meter with everything off, isolate section by section, pressure test, then listen
- Leak repair: isolate, drain, dry — then nip or replace the olive, resolder dry, remake push-fit to full depth, or remake threads with fresh PTFE
📝 16-Question Mock Test
Click an option to see whether you got it right. Explanations appear instantly — no submitting at the end.
Jammed headgear. The four named defects are a worn or broken washer, a defective tap seat, jammed headgear and ceramic disc failure. All four are tap or float valve faults.
A pitted seat. Water passing between washer and seating erodes the brass, and a new washer pressed onto a pitted seat cannot seal evenly. That is why a tap should be reseated as well as re-washered during maintenance.
Limescale build-up on the spindle threads, or corrosion. The tap gets stiff, then immovable, and forcing the handle shears the spindle. Free and descale the spindle rather than applying more force.
Open the tap to relieve residual pressure, and put the plug in the appliance. The plug matters more than it sounds — small screws and nuts otherwise disappear down the waste and into the trap.
It grinds the seat, removing the pits caused by water passing between seat and washer, so the new washer sits evenly. Inspect the seat with a torch first to see whether it is needed.
To flush out the grinding debris left by reseating. Leave it in and it lodges under the new washer, and you have recreated the drip you came to fix.
Whether it is hot or cold, because they open in opposite directions. Ceramic disc taps have no washer and most are not repairable, so the head workings are replaced as a like-for-like unit.
Insecure pipework. The four named sources are insecure pipework, air in the system, loose components and a defective washer. Pipe that isn't clipped at the right spacing knocks against the structure and damps nothing.
A defective washer. Instead of sealing, it flutters against the seat and the vibration travels down the pipework. Note that the same fault appears in both named lists — it causes noise as well as drips.
Gurgling and spitting, with irregular flow, is trapped air. A steady drip is a washer or seat, and a stiff handle is jammed headgear.
Outside. If every outlet is affected, the cause is common to all of them: low incoming pressure, an underground burst, or a partially closed stop valve. Poor flow at one outlet points to that outlet.
There is not enough head to shift the trapped pocket. On a mains-fed outlet with two or three bar behind it, air is pushed straight out; on a gravity run with a metre of head, it sits there and stops the flow.
A partially closed valve — typically a stop valve never fully reopened after previous work. It costs nothing to check and explains a surprising number of callouts.
Turn everything off and watch it. If the meter still moves, water is going somewhere it shouldn't. Close the internal stop valve as well: if it stops, the leak is inside; if it keeps moving, it is on the supply pipe outside.
A quarter turn. A weeping compression joint is often simply undertightened. If that does not stop it, isolate, dismantle and replace the olive — a distorted or over-compressed olive will not reseal.
Water carries the heat away. The blowtorch ends up boiling the water in the tube instead of heating the fitting, and the joint never reaches temperature. Bone dry is not a preference — it is the difference between a joint and a mess.
How PlumbMate puts this into practice
Three named lists and a handful of procedures — ideal spaced retrieval material, and the cheapest 6 marks on the paper once they stick.
- Flashcards, not essays. One prompt, one answer.
- Wrong answers are logged and resurface more frequently in later sessions.
- The 3× rule. Three correct answers before a question clears.
- Explanations on every question, like the ones above.