A cold water installation isn't finished when the last fitting is made up — it's finished when the system has been commissioned, pressure-tested, flushed, and handed over to the customer with the paperwork they need. Level 2 expects you to know the five commissioning stages, both soundness-testing procedures (rigid and plastic), and the basics of ongoing maintenance.
This is the sixth and final deep-dive in the Level 2 cold water sub-cluster. For the others, see the water sources and supply, direct vs indirect systems, cisterns, fluid categories and backflow, and hard and soft water posts.
The five stages of commissioning
Same structure as the heating and drainage commissioning posts — because the Water Regulations specify the same commissioning sequence for every domestic plumbing installation:
- Visual Inspection
- Soundness Testing
- Flushing and Disinfecting
- Performance Testing
- Final Checks and Handing Over
Each stage completes before the next starts. Skipping ahead — for example, trying to pressure test without checking for open ends first — is how jobs go wrong.
Stage 1: Visual inspection
Before filling with water, walk round the installation and check:
- Pipework adequately supported — clips at appropriate centres (15mm horizontal copper at 1.2m; 22mm horizontal copper at 1.8m; 15mm horizontal plastic at 300mm — covered in the processes material)
- No damage to pipework or appliances
- No open ends — any unsealed pipe will make an expensive mess when the system fills
- Valves in the right positions — stop valves on supply, gate valves on distribution
- Joints properly made — all solder joints clean, all compression fittings hand-tight, all pushfit connections fully home
Once the inspection passes, fill the system with water and check again for obvious leaks before pressure testing.
Stage 2: Soundness testing — rigid pipe
Rigid pipe includes copper, low carbon steel (LCS), and stainless steel. The test procedure:
- Visually check for open ends — cap any before starting
- Fill the system with wholesome water and leave for 30 minutes so the water temperature stabilises
- Check for visible leaks
- Using a hydraulic pump, pressurise the system to 1.5× the maximum working pressure
- Check again for leaks
- Leave on test for 1 hour at 1.5× working pressure
- Check for any drop in pressure — if there is one, find and fix the leak, then restart from the fill-with-water stage
- If no pressure drop, complete the paperwork and move on to flushing
Worked examples for the test pressure:
- Working pressure 3 bar → soundness test at 4.5 bar
- Working pressure 5 bar → soundness test at 7.5 bar
If you find a leak at any stage, stop, fix, and restart the test. Don't try to patch and continue.
Stage 2 (continued): Soundness testing — plastic pipe
Plastic pipe (polybutylene, MDPE) is elastic — it stretches slightly under pressure, so simple rigid-pipe-style tests give misleading results. Two test procedures apply.
Test A — tiered pressure test:
- Visual check for open ends
- Fill with wholesome water to 1 bar and leave for 45 minutes
- Check for leaks
- Pressurise to 1.5× working pressure and check again
- Hold at 1.5× working pressure for 15 minutes
- Drop to 1/3 of working pressure and hold for 45 minutes
- Check for pressure drop — if present, fix and restart
- If no drop, move on to flushing
Test B — extended observation with tolerance:
- Visual check for open ends
- Fill with wholesome water and check for leaks
- Pressurise to 1.5× working pressure, check for leaks
- Top up regularly to maintain 1.5× working pressure for 30 minutes (allows pipe to stretch)
- Note the pressure, leave for 30 minutes, then check — if drop is more than 0.6 bar, test fails
- If within tolerance, note pressure and leave for 120 minutes — if drop is more than 0.2 bar, test fails
- If within both tolerances, move on to flushing
The principle behind Test B: plastic pipe continues stretching slightly for some time after pressurisation, and some pressure drop is normal. The tolerances distinguish stretching (expected) from leaks (not acceptable).
Stage 3: Flushing and disinfecting
Flushing removes flux residues, debris, and manufacturing lubricants from the pipework before the system goes into service.
Domestic flushing:
- Flush with wholesome water (mains water)
- No chemical disinfection required under normal circumstances
- Run every tap until the water runs clear
Commercial or industrial flushing:
- May require chlorine-based products for disinfection
- All relevant COSHH procedures must be followed
- If the disinfected water is to be flushed into the sewage system, the water undertaker must be informed beforehand
Large quantities of disinfection fluid can overwhelm treatment processes or damage the biological components of some sewage plants, which is why the water company needs advance notice.
Stage 4: Performance testing
Performance testing checks the system actually works as designed under real operating conditions. For cold water systems, the two key tests:
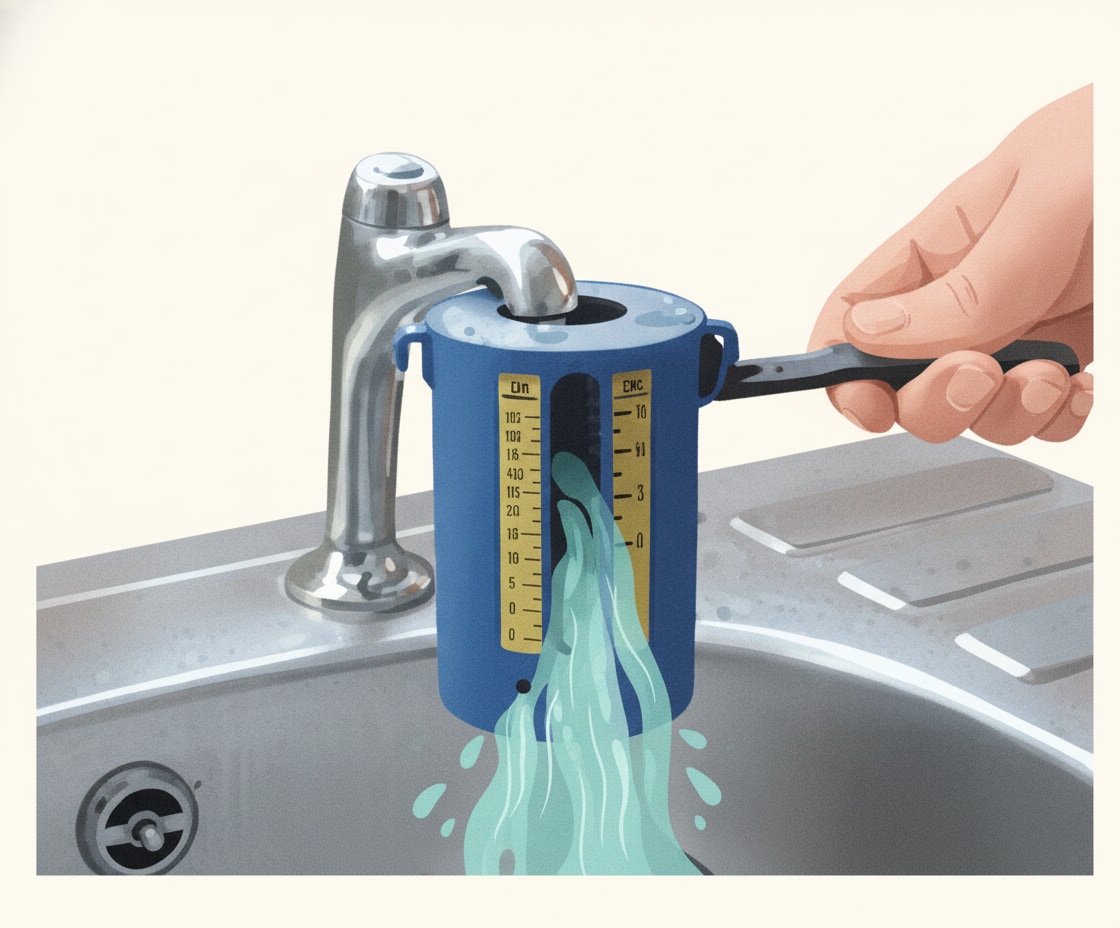
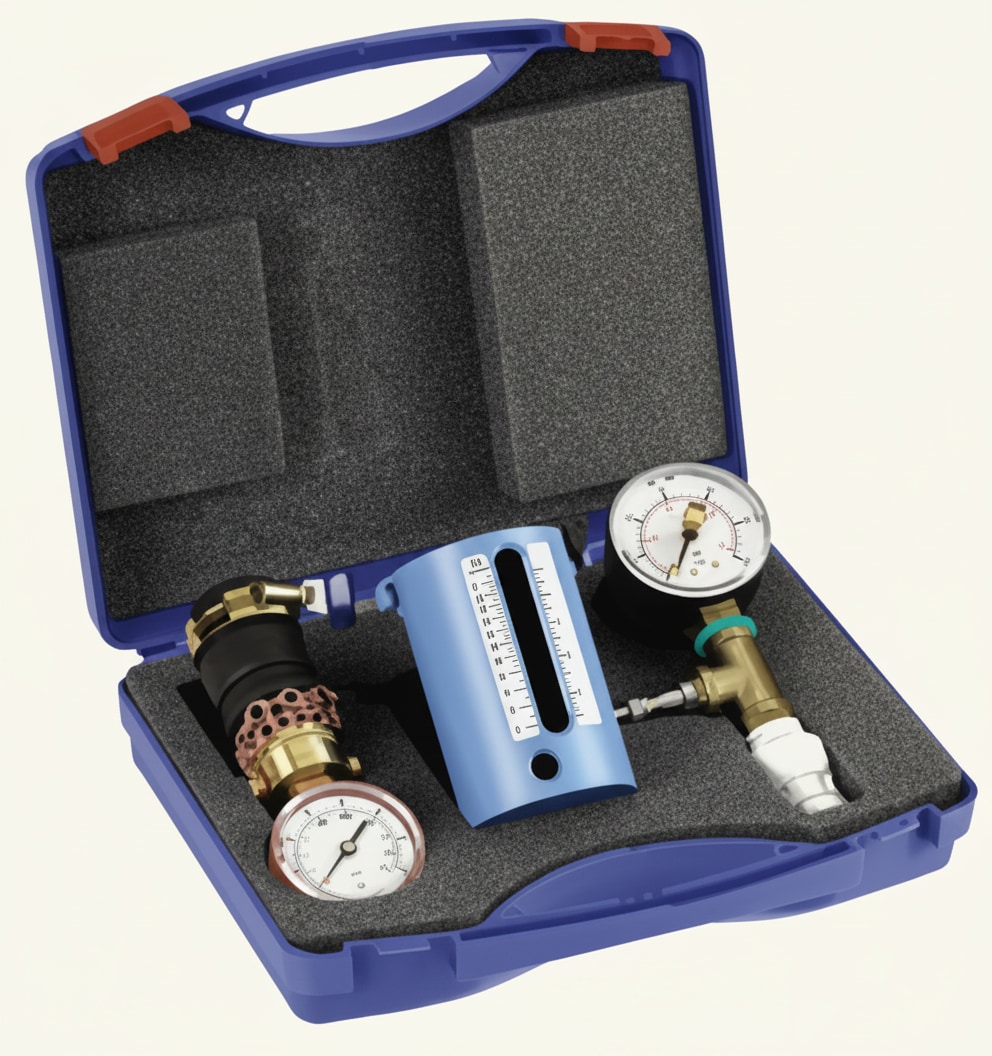
Flow rate test. Measured at each outlet under maximum demand (all taps open simultaneously). The tool: a Weir cup — a device that measures how many litres per minute flow from a given outlet.
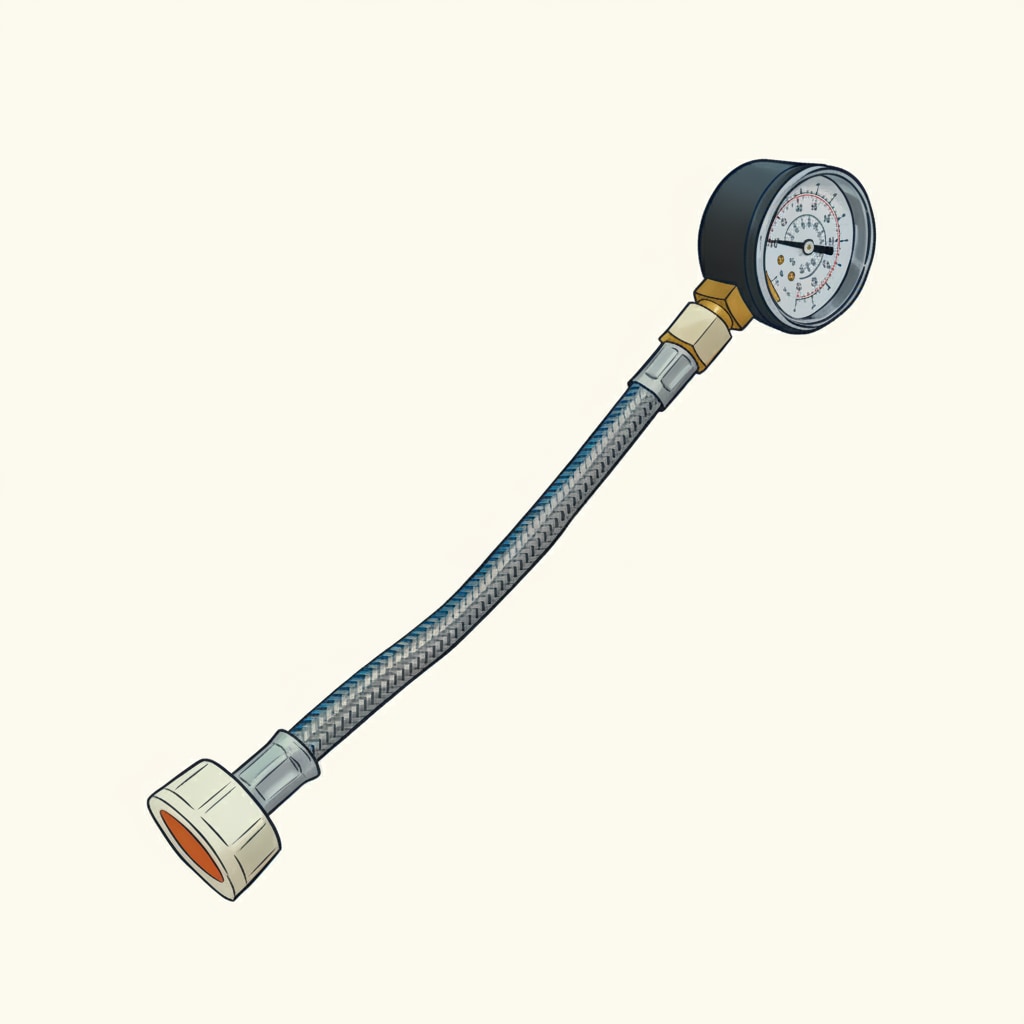
Pressure test. Measured at each outlet with a pressure gauge. Tests both:
- Static pressure — pressure with all outlets closed
- Working pressure — pressure with all outlets running
Both are important. Static pressure tells you what the system holds against; working pressure tells you what's available to an appliance under real conditions.
Record the results — the customer (and any future plumber) needs to know what pressures and flow rates are available in the property.
Stage 5: Final checks and handover
The end of the job:
- Hand over all relevant documents — installation certificates, any warranties, manufacturer information
- Explain how the system works to the customer — where the stopcocks are, which valve does what, how to isolate specific appliances
- Demonstrate operation where useful (draining down, refilling)
Good-practice additions:
- A letter thanking them for their custom
- Highlight the need for annual servicing of appliances like water softeners and filters
- Leave an emergency contact number, ideally attached to a key appliance, so the customer calls you rather than a competitor when there's a problem
Maintenance
Maintenance frameworks follow the same pattern as other clusters:
Planned preventative maintenance. Components replaced at convenient times before they fail. Scheduled using a maintenance schedule; outcomes logged on a maintenance record. Common on large installations (commercial, industrial).
Regular visual inspections. Checking for:
- Leaks — any sign of weeping joints or damp patches in cupboards or ceilings
- Adequate clipping — have any clips broken or come loose?
- Safety — loose pipework, missing electrical bonding on metal pipework, stainless steel sinks, cast iron pipes
- Cistern water levels — adjust or replace float valves as needed
Annual performance testing on larger systems — confirm the system still delivers expected pressures and flow rates.
Decommissioning
Temporary decommissioning — taking part of the system out of service with expectation of returning it:
- Inform anyone affected before turning off supply
- Isolate at the internal stop valve for small jobs
- If isolating at the external stopcock, check whether it affects more than one property
- Provide alternative supply or heat source for elderly or infirm customers in cold weather
- If the only WC in a property is affected, reinstate the same day
Permanent decommissioning — removing an appliance or pipework for good:
- Cap the pipe as far back as possible — typically to the branch, to prevent stagnation and bacterial growth in a dead leg
- Remove appliance, trap, and associated pipework properly
Open-ended pipework on a live system must be sealed with stop ends — not tape, not plugs, not crimping. Only proper stop ends give a reliable seal on live pipework.
Common exam traps
Trap 1: Rigid pipe test pressure = 1.5× working pressure. Not 2×, not working pressure, not 1× with a 30-minute hold. Specifically 1.5× working pressure for 1 hour.
Trap 2: Temperature stabilisation period = 30 minutes. Before any pressure test on rigid pipework, let the water sit for 30 minutes so any temperature-induced pressure fluctuations settle down.
Trap 3: Plastic tolerance figures. Test B: 0.6 bar max drop over the first 30-minute observation, 0.2 bar max drop over the 120-minute observation.
Trap 4: Domestic flushing = wholesome water. Not chlorine. Not COSHH-controlled chemicals. Those are for commercial installations only.
Trap 5: Chlorine discharge requires notifying the water undertaker. Not building control, not the HSE — the water undertaker. Because large chlorine discharges can damage sewage treatment biology.
Trap 6: Performance testing tools. Weir cup for flow rate; pressure gauge for pressure. Not a thermometer, not a voltage tester.
Trap 7: Dead legs. Cap as far back as possible when decommissioning — same principle as everywhere else in plumbing: don't leave stagnant water.
Quick revision summary
Before the mock test, seven things you need to be able to produce from memory:
- Five commissioning stages in order: Visual → Soundness → Flushing → Performance → Handover
- Rigid pipe soundness test: wholesome water, 30 min stabilisation, 1.5× working pressure, 1 hour hold
- Plastic pipe Test A: 1 bar/45 min → 1.5× working pressure/15 min → 1/3 working pressure/45 min
- Plastic pipe Test B: 1.5× working pressure, 30 min top-up → 30 min observation (0.6 bar drop max) → 120 min observation (0.2 bar drop max)
- Flushing: domestic = wholesome water; commercial = chlorine (COSHH) + inform water undertaker
- Performance tools: pressure gauge + Weir cup
- Decommissioning: cap as far back as possible to prevent stagnation; stop ends on open pipework
📝 10-Question Mock Test
Click an option to see whether you got it right. Explanations appear instantly — no submitting at the end.
Fitting components is installation, not commissioning. Commissioning is everything you do after installation to verify the system works. Options A, B and C are all genuine commissioning stages.
The standard rigid pipe test pressure. Working pressure alone (A) wouldn't catch weaknesses; 2× (C) is unnecessarily aggressive; 10× (D) would destroy the pipework. Same figure as heating and drainage testing.
The water needs time to reach ambient temperature after being fed into the system — otherwise cooling/warming during the test will cause pressure fluctuations that look like leaks. Shorter periods don't reliably stabilise.
One hour on test at 1.5× working pressure. Shorter periods don't give slow leaks time to show themselves in the pressure reading.
Test A starts at 1 bar for 45 minutes before moving up to 1.5× working pressure. The 1 bar initial stage allows basic leak inspection at low pressure before committing to the full test pressure.
Domestic flushing uses mains water directly. Chlorine solutions (A) are for commercial/industrial systems where disinfection is part of commissioning. Inhibitor (C) is for heating systems specifically. Deionised water (D) isn't used for flushing — it's a lab-specific material.
The water company needs advance notice so they can manage treatment process capacity and prevent damage to sewage treatment biology. Building control (B) is for planning/construction matters. CORGI (C) and IPHE (D) aren't regulators for water discharge.
Measures flow in litres per minute — how much water actually comes out. Pressure gauge (A) measures pressure, not flow. Voltage indicator (B) is electrical. Temperature probe (D) is thermal.
Cuts out dead legs where stagnation could grow bacteria. Leaving open (A) is a contamination route. Leaving a long pipe with disinfectant (C) still creates a dead leg. Removing the entire pipe (D) is over-specified for most jobs.
Stop ends are the proper, approved way to seal live pipework. Tape (A) leaks. Crimping (B) weakens the pipe. Timber plugs (C) rot and contaminate. Only purpose-made stop ends give a reliable long-term seal.
How PlumbMate puts this into practice
Commissioning and testing content is heavy on specific procedures and specific numbers — ideal for spaced repetition.
- Flashcards, not essays. One prompt, one answer — the format that research has consistently shown works best for active recall.
- Wrong answers are logged. Every question you get wrong goes into a dedicated collection that resurfaces more frequently in future sessions.
- The 3× rule. You need to get a question right three times before it clears — one lucky guess isn't enough.
- Explanations on every question. Like the ones above, but on every single question in the app.