Three numbers make the difference between a gutter that works for thirty years and one that sags, overflows and pulls its joints apart in three.
Clip and bracket spacing
Gutter support brackets
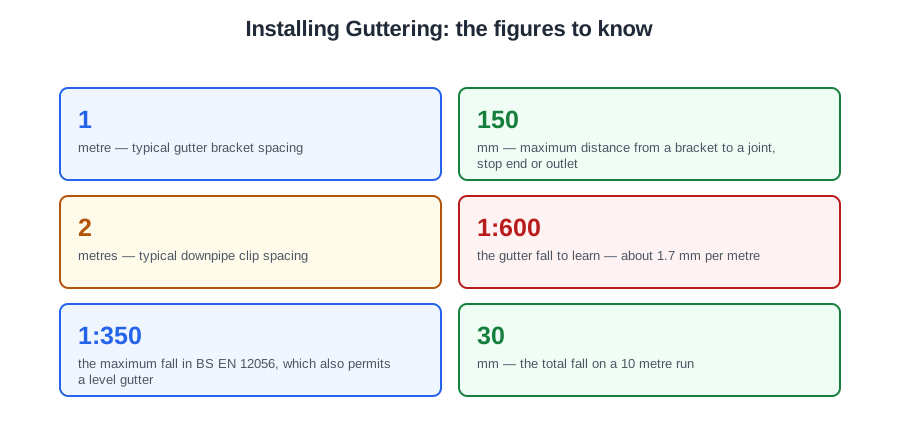
- About every 1 metre along the run.
- Always within about 150 mm of a joint, a stop end or an outlet — the places where the load is concentrated.
Downpipe clips
- About every 2 metres on a vertical run.
- At every socket and bend.
And the rule above all of them
Always check the manufacturer’s instructions. The figures vary a little between systems, and their instructions take priority over any general rule — including the ones in this article.
What happens if there are too few brackets
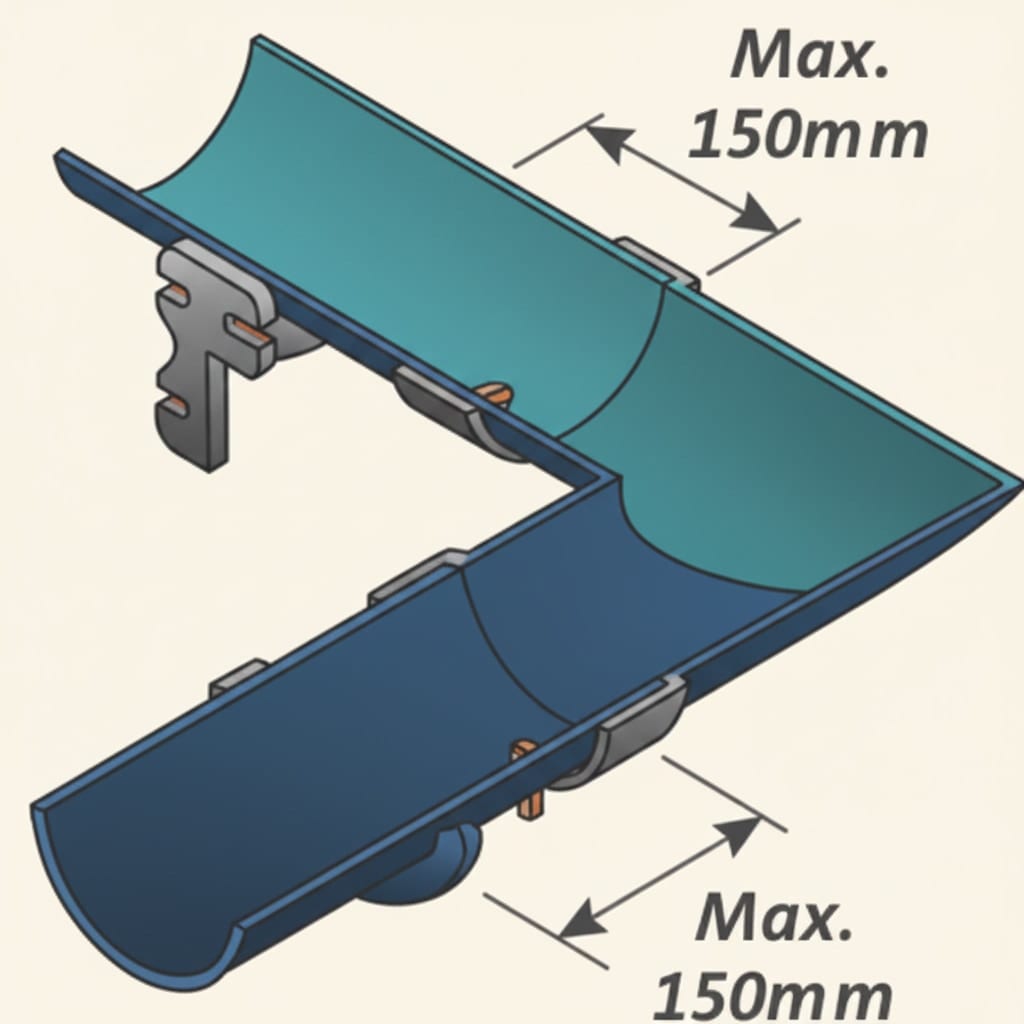
The gutter sags between them. Water then stands in the dip instead of running to the outlet, and three things follow:
- Silt settles in the standing water, and blockages start there.
- It overflows in heavy rain, because the low point fills first.
- Frost damage — standing water freezes and expands, and ice splits joints.
A gutter is a shallow open channel, so it has very little tolerance for being out of line. A sag of a few millimetres is enough to hold water.
The expansion gap
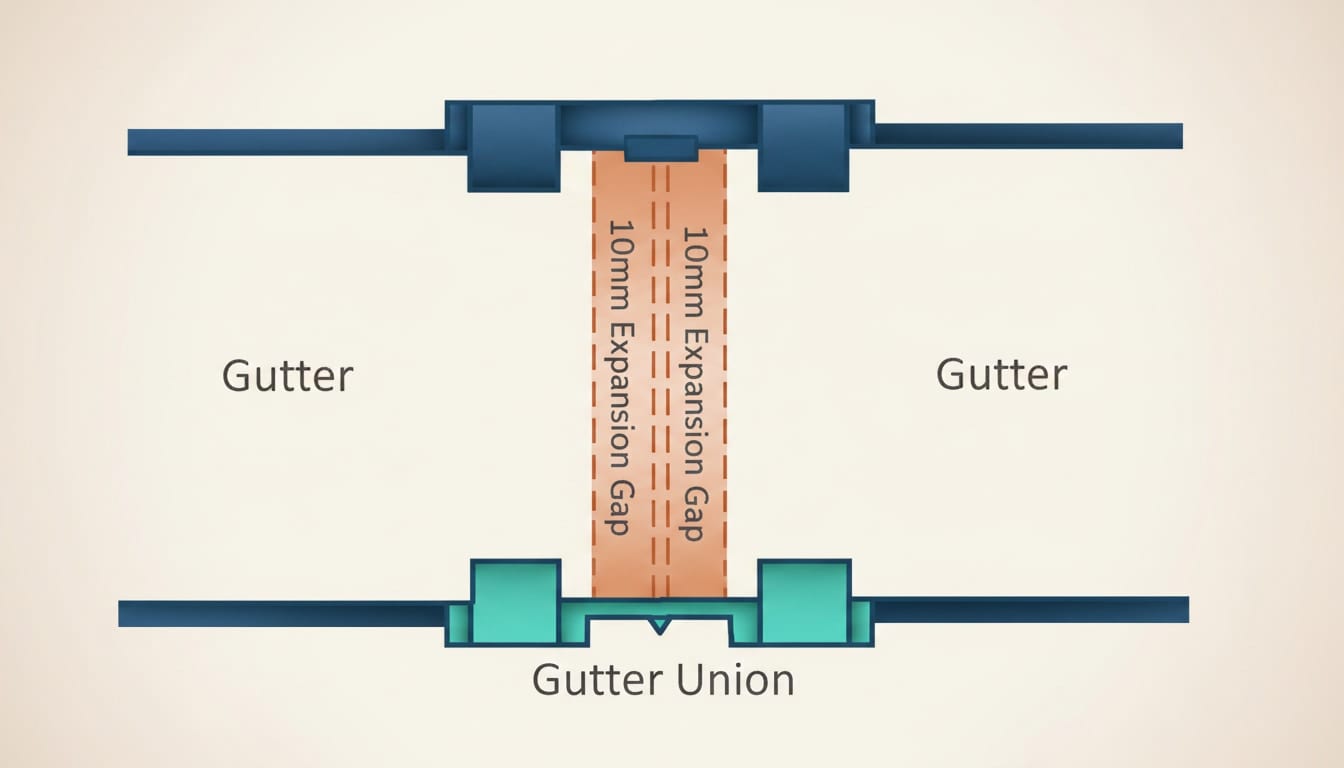
This is the part that gets missed, and it is worth understanding rather than memorising.
Plastic expands and contracts noticeably with temperature. A gutter in full sun can be 30 °C hotter than the same gutter at night, and it changes length as it goes.
If the pipe is pushed hard against the back of every socket, it has nowhere to go when it grows. So it:
- bows out of the brackets,
- forces the joints apart,
- and leaks.
That is why an expansion gap is left at each joint. You do not have to work it out: most fittings have an insertion depth mark moulded into them. Push the gutter in up to the mark and no further, and the gap is set for you.
The same principle turns up again with waste pipe and with plastic pressure pipe. Plastic moves; the joint has to allow for it.
The gradient fall
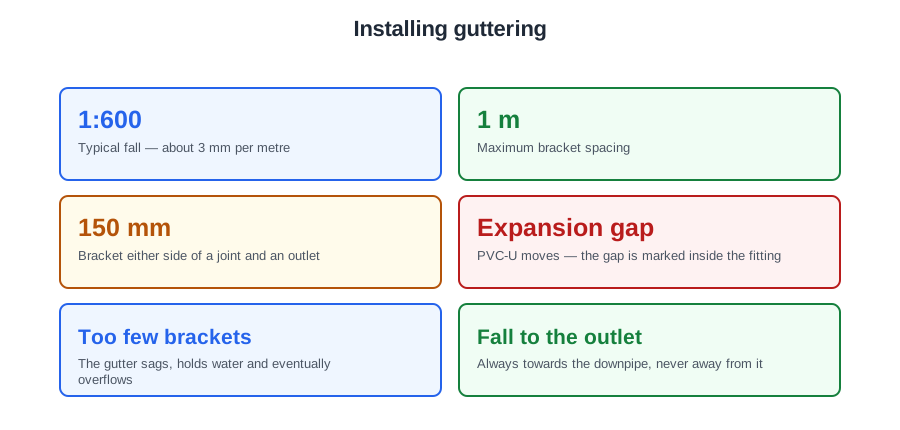
A gutter is normally laid to a slight fall towards the outlet. The figure to learn is 1:600 — about 1.7 mm per metre — unless the manufacturer says otherwise.
“1:600” means one unit of drop for every 600 units along. It is a ratio, so it works in any units you like: 1 mm down for every 600 mm along, or 1 m down for every 600 m along.
What the standard actually says
Worth knowing, because you will meet both figures and they look like a contradiction.
City & Guilds teach 1:600, and that is the answer to give in an exam.
BS EN 12056 — the standard for gravity drainage inside buildings — comes at it from the other end. It gives 1:350 as a maximum rather than a target, and it allows a gutter to be laid level.
So the two are not really in conflict. The standard sets the outer limits; 1:600 sits comfortably inside them and is what is taught. And a level gutter is not a fault, whatever anybody tells you on site — though a slight fall is still the better job, because it carries the silt to the outlet instead of leaving it to settle.
Setting it with a string line
- Fix the bracket at the high end.
- Fix the bracket at the outlet end lower, by the calculated amount.
- Run a string between them.
- Set every bracket to the string.
Doing it this way means the fall is even along the whole run, which eyeing it never is.
Getting it wrong, both ways
- Too little fall — water stands in the gutter, silt settles, and it blocks.
- Too much fall — it looks wrong against the roof line, and at the outlet end the gutter drops below the edge of the roof, so water overshoots it in heavy rain and never gets into the gutter at all.
The second one surprises people. More fall is not safer.
A sense of the scale
Divide the run by 600. A 12 metre run drops 20 mm from the high end to the outlet, and 18 metres drops 30 mm — a little over an inch across a whole house.
That is worth holding on to, because it tells you what the finished job should look like: the fall should be barely visible. If you can obviously see the gutter sloping from the ground, it has too much.
🔢 The numbers worth memorising
- 1
- metre — typical gutter bracket spacing
- 150
- mm — maximum distance from a bracket to a joint, stop end or outlet
- 2
- metres — typical downpipe clip spacing
- 1:600
- the gutter fall to learn — about 1.7 mm per metre
- 1:350
- the maximum fall in BS EN 12056, which also permits a level gutter
- 30
- mm — the total fall on a 10 metre run
- 30
- °C — how much hotter a gutter in full sun can be than at night
⚠️ Where people go wrong
- Quoting 1:350 as the fall. It is the maximum in BS EN 12056; the figure to give is 1:600.
- Saying a gutter may never be laid level. BS EN 12056 permits it — though a slight fall is the better job.
- Assuming more fall is safer. Too much and the gutter drops below the roof edge, so water overshoots.
- Pushing the pipe fully home into every socket. Stop at the insertion depth mark and leave the expansion gap.
- Spacing brackets evenly and ignoring the joints. A bracket goes within about 150 mm of every joint, stop end and outlet.
- Using these figures instead of the manufacturer’s. Their instructions take priority.
📝 8-Question Self-Test
Straight from the Level 1 course question bank. Click an option to see whether you got it right — the explanation appears instantly, and there is nothing to submit.
1:600 towards the outlet — about 1.7 mm per metre — unless the manufacturer says otherwise. BS EN 12056 gives 1:350 as a maximum and permits a level gutter, but 1:600 is the figure to give.
Plastic expands with temperature. With no gap it bows out of the brackets and forces the joints apart, which leaks.
About every 1 metre, and always within about 150 mm of a joint, stop end or outlet.
Brackets go about every 1 metre, and always within about 150 mm of a joint, a stop end or an outlet — the places where the load is.
Too few brackets and the gutter sags between them. Water then stands in the dip instead of running to the outlet, which is where blockages, overflows and frost damage start.
Most fittings have an insertion depth mark moulded into them: push the gutter in up to the mark and no further, and the gap is set for you.
Plastic expands and contracts noticeably with temperature. With nowhere to go when it grows, it bows out of the brackets, forces the joints apart and leaks.
1:600 works out at about 1.7 mm per metre — 1000 divided by 600. On a 12 metre run that is 20 mm in total.
Going deeper: the same ground at Level 2
Level 1 gives you the shape of this. The Level 2 guides below take it considerably further — the regulations, the calculations and the detail you will need next. Free to read, same as these.
- Start here: Above Ground Drainage for Level 1 — the whole unit in one piece
- All 72 Level 1 guides — one per lesson, across all ten units
- The Level 1 glossary — 620 terms in plain English