Plastic pressure pipe needs almost no tools, which is a large part of why it is used so widely on new work. There is no heat and no flame — but there is one cut that has to be right.
Why the list is so short
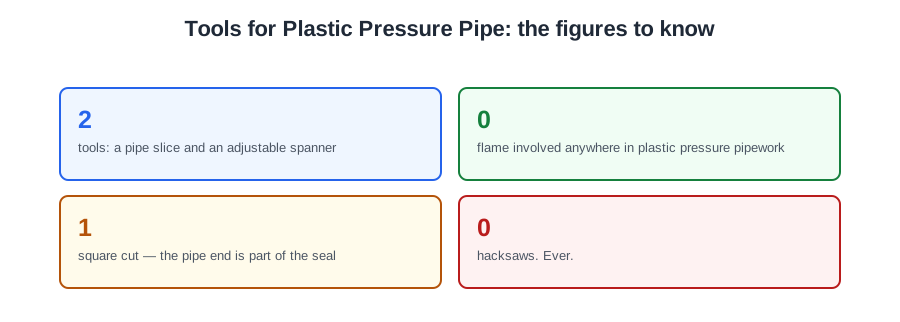
Plastic pressure pipe is the material that replaced copper on most new domestic work, and the reason is in this lesson: no heat, no flame, and two tools.
No flame means no hot works permit, no fire watch, no risk of setting light to a floor void, and no waiting for a joint to cool. On a house full of first fix, that adds up to a lot of hours.
The tools
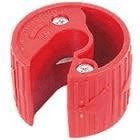
Plastic pressure pipe cutter (pipe slice)
Cuts the pipe square in one action. A blade closes through the pipe as you squeeze.
A square cut matters more on plastic than on copper, and it is worth understanding why. A copper pipe going into a soldered fitting is sealed by solder filling the gap, so a slightly imperfect end can still make a sound joint. A plastic pipe going into a push fit fitting is sealed by the pipe end seating evenly against the O-ring — the pipe itself is part of the seal. An angled end presses hard on one side of the O-ring and barely touches the other, and it weeps.
Adjustable spanner
Tightening compression fittings.
Safety requirements
- Correct use of tools — the cutter closed steadily rather than snatched. Snatching it shears the plastic rather than slicing it, and leaves a lip.
- Tools maintained in good condition. A blunt cutter crushes the pipe oval instead of cutting it, and an oval pipe will not seal. This is the single most common cause of a leaking plastic joint, and it is a tool fault rather than a technique fault.
- Appropriate PPE.
Basic maintenance
- Replace the blade in a pipe slice when the cut stops being clean. Blades are cheap; a call-back is not.
- Keep the jaws free of plastic shavings, which stop the pipe sitting square in the tool in the first place.
- Keep the spanner’s adjuster working so it grips the nut squarely.
Never cut it with a hacksaw
This gets its own heading because it is the thing people do when the slice is in the van.
A hacksaw on plastic pressure pipe causes two problems at once:
- A ragged end, which will not seat evenly against the O-ring.
- Swarf inside the pipe — plastic shavings that stay in the bore.
And both end up in the seal. A shaving carried along by the water lodges between the O-ring and the pipe, and holds it open just enough to weep. That leak may not appear for weeks, and it will be inside a wall.
The same goes for a saw of any kind. If the slice is not to hand, fetch it.
🔢 The numbers worth memorising
- 2
- tools: a pipe slice and an adjustable spanner
- 0
- flame involved anywhere in plastic pressure pipework
- 1
- square cut — the pipe end is part of the seal
- 0
- hacksaws. Ever.
⚠️ Where people go wrong
- Cutting with a hacksaw. It leaves a ragged end and swarf inside, and both reach the seal.
- Using a blunt slice. It crushes the pipe oval, and an oval pipe will not seal.
- Snatching the cutter closed. Close it steadily so it slices rather than shears.
- Treating a slightly angled cut as good enough. On plastic the pipe end is part of the seal.
📝 8-Question Self-Test
Straight from the Level 1 course question bank. Click an option to see whether you got it right — the explanation appears instantly, and there is nothing to submit.
A pipe slice cuts the pipe square in one action. A hacksaw leaves a ragged end and swarf inside.
A blunt cutter crushes the pipe oval, and an oval pipe end will not seal against the O-ring.
Replace the blade when it stops cutting cleanly, and keep the jaws free of plastic shavings.
A pipe slice cuts the pipe square in one action, and a square cut matters because the pipe end has to seat evenly against the O-ring.
A hacksaw leaves a ragged end and swarf inside the pipe, and both end up in the seal.
Tools maintained in good condition: a blunt cutter crushes the pipe oval instead of cutting it, and an oval pipe will not seal.
Correct use of tools: the cutter is closed steadily rather than snatched.
Replace the blade when the cut stops being clean. Keep the jaws free of plastic shavings.
Going deeper: the same ground at Level 2
Level 1 gives you the shape of this. The Level 2 guides below take it considerably further — the regulations, the calculations and the detail you will need next. Free to read, same as these.
- Start here: Plastic Pressure Pipework for Level 1 — the whole unit in one piece
- All 72 Level 1 guides — one per lesson, across all ten units
- The Level 1 glossary — 620 terms in plain English