Guttering looks like the easiest job on any house and is quietly full of ways to get it wrong. Two of them — the fall and the expansion gap — cause most of the leaks, and neither is visible once the job is done.
Naming the gutter fittings
A gutter run is made from a small number of standard parts, and you have to be able to name them.
- Union bracket — joins two lengths of gutter and supports the joint at the same time.
- Running outlet — the take-off in the middle of a run, where the downpipe leaves.
- External stop end — closes the end of a gutter, fitting over the outside of it.
- Internal stop end — closes it from the inside, for where the gutter runs tight up to a wall and there is no room outside.
- Downpipe connector — joins lengths of downpipe.
- Offset bend — a pair of bends stepping the downpipe back to the wall. Also called a swan neck.
- Shoe — the last fitting at the bottom, angled to throw the water away from the wall into a gully.
Holding it all up: fascia support brackets screwed to the fascia board, and downpipe clips that hold the pipe slightly off the wall so it can be painted behind and does not stain the brickwork.
The fall
Two hazards ride along with this unit and are easy to forget, because neither is about the pipe. Solvent cement gives off flammable vapour, so it belongs nowhere near a naked flame and wants ventilation. And drainage means possible contact with foul water, so cuts get covered and hands get washed before eating.
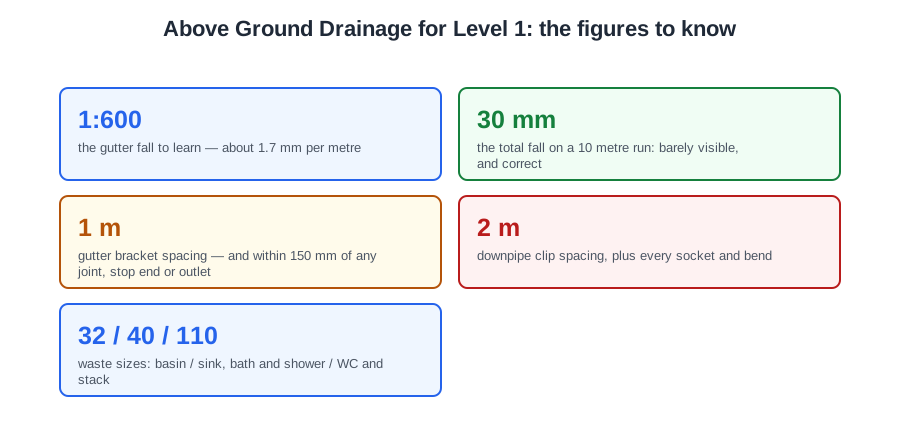
A gutter is normally laid to a slight fall towards the outlet. The figure to learn is 1:600 — about 1.7 mm per metre. BS EN 12056 gives 1:350 as a maximum and permits a gutter to be laid level, so a level gutter is not a fault; 1:600 is simply what City & Guilds teach and what an exam wants.
That is less than it sounds. On a 10 metre run the whole fall is about 30 mm — a little over an inch across the front of a house. It should be barely visible.
Set it with a string line: fix the bracket at the high end, fix the bracket at the outlet end lower by the amount you have calculated, run a string between them, and set every bracket in between to the string.
Both ways of getting it wrong have consequences. Too little fall and water stands in the gutter, silt settles and it blocks. Too much and it looks wrong against the roof line, and at the outlet end the gutter drops below the roof edge so water overshoots it altogether.
Brackets, and the expansion gap
Gutter support brackets go about every 1 metre, and always within about 150 mm of a joint, a stop end or an outlet — the places where the load is. Downpipe clips go about every 2 metres on a vertical run, and at every socket and bend.
Too few brackets and the gutter sags between them. Water then stands in the dip instead of running to the outlet, which is where blockages, overflows and frost damage start.
Now the one that catches people. Plastic expands and contracts noticeably with temperature — a gutter in full sun can be 30 °C hotter than the same gutter at night. If the pipe is pushed hard against the back of every socket, it has nowhere to go when it grows, so it bows out of the brackets, forces the joints apart and leaks.
That is why an expansion gap is left at each joint. You do not have to guess it: most fittings have an insertion depth mark moulded into them. Push the gutter in up to the mark and no further, and the gap is set for you.
Waste pipe sizes
Three sizes cover a house, and undersizing is the mistake people actually make.
- 32 mm — wash basin, bidet.
- 40 mm — sink, bath, shower, washing machine, dishwasher.
- 110 mm — WC, and the soil stack itself.
A bath on 32 mm empties slowly and can siphon its own trap dry — which then lets drain smells into the room. Waste pipe sizes are outside diameters.
Jointing waste pipe
Three methods:
- Push fit — a socket with a rubber seal inside.
- Compression — a nut and a seal that tighten onto the pipe. Common on traps and appliance connections.
- Solvent weld — welded to the pipe with cement.
Whichever you use, every cut end is deburred and chamfered first. A burr left on catches waste and starts a blockage, and on a push fit joint it can cut or roll the rubber seal as the pipe goes in — which leaks.
One warning worth carrying: the three plastics — PVC, ABS and polypropylene — are not always interchangeable between makes. Check the pipe and the fitting are the same system before you cement anything, because solvent weld does not come apart.
🔢 The numbers worth memorising
- 1:600
- the gutter fall to learn — about 1.7 mm per metre
- 30 mm
- the total fall on a 10 metre run: barely visible, and correct
- 1 m
- gutter bracket spacing — and within 150 mm of any joint, stop end or outlet
- 2 m
- downpipe clip spacing, plus every socket and bend
- 32 / 40 / 110
- waste sizes: basin / sink, bath and shower / WC and stack
⚠️ Where people go wrong
- A bath on 32 mm is the classic undersize. It empties slowly and can siphon its own trap dry.
- Do not push a gutter past the insertion depth mark. That mark is what leaves the expansion gap.
- Too much fall is a fault too. At the outlet end the gutter drops below the roof edge and water overshoots it.
- Always deburr and chamfer. A burr rolls the rubber seal on a push fit joint, and the joint leaks.
- PVC, ABS and polypropylene are not always interchangeable. Check before you cement — solvent weld does not come apart.
📝 8-Question Self-Test
Straight from the Level 1 course question bank. Click an option to see whether you got it right — the explanation appears instantly, and there is nothing to submit.
A deburring tool removes the burr inside and out. Every cut end is deburred and chamfered before jointing.
Replace blunt blades rather than forcing them. Forcing a blunt blade is when it slips.
A string line marks a straight line between two points — the fall of a gutter run from the high end to the outlet. A plumb line finds true vertical.
A file cleans up a cut end and puts a slight chamfer on it, so the pipe enters a push fit socket without damaging the seal.
Replace blunt blades rather than forcing them. Keep the deburring tool sharp, and clean plastic swarf and solvent cement off tools before it sets.
Clean plastic swarf and solvent cement off tools before it sets, and store them dry.
Multipurpose saw — cutting waste pipe and guttering. Question 1 of the paper is worth six marks and wants three tools AND their uses, so the pairing is what earns them.
Plumb line — setting out a vertical line. String line — setting out a horizontal line. The plumb line hangs, so gravity gives it vertical; the string line stretches between two points, so it gives horizontal.
Going deeper: the same ground at Level 2
Level 1 gives you the shape of this. The Level 2 guides below take it considerably further — the regulations, the calculations and the detail you will need next. Free to read, same as these.
- All 72 Level 1 guides — one per lesson, across all ten units
- The Level 1 glossary — 620 terms in plain English