A soldered joint is not glued together. The solder is pulled into the gap by the same effect that draws water up a narrow tube — and knowing that is what makes the method make sense.
Compression
A nut squeezes a soft brass ring — the olive — onto the pipe, and the olive makes the seal.
No heat, which is the whole reason for choosing it. That means it can be used:
- near anything flammable — a timber floor void, insulation, a fitted cupboard;
- on a pipe that will not dry out. A soldered joint cannot be made on a wet pipe, because the water carries the heat away faster than the torch puts it in, and on a repair the pipe is usually wet.
Against it: it takes up more room and costs more than a soldered joint. In its favour again: it can be undone and remade.
Making one
Cut square, deburr, push fully home, then tighten by hand and about a turn and a quarter with a spanner.
Overtightening splits the olive, and once an olive is compressed it is not reused. If you take a compression joint apart, the olive is scrap — put a new one on.
Push fit
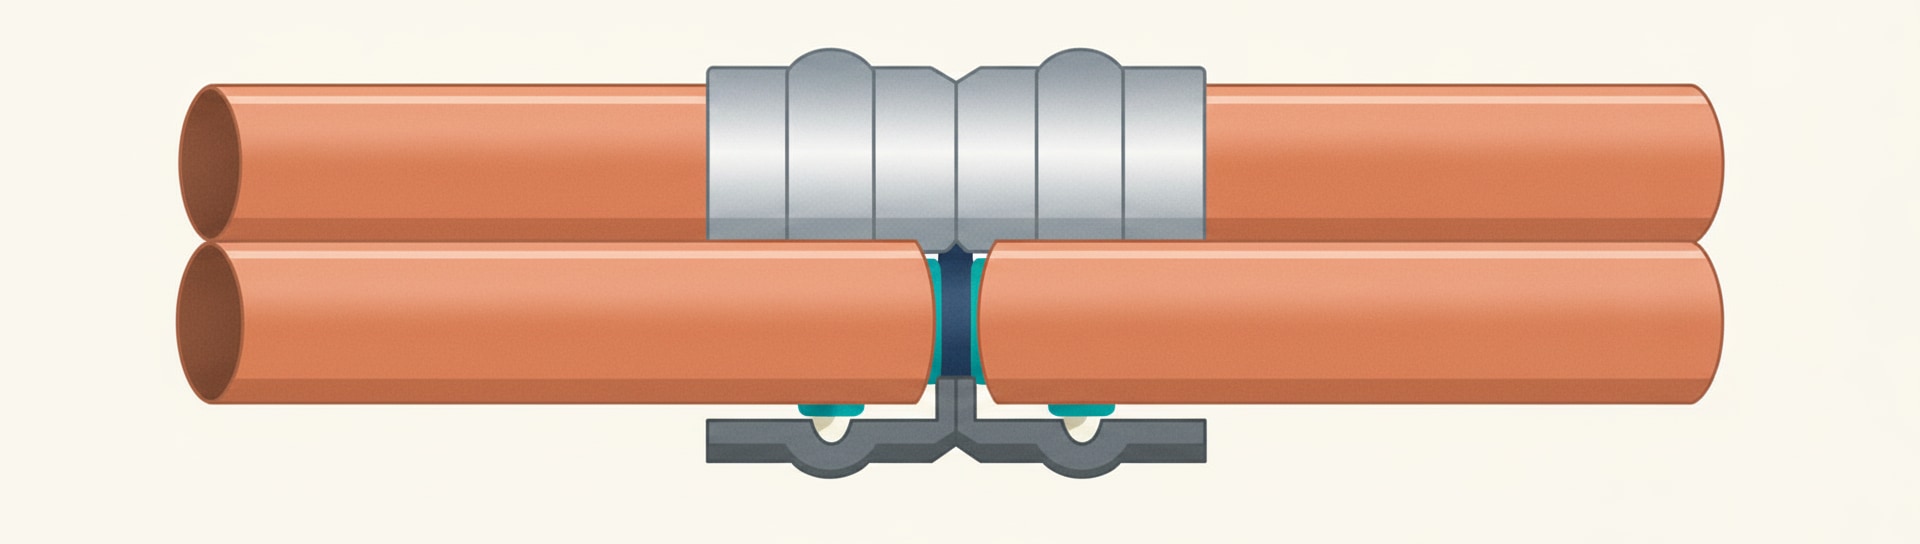
A fitting with a rubber O-ring to seal and a stainless grab ring to hold. The pipe pushes in and the grab ring’s teeth bite into it.
Quick, needs no heat and no tools, and it works on both copper and plastic — which is why it is so common on repairs and in awkward places where a torch will not go.
Cut square, deburr, mark the insertion depth and push fully home.
The soldered capillary joint
The joint copper is really designed for.
The fitting is a close fit on the pipe — deliberately, with only a tiny gap. When it is heated, molten solder is drawn into that gap by capillary action: the same effect that pulls water up a narrow tube, or up a piece of kitchen roll.
Two things follow from that, and they explain the whole method:
- The solder fills the entire joint, all the way round and along, giving a strong permanent connection.
- Capillary action only works if the gap is clean and the surfaces are wetted by the solder — which is why cleaning and fluxing are not optional steps.
The two kinds
- Solder ring (Yorkshire) — solder already inside. Easier, and you can see it has worked when a ring of solder appears all the way round the mouth.
- End feed — no solder in it, so you feed solder wire into the joint once it is up to temperature. Cheaper, and it needs more judgement about when the joint is hot enough.
Choosing between the three
| Method | Heat? | Comes apart? | Best for |
|---|---|---|---|
| Compression | No | Yes | Near flammables, wet pipe, where access is wanted |
| Push fit | No | Yes | Speed, repairs, awkward spots |
| Soldered | Yes | No | Neat permanent pipework, concealed runs |
Making a soldered joint
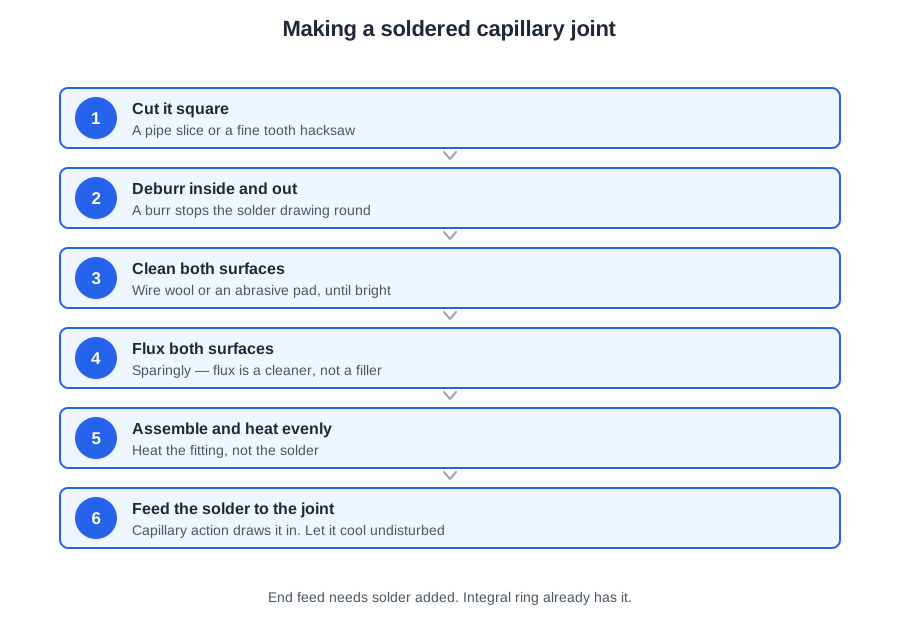
- Cut square and deburr.
- Clean the pipe end and the inside of the fitting until bright, with wire wool or a cleaning brush. Solder will not flow onto dirty or oxidised copper — this is the step that decides whether the joint works.
- Apply a thin, even coat of flux to both. Flux stops the copper oxidising as it heats and helps the solder flow. Thin and even: more flux is not better.
- Assemble, and support the pipework so it cannot move.
- Heat the fitting, not the solder, moving the flame around the joint. You are bringing the whole joint up to temperature so that it draws the solder in — touching the flame to the solder just melts a blob that falls off.
- Solder ring: watch for a complete ring of solder at the mouth. End feed: touch the solder to the joint and let the heat draw it in, all the way round.
- Take the heat away and let it cool undisturbed. Moving it while the solder is still soft ruins the joint, and it will not look ruined.
- Wipe off surplus flux — left on, it corrodes the copper.
Before you light the torch
From the fire lesson in Unit 102, and it applies every single time:
- Clear combustible material away.
- Use a heat mat behind the pipe.
- Have an extinguisher to hand.
- Check the area again before you leave.
Fires from soldering usually start hours later, once the operative has gone. That last check is the one that prevents them.
🔢 The numbers worth memorising
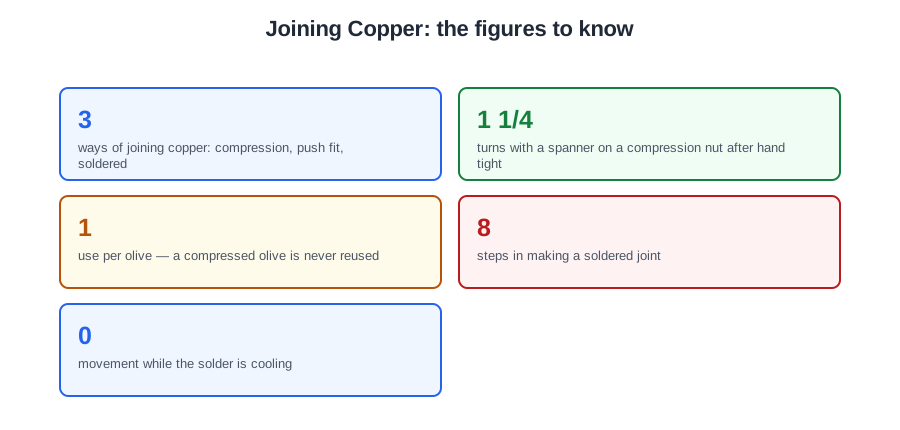
- 3
- ways of joining copper: compression, push fit, soldered
- 1 1/4
- turns with a spanner on a compression nut after hand tight
- 1
- use per olive — a compressed olive is never reused
- 8
- steps in making a soldered joint
- 0
- movement while the solder is cooling
⚠️ Where people go wrong
- Reusing an olive. Once compressed it is scrap.
- Heating the solder instead of the fitting. The heat goes into the joint, which then draws the solder in.
- Skipping the cleaning. Solder will not flow onto dirty or oxidised copper.
- Trying to solder a wet pipe. Use compression instead — the water carries the heat away.
- Moving the joint while it cools. It ruins it, and it does not look ruined.
📝 8-Question Self-Test
Straight from the Level 1 course question bank. Click an option to see whether you got it right — the explanation appears instantly, and there is nothing to submit.
The gap between pipe and fitting is very narrow, so capillary action draws the molten solder right through it — even upwards.
The wedge between the nut and the body is the olive. Tightening the nut squeezes it between the pipe and the fitting, and that is the seal.
Compression uses a nut and a brass olive, needs no heat, and can be undone and remade — though the olive itself is not reused.
The fitting is a close fit on the pipe, and molten solder is drawn into that tiny gap by capillary action.
Three methods: soldered, push fit and compression. Soldered is neat, cheap and permanent and needs a flame. Compression is quick and can be undone. Push fit is fastest and costs the most per joint.
Compression and push fit both work without heat, which is why they are the answer near a bath panel, near joists, or anywhere a flame is a problem. Most jobs use all three, chosen by what is around the joint.
The common push fit failure is not pushing the pipe fully home. It grips and holds pressure at half depth, which is exactly why the failure appears later rather than on the day.
Cut square and deburr comes before all three. Soldering then needs cleaning and flux; compression needs the pipe pushed fully to the stop; push fit needs the end chamfered so it does not cut the O-ring. The first step is the same for each.
Going deeper: the same ground at Level 2
Level 1 gives you the shape of this. The Level 2 guides below take it considerably further — the regulations, the calculations and the detail you will need next. Free to read, same as these.
- Start here: Copper Pipework for Level 1 — the whole unit in one piece
- All 72 Level 1 guides — one per lesson, across all ten units
- The Level 1 glossary — 620 terms in plain English