Copper is the material the trade is built on, and soldering is the first skill that makes you feel like a plumber. It is also completely unforgiving of a step done out of order — so here is the order, and why each step is where it is.
The tube
Domestic copper is measured on its outside diameter. The two sizes you will use constantly are 15 mm and 22 mm.
15 mm does connections to basins, WCs and radiators, and most branch pipework. 22 mm does baths, and the main distribution pipes feeding several outlets.
The fittings are the same shapes you will meet in every material: elbow (changes direction), tee (takes a branch off a run), coupling (joins two straight lengths), reducer (one size to another), and tap connector (pipework to the threaded tail of a tap or ballvalve).
Three ways to join it
Each one exists for a reason, and knowing the reason is more useful than knowing the name.
Compression
A nut squeezes a soft brass ring — the olive — onto the pipe, and that makes the seal. No heat, so it can be used near anything flammable and on a pipe that will not dry out. It takes more room and costs more than a soldered joint, and it can be undone and remade.
Cut square, deburr, push fully home, tighten by hand then about a turn and a quarter with a spanner. Overtightening splits the olive, and once an olive has been compressed it is not reused.
Push fit
A fitting with a rubber O-ring to seal and a stainless grab ring to hold. The pipe pushes in and stays. Quick, needs no heat and no tools, and works on both copper and plastic — which is why it turns up on repairs and in awkward places.
Cut square, deburr, mark the insertion depth, push fully home.
Soldered — the capillary joint
The joint copper is really designed for. The fitting is a close fit on the pipe, and when it is heated the molten solder is drawn into that tiny gap by capillary action — the same effect that pulls water up a narrow tube. It fills the whole joint and sets into a strong, neat, permanent connection.
Two kinds: a solder ring fitting (also called Yorkshire) has the solder already inside it, and you can see it has worked when a ring of solder appears all the way round the mouth. An end feed fitting has none, so you feed solder wire in once the joint is up to temperature — cheaper, and it needs more judgement.
Making a soldered joint, in order
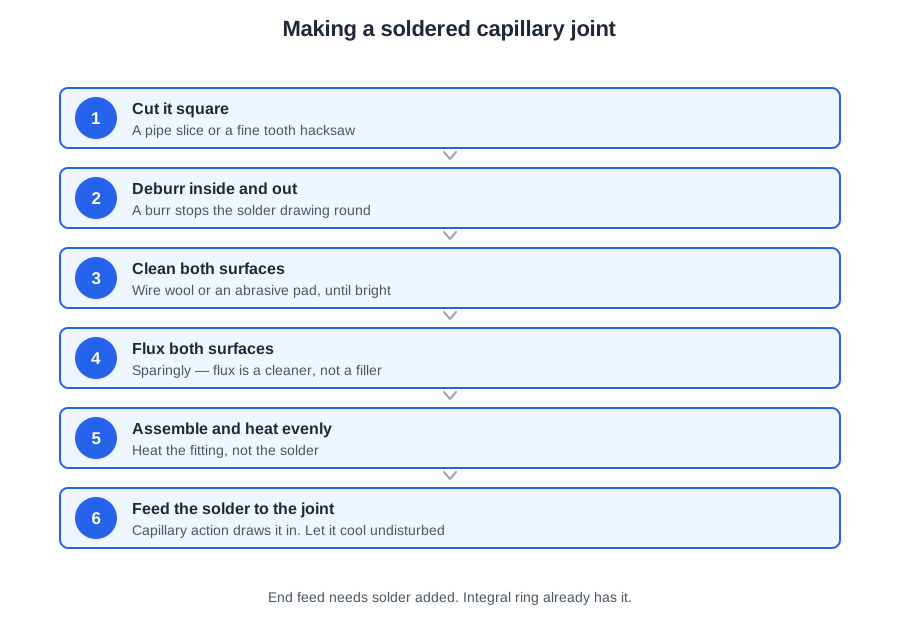
Eight steps. Every one of them is there because leaving it out produces a joint that either will not take or leaks in a month.
- Cut square and deburr. A joint that is not square will not seat, and the burr stays in the bore for the life of the pipe.
- Clean the pipe end and the inside of the fitting until they are bright, with wire wool or a cleaning brush. Solder will not flow onto dirty or oxidised copper.
- Flux both, thinly and evenly. Flux stops the copper oxidising as it heats and helps the solder flow — and it can only do that on clean metal, which is why this comes after the cleaning and not instead of it.
- Assemble, and support the pipework so it cannot move. Support goes in before the heat, because you cannot hold a hot joint still afterwards.
- Heat the fitting, not the solder, moving the flame around the joint.
- Watch for a complete ring of solder right round the mouth. That ring is how you know capillary action has pulled solder all the way through.
- Take the heat away and let it cool undisturbed. Moving it while the solder is soft ruins the joint, and you will not find out until the system is filled.
- Wipe off the surplus flux. Left on, it corrodes the copper.
Before you light a torch
Fires started by soldering usually take hold hours after the plumber has left. Four things, every time:
- Clear combustible material away from behind and around the joint.
- Use a heat mat behind the pipe.
- Keep an extinguisher to hand.
- Check the area again before you leave.
Clips
Copper is clipped at these spacings:
- 15 mm — 1.2 m horizontal, 1.8 m vertical.
- 22 mm — 1.8 m horizontal, 2.4 m vertical.
Two patterns worth noticing, because they hold for every material. Horizontal runs need more support than vertical ones, because a horizontal pipe sags between clips while a vertical one carries its weight down itself. And bigger pipe needs fewer clips, because it is stiffer.
Always clip close to a fitting, a bend and an appliance connection, so the weight is never hanging on the joint. Unclipped pipe is the usual cause of banging in a system: when the water stops suddenly the pipe moves, and a loose pipe hits the joist.
🔢 The numbers worth memorising
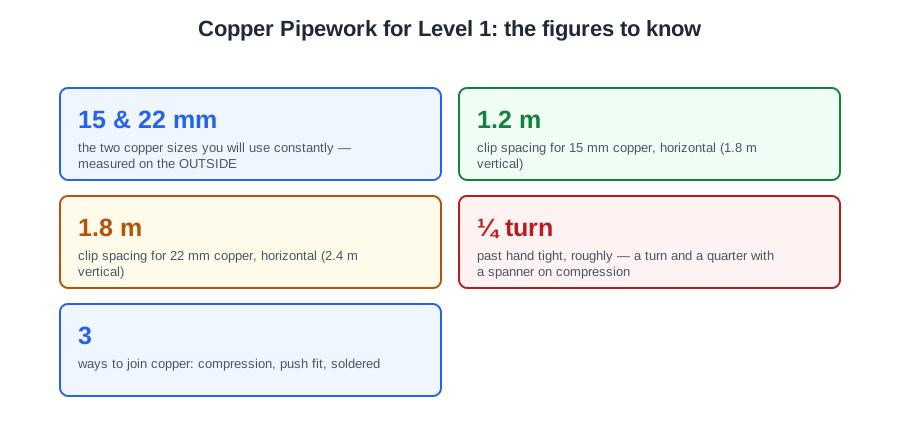
- 15 & 22 mm
- the two copper sizes you will use constantly — measured on the OUTSIDE
- 1.2 m
- clip spacing for 15 mm copper, horizontal (1.8 m vertical)
- 1.8 m
- clip spacing for 22 mm copper, horizontal (2.4 m vertical)
- ¼ turn
- past hand tight, roughly — a turn and a quarter with a spanner on compression
- 3
- ways to join copper: compression, push fit, soldered
⚠️ Where people go wrong
- Clean before you flux, not instead of it. Flux on top of dirt just traps the dirt.
- Heat the fitting, not the solder. The heat is what draws the solder in.
- An olive is never reused. Once it has been compressed, it is done.
- Wipe the flux off afterwards. Left on, it corrodes the copper it was protecting.
- Copper is measured on the outside; steel on the bore. That is why 15 mm steel is fatter than 15 mm copper.
📝 8-Question Self-Test
Straight from the Level 1 course question bank. Click an option to see whether you got it right — the explanation appears instantly, and there is nothing to submit.
Propane and MAPP are the gases named in the standard. MAPP burns hotter than propane.
Upright, outside, well ventilated and secure. On its side, liquid gas can reach the valve.
MAPP gas burns hotter than propane, so it solders larger sizes faster. It usually comes in small disposable cylinders.
Both are heavier than air, so a leak sinks and collects in a trench, a basement or the bottom of a van rather than drifting away.
Upright always, outside in the open air, well ventilated so a small leak disperses, and secure so bottles cannot fall over or be interfered with.
On its side, liquid gas can reach the valve and leave the bottle as liquid rather than vapour.
The flashback arrestor stops a flame travelling back down the hose towards the bottle. The regulator reduces the pressure.
Leak detection fluid bubbles where gas escapes. Never test with a flame.
Going deeper: the same ground at Level 2
Level 1 gives you the shape of this. The Level 2 guides below take it considerably further — the regulations, the calculations and the detail you will need next. Free to read, same as these.
- Hand Tools for Plumbers: Identification, Use and Safety
- Jointing Pipework: Solder, Compression, Pushfit and Threaded
- Water Sources and Supply to the Property
- Direct vs Indirect Cold Water Systems
- Hot Water Systems: Classifications and How They Combine
- System Design and Valves Under the Water Regulations: Sizing, Isolation and Dead Legs
- All 72 Level 1 guides — one per lesson, across all ten units
- The Level 1 glossary — 620 terms in plain English