This is one of the very few things at Level 1 with real numbers attached, which means it is one of the few where an approximate answer earns nothing.
The short answer
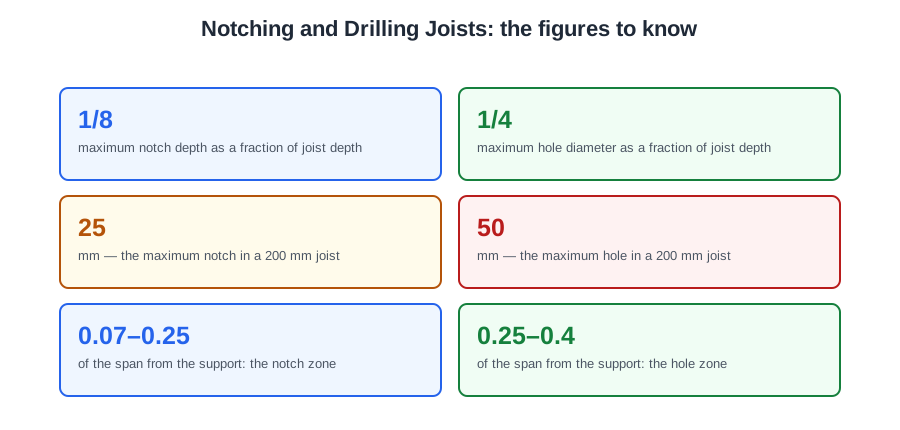
A notch may be up to one eighth of the joist depth, in the zone from 0.07 to 0.25 of the span from the support.
A hole may be up to one quarter of the joist depth, drilled on the centre line, in the zone from 0.25 to 0.4 of the span, with at least three diameters between holes.
On a 200 mm joist that is a 25 mm notch and a 50 mm hole. Never both at the same point.
Why a notch and a hole get different rules
This is the bit that makes the numbers stick, because otherwise they are just two fractions to swap round under pressure.
A loaded joist bends. The top of it is squeezed — in compression. The bottom is stretched — in tension. In between there is a line where the timber is neither being squeezed nor stretched, and it is doing almost no work at all. That is the neutral axis, and it runs along the centre.
So a hole drilled on the centre line takes material from the least important part of the joist, which is why a hole is allowed to be twice as deep as a notch. A notch is cut in the top edge — the compression face, the part working hardest — so it is limited far more tightly. Cut a deep notch in the top of a joist and you have created a hinge in the exact place the timber was strongest.
Why the zones are where they are
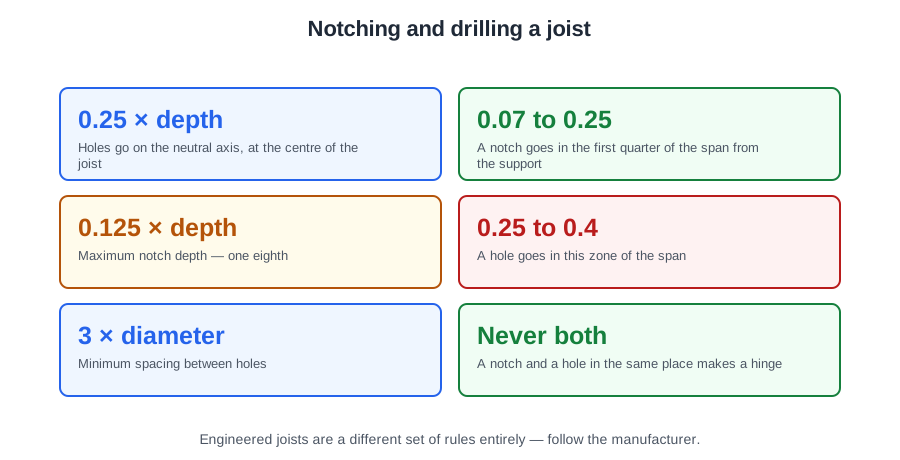
The same logic explains the zones. Bending is greatest in the middle of the span and least near the supports, so neither a notch nor a hole is allowed in the middle third.
Shear — the sliding force that tries to tear the joist vertically — is greatest right at the supports, which is why the notch zone starts at 0.07 of the span rather than at the wall. Neither zone is arbitrary. Each one is the stretch of joist where that particular kind of cut does the least harm.
And it explains the last rule. A notch and a hole at the same point remove material from the top and the middle together, and the two allowances were each calculated on the assumption that the other one was not there.
Doing it on site
Measure the joist depth first — 200 mm is common in older houses but nothing is guaranteed, and the fraction is of the actual depth, not a remembered one. Measure the span, work out the zone, and mark it before you pick up a drill. It takes two minutes and it is checkable.
Where a pipe simply will not fit inside the allowances, the answer is not a bigger notch. It is to run the pipe a different way: along the joist rather than across it, under the joists in a ceiling void with a boxing, or on the surface. Plastic pipe has made this easier because it will go through a hole in a long continuous run without a joint in the floor.
And never leave a joint buried in a floor void. Nobody can see it, nobody can reach it, and it is the leak that damages a ceiling for three months before anyone notices.
Engineered joists are a different set of rules entirely
Posi joists, I-joists and metal web joists are increasingly what a new build has, and none of these fractions apply to them. An I-joist has a thin plywood web and a small solid flange top and bottom — cut the flange and you have effectively cut the joist through.
They come with pre-formed service holes or knock-outs, and with manufacturer's instructions saying exactly what may be cut and where. That is the document you follow, and it is another instance of the same rule from the last lesson: the manufacturer’s instructions take priority.
What comes next
Level 2 puts these numbers alongside pipe support spacings and the routing decisions that go with them. The structural reasoning is the same one that governs where you are allowed to chase a wall.
🔢 The numbers worth memorising
- 1/8
- maximum notch depth as a fraction of joist depth
- 1/4
- maximum hole diameter as a fraction of joist depth
- 25
- mm — the maximum notch in a 200 mm joist
- 50
- mm — the maximum hole in a 200 mm joist
- 0.07–0.25
- of the span from the support: the notch zone
- 0.25–0.4
- of the span from the support: the hole zone
- 3
- diameters minimum between holes, centre to centre
⚠️ Where people go wrong
- Swapping the two fractions. A notch is one eighth; a hole is one quarter.
- Notching in the middle of the span. Notches go in the outer zone only.
- Drilling off the centre line. The neutral axis is where the timber is doing least work.
- Notching and drilling at the same point. Each is allowed alone; together they are not.
- Cutting an engineered or posi joist like ordinary timber. Check the instructions and use the pre-formed holes.
📝 8-Question Self-Test
Straight from the Level 1 course question bank. Click an option to see whether you got it right — the explanation appears instantly, and there is nothing to submit.
A notch may be no deeper than 0.125 — an eighth — of the joist depth. A hole may be a quarter.
A joist carries its load by being deep, and the top and bottom edges do the most work. The middle, top to bottom, does the least, so a hole drilled through the centre line takes out very little strength.
The rules come from Building Regulation Part A, which covers structure.
A hole goes through the neutral axis, where the timber is doing least work, so it does far less harm than a cut in the top edge. A hole may be a quarter of the depth, a notch only an eighth.
The Building Regulations — Part A, the part dealing with structure. Notching and drilling take strength out of a joist, which makes it a structural matter.
The maximum size of holes is one quarter of the joist depth — 50 mm in a 200 mm joist — drilled on the centre line, in the zone from 0.25 to 0.4 of the span, with at least three diameters between holes. A notch is one eighth.
Maximum depth of notch is one eighth; maximum size of holes is one quarter, on the centre line. On a 200 mm joist that is 25 mm and 50 mm. The hole may be deeper because the centre line is the neutral axis, doing least work.
A loaded joist is squeezed along the top and stretched along the bottom, and the centre line between them does almost no work. That is the neutral axis. A notch is cut into the top, which is the face working hardest, so it is limited to an eighth against a quarter.
Going deeper: the same ground at Level 2
Level 1 gives you the shape of this. The Level 2 guides below take it considerably further — the regulations, the calculations and the detail you will need next. Free to read, same as these.
- Start here: Site Preparation for Level 1 Plumbers — the whole unit in one piece
- All 72 Level 1 guides — one per lesson, across all ten units
- The Level 1 glossary — 620 terms in plain English