Unit 104 is where Level 1 stops being general and starts being practical. It is also where the one set of real numbers lives — the limits on cutting a joist, which come straight out of the Building Regulations and are worth learning properly.
The right bit for the material
Using the wrong drill bit does not just fail. A masonry bit tears timber, and an HSS bit is ruined in seconds in masonry.
- Masonry — brick, block and concrete. Hardened tip, used with hammer action.
- Wood boring bit — larger holes in timber. Flat bits and auger bits; a flat bit is how most joists get drilled for a pipe.
- HSS (high speed steel) — metal. No hammer action, often with a cutting fluid.
- Hole saw — larger holes in timber, plastic and thin metal. Cutting through a cupboard side for a waste pipe.
- Diamond tipped core drill — large clean holes right through masonry, for a flue or an extractor. It cuts a circle rather than the whole hole.
Screw heads: two different things
People muddle these because they sound like one list. They are two.
The recess — what the driver goes into: slotted (a single straight slot, and the driver slips out easily), Phillips (a cross, designed so the driver rides out when tight), and Pozidrive (also a cross, with extra small lines between the arms — grips better, and the common one on site).
The head shape — roundhead sits on top of the surface; countersunk pulls down flush with it.
A Phillips driver in a Pozidrive screw will chew the head. It is worth being able to tell them apart at a glance.
Fixing into four surfaces
- Solid brick or block — masonry bit and a plastic wall plug with a screw. Larger loads take a frame fixing or an anchor bolt.
- Wood — a wood screw straight in, no plug. Pilot hole in hardwood or near an edge.
- Tiles — drill the tile first on slow speed with no hammer action, using a tile bit, then change to a masonry bit for the wall behind. Tape over the spot to stop the bit wandering.
- Plasterboard — find the timber stud behind it if you can. If not, use a proper plasterboard fixing (a spring toggle or a self drilling plug); an ordinary plug pulls straight out.
Never hang anything heavy on plasterboard alone — a radiator, a cistern, a boiler. Find the stud, or fit a timber pattress behind the board.
Lifting a floor without cutting a cable
Under a floor there are pipes and cables, and you cannot see them until the board is up. Two rules do most of the work.
Set the saw to the board thickness and no deeper. Cutting deeper is how a circular saw finds a cable stapled to the side of a joist.
Cut across the board over the centre of a joist, so both the piece you lift and the piece left behind still have something to sit on. If a cut does land between joists, screw a timber batten to the side of the joist to carry the board end.
The technique in order: find the joists from the nail lines; cut the tongue along both edges; cut across over a joist; lever it up with a bolster chisel, working along evenly so it does not split; remove or punch down the old nails.
Putting it back: screw rather than nail, so it lifts cleanly next time and does not squeak — and mark the floor where the pipes run. The next person will thank you, and it may well be you.
Two other risks in an occupied house. An open floor is something a person can step into, so guard it or cover it whenever you leave the room. And a loft has no proper floor at all: step only on the joists, take a light, watch for roofing nails at head height, and remember insulation hides everything.
The joist numbers
This is the one part of Level 1 with real arithmetic attached, and it comes from Building Regulation Part A, which covers structure.
Notches — cut into the top edge:
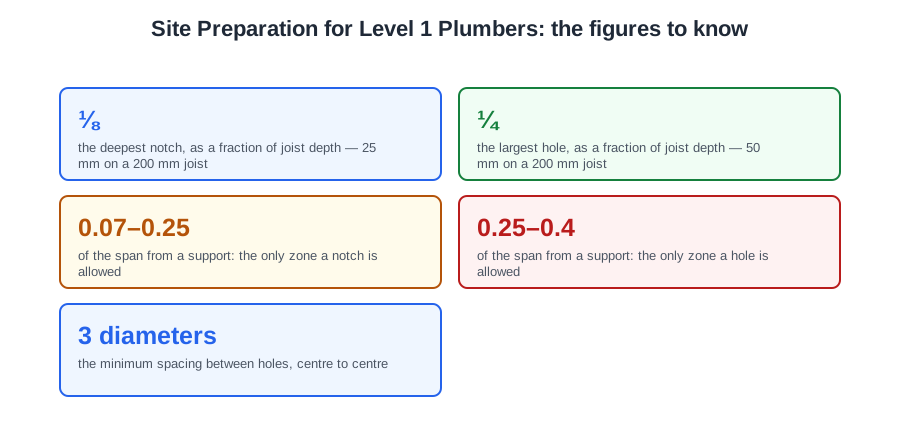
- Maximum depth: one eighth (0.125) of the joist depth. On a 200 mm joist, 25 mm.
- Only between 0.07 and 0.25 of the span from a support — roughly the outer quarter at each end, never in the middle.
Holes — drilled through:
- Maximum size: a quarter (0.25) of the joist depth. On a 200 mm joist, 50 mm.
- On the centre line — the neutral axis, where the timber is doing least work.
- Only between 0.25 and 0.4 of the span from a support.
- At least three diameters apart, centre to centre.
A hole may be twice the size of a notch, and that is not an accident: a hole through the middle does far less harm than a cut in the top edge, where the timber is under most tension.
Never notch and drill at the same point. And never cut an engineered or metal web joist at all without checking the manufacturer’s instructions — they have their own rules and pre-formed service holes.
🔢 The numbers worth memorising
- ⅛
- the deepest notch, as a fraction of joist depth — 25 mm on a 200 mm joist
- ¼
- the largest hole, as a fraction of joist depth — 50 mm on a 200 mm joist
- 0.07–0.25
- of the span from a support: the only zone a notch is allowed
- 0.25–0.4
- of the span from a support: the only zone a hole is allowed
- 3 diameters
- the minimum spacing between holes, centre to centre
⚠️ Where people go wrong
- A hole may be bigger than a notch. A quarter of the depth against an eighth — because a hole on the centre line does less harm.
- Never notch in the middle of the span. That is where a notch does the most damage.
- Phillips and Pozidrive are not the same. A Phillips driver in a Pozi screw chews the head.
- No hammer action on a tile. Slow speed, tile bit, tape over the spot — then swap to a masonry bit for the wall behind.
- Set your saw to board thickness. Deeper, and it finds the cable stapled to the joist.
📝 8-Question Self-Test
Straight from the Level 1 course question bank. Click an option to see whether you got it right — the explanation appears instantly, and there is nothing to submit.
The bolster chisel has a wide blade for cutting brick and block and levering up floorboards.
Repeated striking spreads the end of a chisel or bolster into a mushroom shape, and pieces can fly off it.
Maintenance means sharpening points, replacing blades, and making tools safe or removing them from use.
A bolster chisel has a wide blade for cutting bricks and blocks and for lifting floorboards.
A pad saw has a narrow blade for cutting holes in the middle of a board, started from a drilled hole.
The struck end of a chisel or bolster spreads out into a mushroom shape. Pieces can fly off it — it is the classic hand tool fault.
Blunt chisels, saws and blades need more force, and force is what makes a tool slip.
Maintenance means making tools safe or removing them from use: grind off a mushroom head, re-wedge a loose hammer, or take the tool out of service and report it.
Going deeper: the same ground at Level 2
Level 1 gives you the shape of this. The Level 2 guides below take it considerably further — the regulations, the calculations and the detail you will need next. Free to read, same as these.
- Safe Isolation: The Procedure That Keeps You Alive
- Safety Critical Electrical Faults: What to Look For and Who to Tell
- Installation: Clipping, Fixings and Joist Work
- Workplace Documents, Drawings and Information
- Customer Communication and Customer Service
- Effective Communication and Conflict Resolution
- Drainage Pipe Materials, Jointing and Fittings
- Rainwater and Guttering Systems
- Drainage Stack Systems and Branch Pipework
- Traps and Trap Seal Loss
- All 72 Level 1 guides — one per lesson, across all ten units
- The Level 1 glossary — 620 terms in plain English