Almost everything that goes wrong on an underfloor installation goes wrong before the screed arrives, and almost none of it can be put right afterwards. That gives the installation sequence a weight it does not carry on a radiator job, where a mistake is a morning's work to undo.
This article covers Module 6 of the PlumbMate underfloor heating course: the installation sequence, working with the other trades, siting the manifold, insulation and edge strip, laying and fixing the tube, plated and foil floors, and the pressure test that has to happen before the pour. There is a 10-question mock test at the end.
The sequence
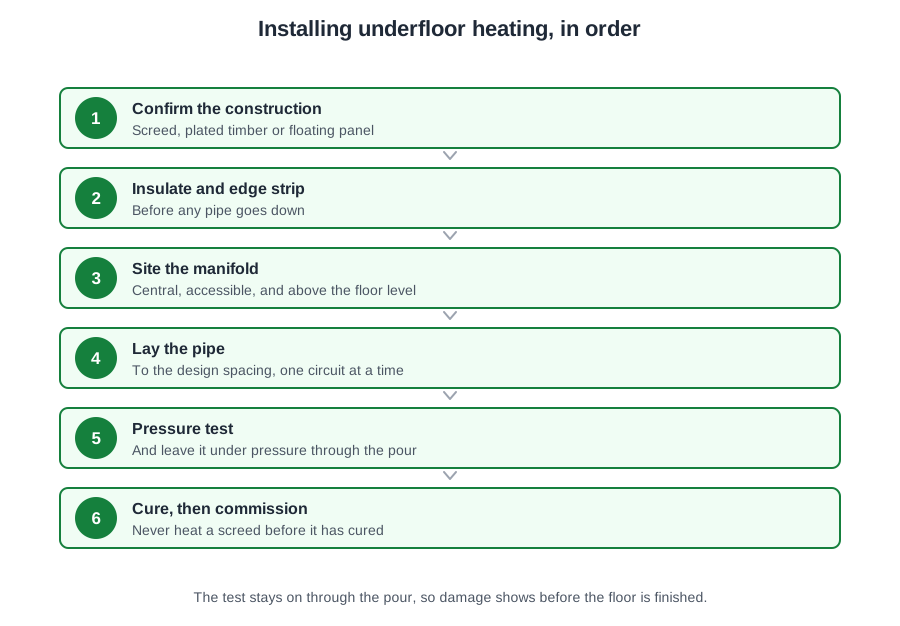
Seven steps, in this order:
- First fix the main wiring
- First fix domestic services below the insulation
- Lay the floor insulation
- Fix the manifolds in position
- Install the underfloor tube
- First fix the primary flow and return
- First fix the remaining hot and cold
Two of those positions surprise people, and both cost money when they are wrong.
The first is that wiring goes in first. Before that step is complete, the boiler, cylinder, thermostat and wiring centre positions all have to be agreed — because a thermostat position agreed after the plaster is on is a chase in a finished wall.
The second is that the manifold is fixed before the tube is laid. Laying pipe towards a position nobody has committed to is how tails end up three metres short, and below ground there is no joint available to make up the difference.
Before any of it starts, the design has to state the coil numbers and lengths, the pipe spacings and the flow rates per zone. Storage matters too: keep tube dry, out of sunlight, away from sharp objects and chemicals, and avoid soldering anywhere near it. If the site might freeze before commissioning, add antifreeze — and flush thoroughly afterwards.
The other trades
Underfloor touches more trades than any other part of a plumbing installation, and each of them needs something specific from you:
- The electrician needs the thermostat positions at first fix.
- The joiner needs to know about notching and blocking — before the joists are cut, not after.
- The screeder needs to know the pipe is down there and that it is pressurised.
The rule that covers the rest: trades involved are briefed; trades not involved are notified and excluded. A floor full of pipework with nobody watching it is an expensive thing to leave unattended.
Two points on documentation. Where the manufacturer's instructions are more demanding than a standard, follow the instructions. Where instructions conflict with statute, statute wins. And read the installation instructions first, not last — underfloor systems differ far more between manufacturers than radiator systems do, and assuming the last one you fitted tells you how this one works is a reliable way to get it wrong.
Siting the manifold
The manifold goes strategically, and as centrally as possible, in the area it serves.
Two reasons, and both are worth being able to say out loud:
- Shorter pipe tails. Every metre of tail is coil you paid for that heats nothing.
- Less uncontrolled energy. Tails crossing heated areas on their way somewhere else give up heat that no room thermostat governs.
The wrong answers that get offered in papers are worth recognising: 300 mm below the return bar, 600 mm above floor level, and “as close to the heat source as possible”. None of those is the rule.
It also has to stay accessible. Meters get read, lockshields get set, actuators get replaced. A manifold boxed into a cupboard behind a fitted wardrobe is a manifold nobody will service. And label every port as you connect it, while you still know which room is which — not from memory a fortnight later.
Insulation, edge strip and conduit
Insulation to Part L means a practical minimum of 75 mm PIR or 110 mm EPS on a ground floor, for the 0.25 W/m²K target. Protect it from the wet screed with heavy duty polythene.
The edge strip goes round every perimeter, every column and every threshold, and it extends to the upper edge of the flooring layer — not just the top of the screed. It is doing two jobs: an insulation barrier at the perimeter, and an expansion gap for a slab that will grow when it is heated.
Wherever the pipe crosses a screed joint or a threshold, sleeve it in a larger conduit for 400 mm either side, and fix the conduit so it cannot migrate along the pipe while the screed is being placed.
And keep the first pipe run at least 100 mm off the wall.
Laying and fixing the tube
Any of the standard fixing methods is acceptable: clips pushed into the insulation, clip rails, matrix overlays, or fixing to reinforcement mesh. Choose for the floor you have rather than for habit.
Handling the pipe is where craftsmanship shows:
- Pull the pipe to shape, never force it. The print line down the side of the tube tells you whether it has twisted — if the line spirals, the pipe is under torsion and it will fight you at every bend.
- Cut square, with a plastic pipe cutter, and leave no burrs.
- No joints below ground. If a repair joint becomes unavoidable, it must be located and recorded on a record drawing in the building log book — because somebody will need to find it one day.
Expansion is worth a number: above ground, roughly 10 mm per linear metre at 60 °C. Once the pipe is embedded in screed that movement is prevented, which is precisely why the conduit at thresholds and joints matters.
Plated and foil floors
Heat emission plates are scored to break at set points: a third from one end and a sixth from the other. Break them groove uppermost over a straight edge, then clean off the burrs. For any other length, score deeply with a knife and cut with a hacksaw along the pipe groove.
On both plated and foil systems the pipe runs parallel to the joists, and there is a minimum of 100 mm of mineral wool between the joists beneath — for downward heat loss and for airborne sound.
Pressure test, then screed
The pressure test happens before the screed, and the pipe stays pressurised throughout the pour.
That is not belt and braces. It is the only arrangement in which damage announces itself at the moment it happens — on the gauge, while the screed is still workable and the pipe is still reachable. Test afterwards and a barrow wheel through a pipe becomes a floor you take up.
Before the screed arrives: board out the walking and barrow routes, and check the edge strip and the conduits one last time. Screed at 65 to 75 mm, a minimum of 75 mm above the insulation, reinforced if the specification calls for it.
Then 21 days. And never heat it dry.
📝 10-Question Mock Test
Click an option to see whether you got it right. Explanations appear instantly — no submitting at the end.
Wiring first, with the boiler, cylinder, thermostat and wiring centre positions all agreed. A thermostat position settled after the plaster is on means chasing a finished wall.
Laying pipe towards a position nobody has committed to is how tails end up short — and below ground there is no joint available to make up the difference.
Follow the instructions. Where instructions conflict with statute, statute wins. And read them first — underfloor systems differ far more between makers than radiator systems do.
Two reasons: shorter tails, and less uncontrolled energy from pipes crossing heated areas on their way elsewhere. It also has to stay accessible for reading meters, setting lockshields and replacing actuators.
It is doing two jobs — insulation barrier and expansion gap — and it goes round every perimeter, column and threshold.
400 mm either side, with the conduit fixed so it cannot migrate along the pipe while the screed is being placed. The two slabs will move relative to each other.
If the line spirals, the pipe is under torsion and will fight you at every bend. Pull the pipe to shape — never force it.
Pipe below ground is laid without joints as a rule. Where one cannot be avoided, somebody will need to find it one day, and the record drawing is how.
Break them groove uppermost over a straight edge, then clean off the burrs. For other lengths, score deeply with a knife and hacksaw along the pipe groove.
It is the only arrangement in which damage announces itself at the moment it happens — on the gauge, while the screed is still workable and the pipe still reachable.
The theme running through all of it is that underfloor work is irreversible in a way most plumbing is not. Almost every item in this module — the sequence, the manifold position, the edge strip, the conduit, the record drawing, the pressure test held through the pour — exists because there is no second chance once the screed truck has left.