The whole Level 1 Diploma, one lesson at a time: the industry you are joining, working safely, the environment, tools and site preparation, drainage, copper, plastic and steel pipework, installation and maintenance, and the science behind it. 83 lessons across 10 units, written against the City & Guilds standards so that everything you can be asked is somewhere in here.
What’s inside
Pass mark: 80%. Your best score for each quiz is saved.
1
The five key trades
Who does what on a building site
Read the lesson ▶
Five trades, and two or three jobs each. It looks like a list to learn by heart, and it is the first thing on the course for a better reason than that. Almost everything that goes wrong on a building site goes wrong at the joins between trades, where one person’s work has to fit around somebody else’s. Learn the five and you can already read a site.
The five, and what each one does
The electrician.Lighting wiring, power supply wiring and maintenance. Two kinds of circuit and then keeping them working. First fix is the cable in before the walls are closed up; second fix is the sockets, switches and fittings on the end of it. Their work runs through the same walls and floors as yours, which is why you will meet them more than any other trade.
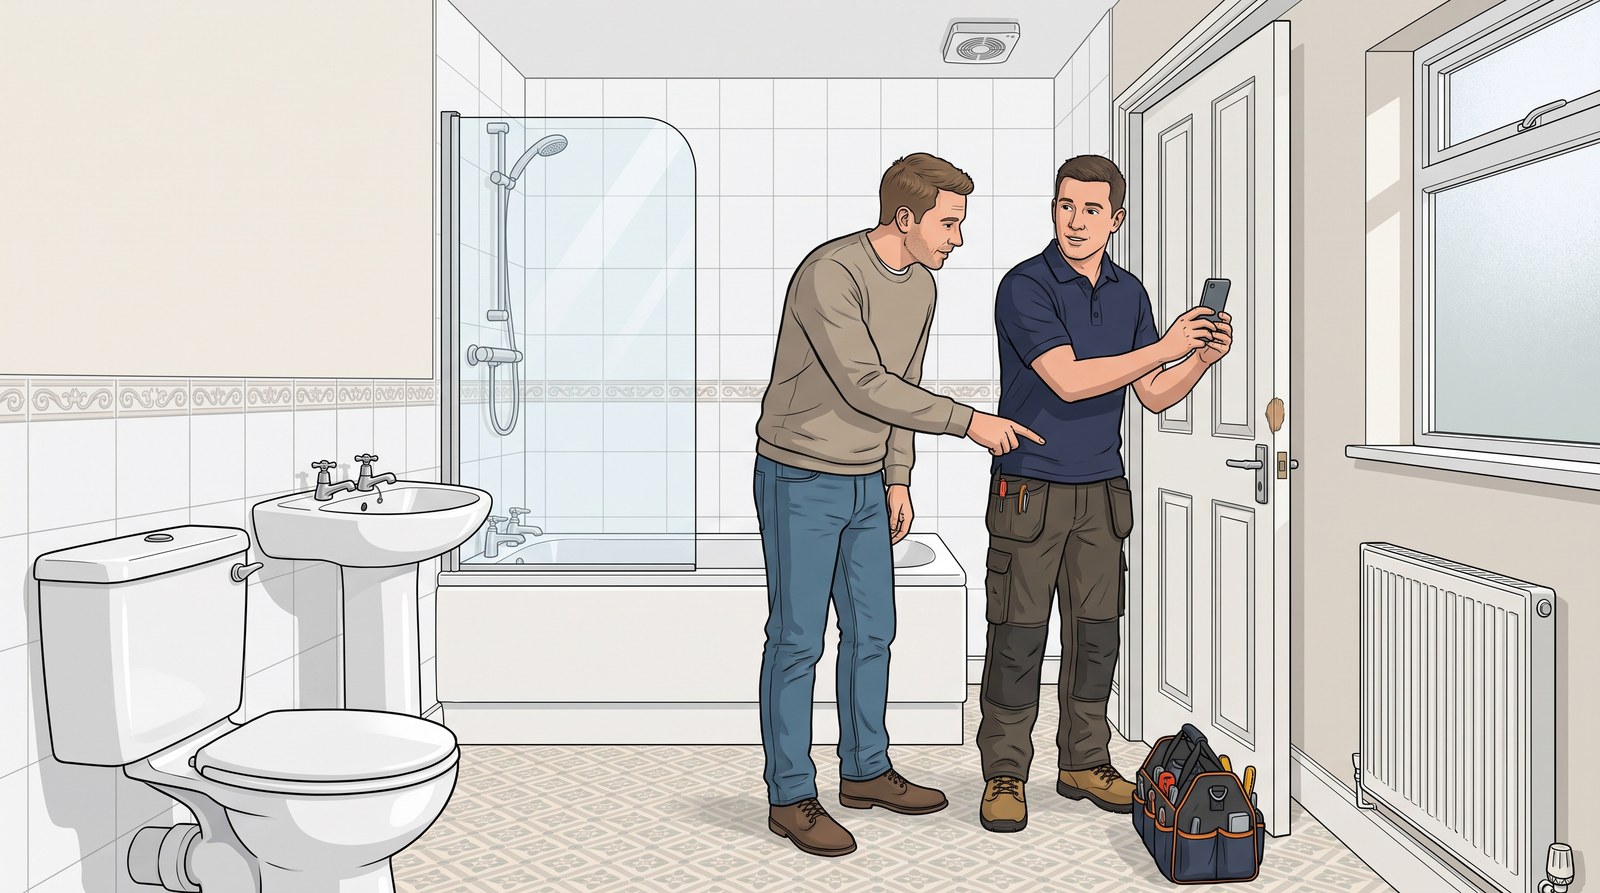
The plumber.Hot and cold water supply, central heating, bathroom installation, and sanitation and drainage. Four jobs where every other trade has two or three, and that is worth noticing: it is the widest list on the page. A domestic plumber might spend Monday on a bathroom, Tuesday on a boiler and Wednesday clearing a blocked drain. It is why your qualification covers water, heating, sanitation and drainage instead of just one of them.
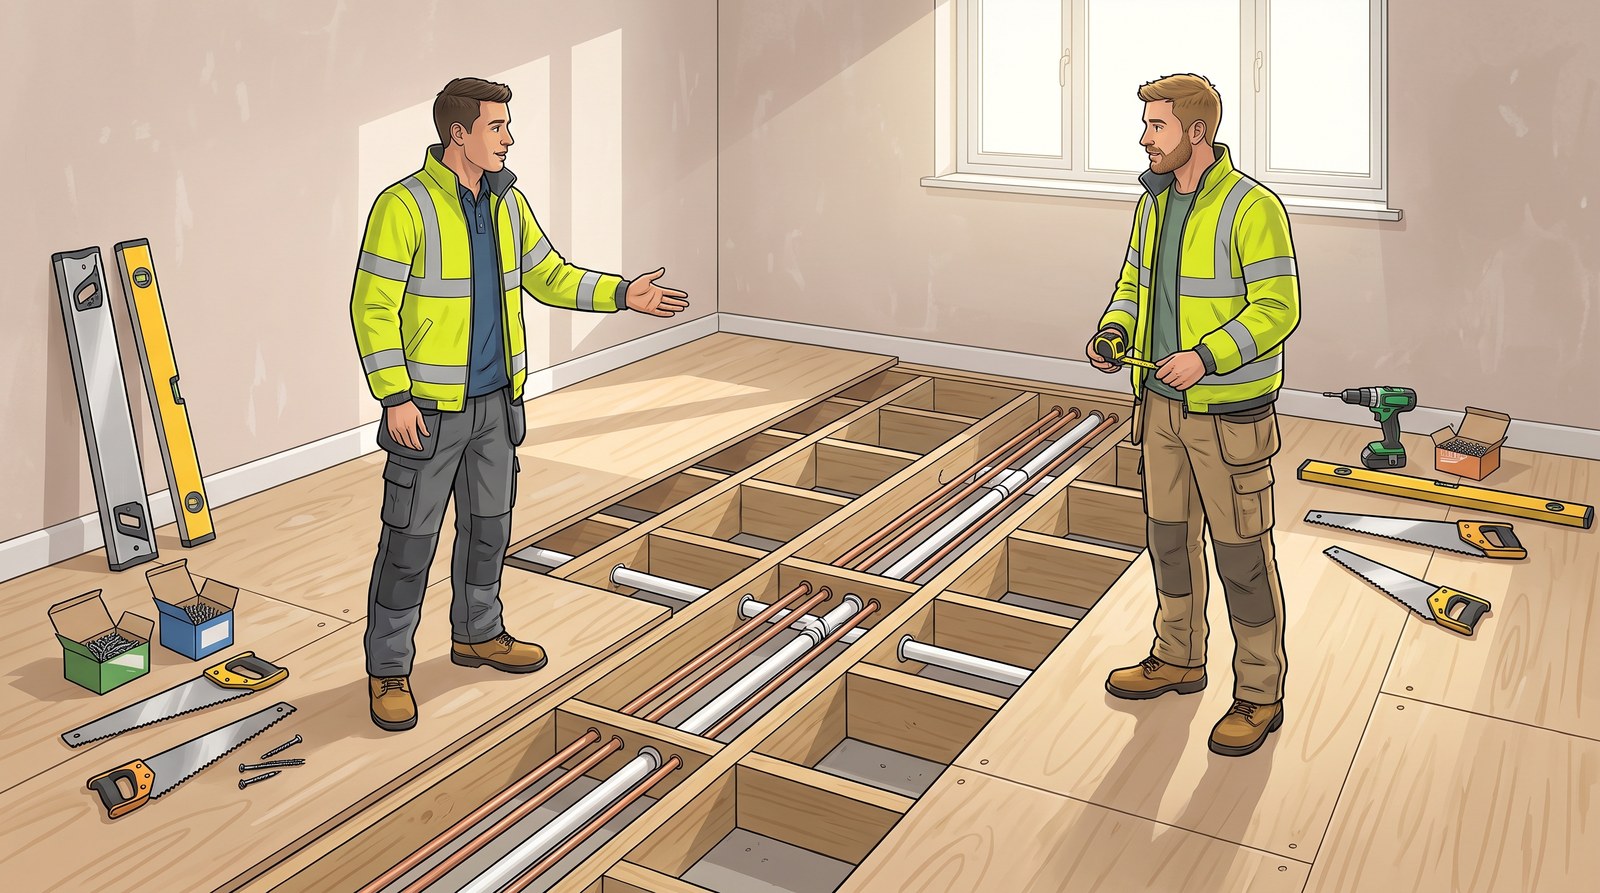
The carpenter.Hanging doors, installing windows and timber roof installation. The full trade description is “installation of doors, windows, roof, skirting board and architrave” — the skirting and the architrave, the moulding round a door frame, are carpentry too. The carpenter boards the floor over your pipework, so they need to know where it runs before they do.
The bricklayer.Brick laying, stone work and concrete block installation. They build the walls; the plasterer finishes them. Keep those two apart, because it is the pair people swap most often.
The plasterer.Plastering and dry lining — only two jobs, which makes it the easiest to learn. Plastering is the wet finish; dry lining is fixing plasterboard to the wall instead. Same trade, two ways of doing it. The trade description for the work is a smooth finish to wall surfaces ready for decoration — which is exactly what the decorator needs from them.
The order they work in, and why it matters to you
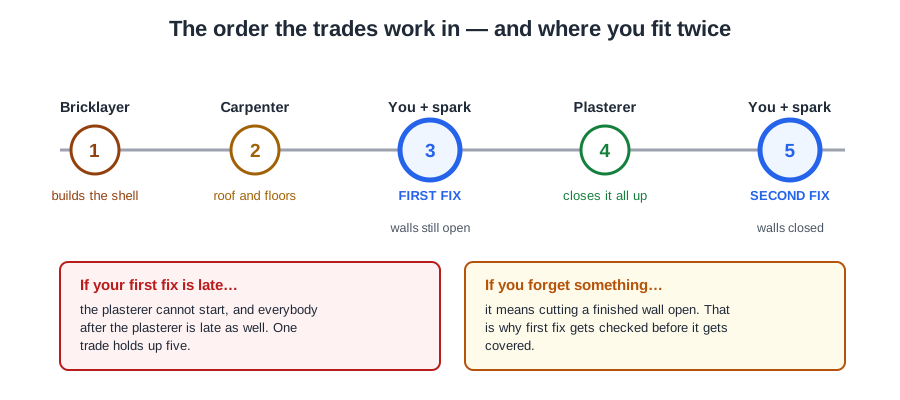
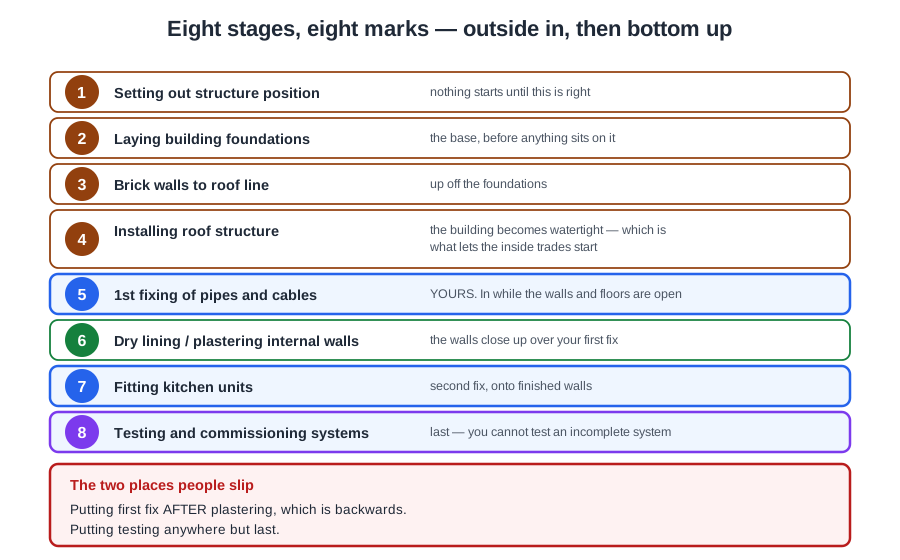
The trades do not all turn up at once. Roughly: the bricklayer builds the shell, the carpenter puts the roof and the floors in, then the plumber and the electrician do their first fix while the walls are still open, then the plasterer closes everything up, and finally the plumber and electrician come back for second fix.
Two things follow from that. First, if your first fix is late, the plasterer cannot start — and everybody after the plasterer is late too. Second, once the plasterer has been, anything you forgot means cutting a finished wall open. That is why first fix gets checked before it gets covered.
The pair that gets mixed up
The plumber appears twice. Everything after first fix waits on you, and everything before second fix is already covered up.
Bricklayer and plasterer. Both work on walls. The bricklayer builds the wall out of brick, block or stone; the plasterer finishes it. If the question is about making the wall, it is the bricklayer. If it is about the surface, it is the plasterer.
The five trades and their jobs
Trade
The jobs the standard names
Electrician
Lighting wiring, power supply wiring, maintenance
Plumber
Hot and cold water supply, central heating, bathroom installation, sanitation and drainage
Brick laying, stone work, concrete block installation
Plasterer
Plastering, dry lining
📝
In the assessmentLearn the five as a list first — electrician, plumber, carpenter, bricklayer, plasterer — then two or three jobs for each. The question can come either way round: “which trade does dry lining” or “name three jobs the bricklayer does”.
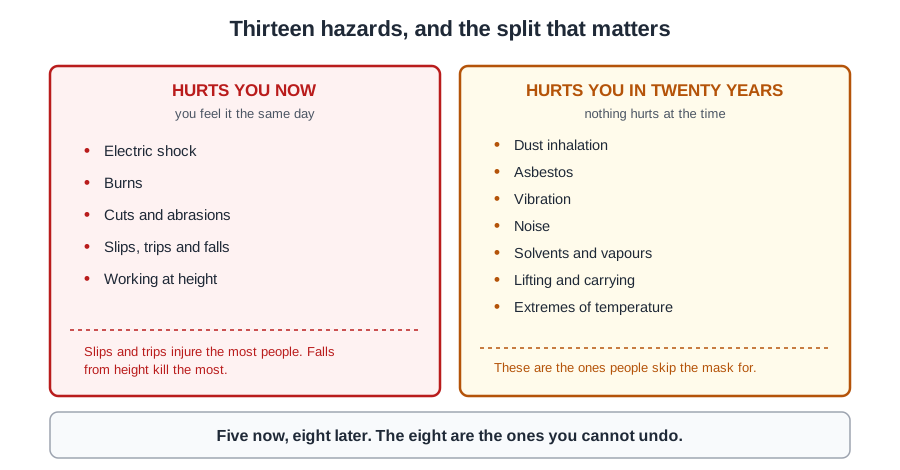
Thirteen hazards, and two things to know about each one: what it does to you, and which trade meets it most. The second half is the one people skip, and it is the half that tells you what the person working next to you is breathing in — so as you go through the list, notice who is named alongside each one.
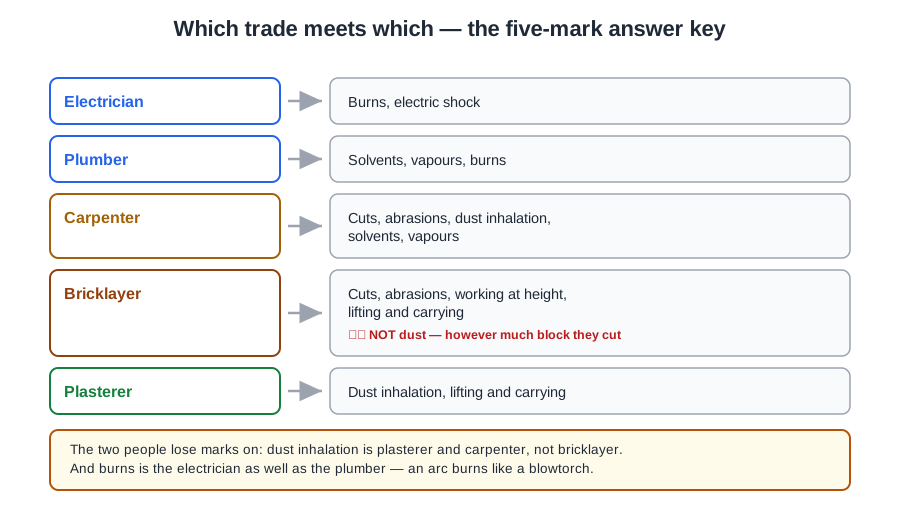
They fall into five groups, one per trade, and that grouping is worth having in your head before you set foot on a site. Learn the thirteen names first and the five groupings after; the table at the end sets them out.
There is also a split running through the list that matters more than the names, and it is the reason people get hurt.
The ones that hurt you now
Electric shock — paired with the electrician, who works on it directly. Anyone drilling blind into a wall with cable in it meets it too, which is most of us. It is the one that kills quickest, which is why a supply is isolated and proved dead rather than assumed to be off.
Burns — paired with the plumber and the electrician. Ours are the blowtorch, hot pipework and hot water; theirs are arcs and shorts, which burn just as badly. Wet cement and plaster damage skin as well — that is cement dermatitis, and it is a real problem for bricklayers and plasterers. It is not called a burn, though, and the distinction is worth keeping: cement dermatitis is its own condition with its own name, and the right word matters when you report it or see a doctor about it.
Cuts and abrasions — paired with the carpenter and the bricklayer. Edged tools all day for one, cut block and banded packs for the other. You will meet plenty of it on cut pipe and broken tile as well; it is just not the pairing marked. This is what gloves are for.
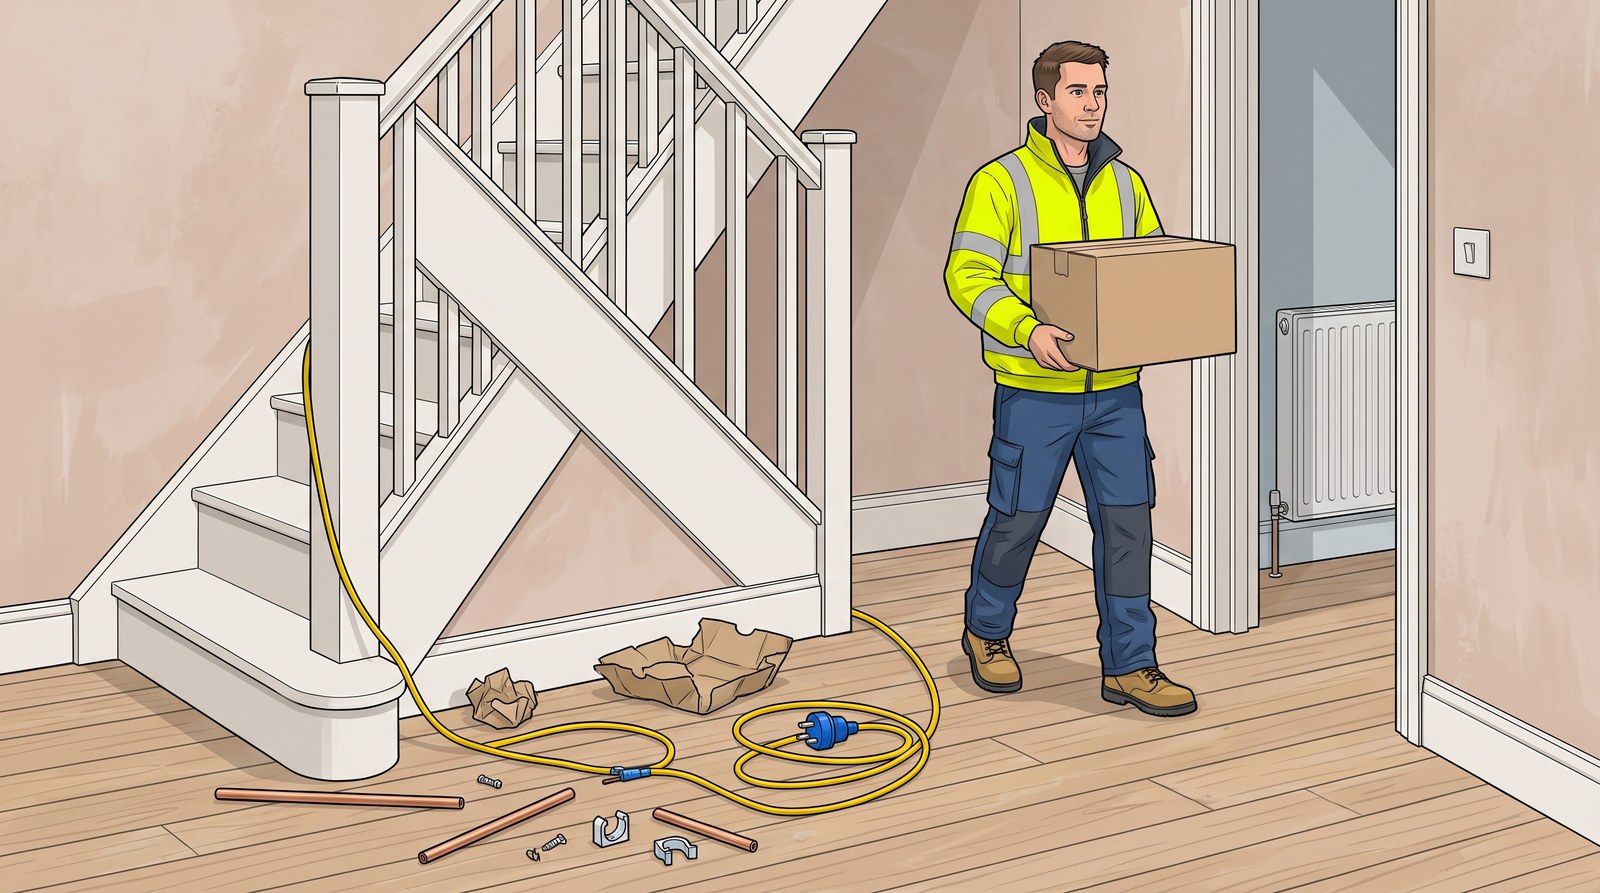
Slips, trips and falls — wet floors, trailing leads, offcuts and packaging left where people walk. These cause more site injuries than anything else on the list, and nearly all of them come from mess.
Working at height — paired with the bricklayer, and only the bricklayer: the scaffold goes up with the wall and that is where the whole day is spent. Everybody else is up and down ladders and steps, which is where most falls actually happen, because nobody thinks a stepladder is dangerous. Slips and trips injure the most people; falls from height kill the most.
The ones that hurt you in twenty years
Five hurt now, eight hurt later. The eight are the ones people skip the mask for, and the ones you cannot undo.
This is the half people underestimate, because nothing hurts at the time.
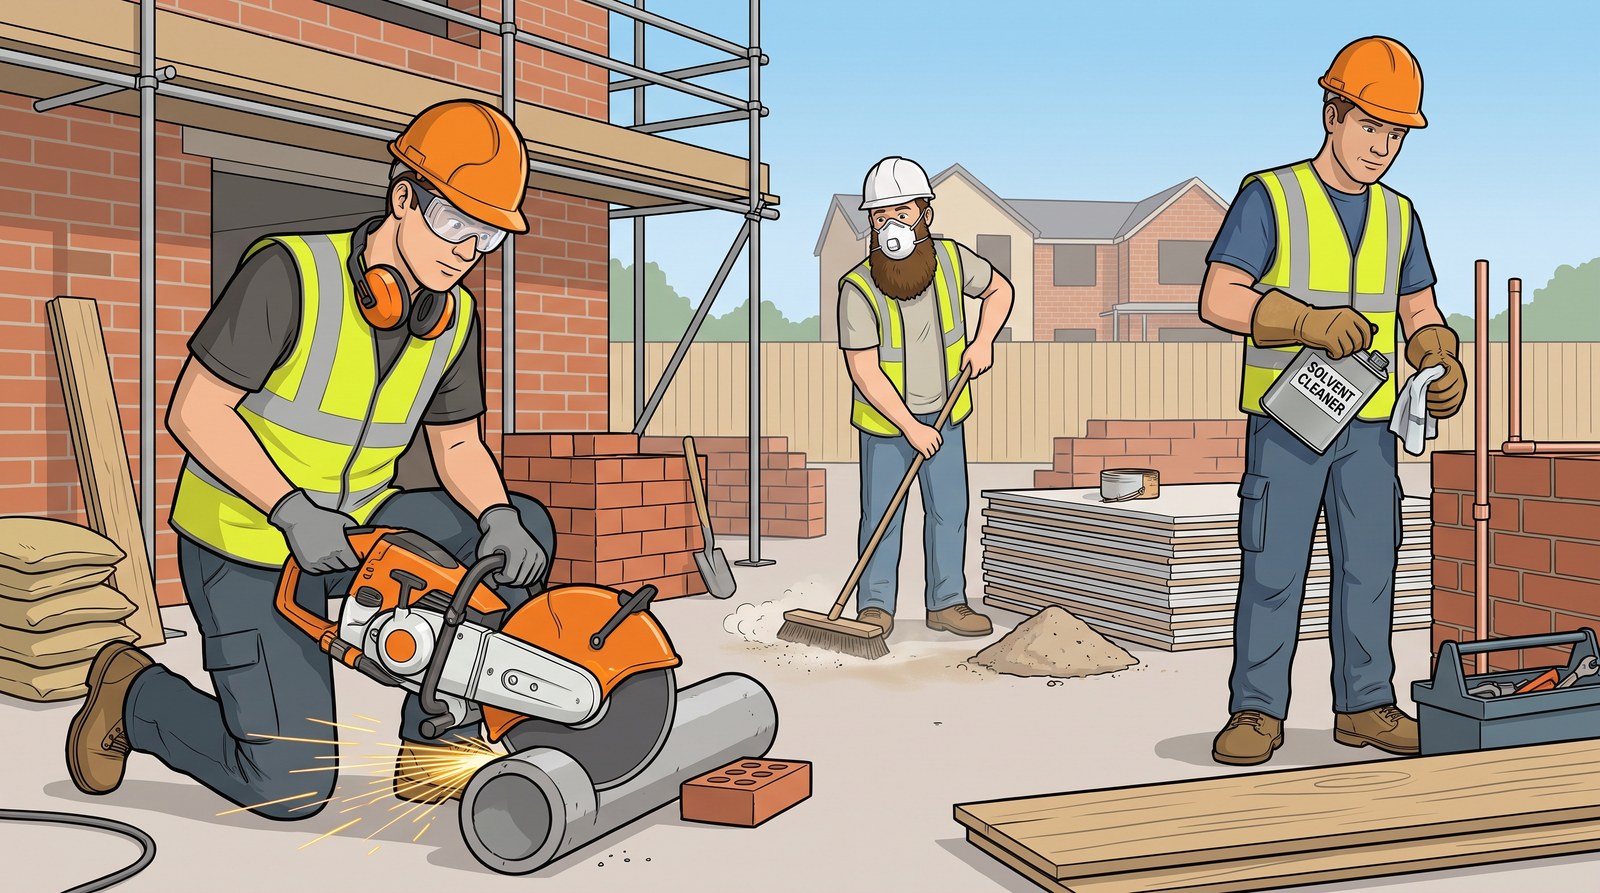
Dust inhalation — paired with the plasterer and the carpenter. Mixing and sanding for one, sawing and machining timber for the other. This is the pairing people get wrong, because a bricklayer cutting block looks like the obvious answer and is not one of the pair. The dust from brick, block and concrete contains silica, which permanently scars the lungs; wood dust does its own damage. Cut wet, or use extraction, and wear a mask that fits.
Asbestos — in anything built or refurbished before 2000, and not paired with any one trade in the matching question. It turns up wherever a building is opened up: pipe lagging, old boiler flues, artex ceilings, under floorboards. If you suspect it you stop, you do not disturb it, and you report it. Removal is licensed work and it is not yours to do.
Vibration — SDS drills, breakers, grinders, and not paired with a trade in the matching question. Anyone chasing a wall is on an SDS more than they think. Long use causes permanent nerve damage in the hands. Rotating the job between people is a real control, not a dodge.
Noise — power tools, cutting, and other trades working next to you. Hearing damage is gradual and permanent, and other people usually notice it before you do.
Solvents and vapours — paired with the plumber and the carpenter, and this one matches the job exactly. Ours are solvent weld cement, cleaners and soldering flux; the carpenter’s are adhesives and solvent-based finishes. Two separate entries on the list: the substance, and what comes off it. In a bathroom with the window shut the vapour builds up instead of dispersing, and a bathroom is exactly where a plumber uses it.
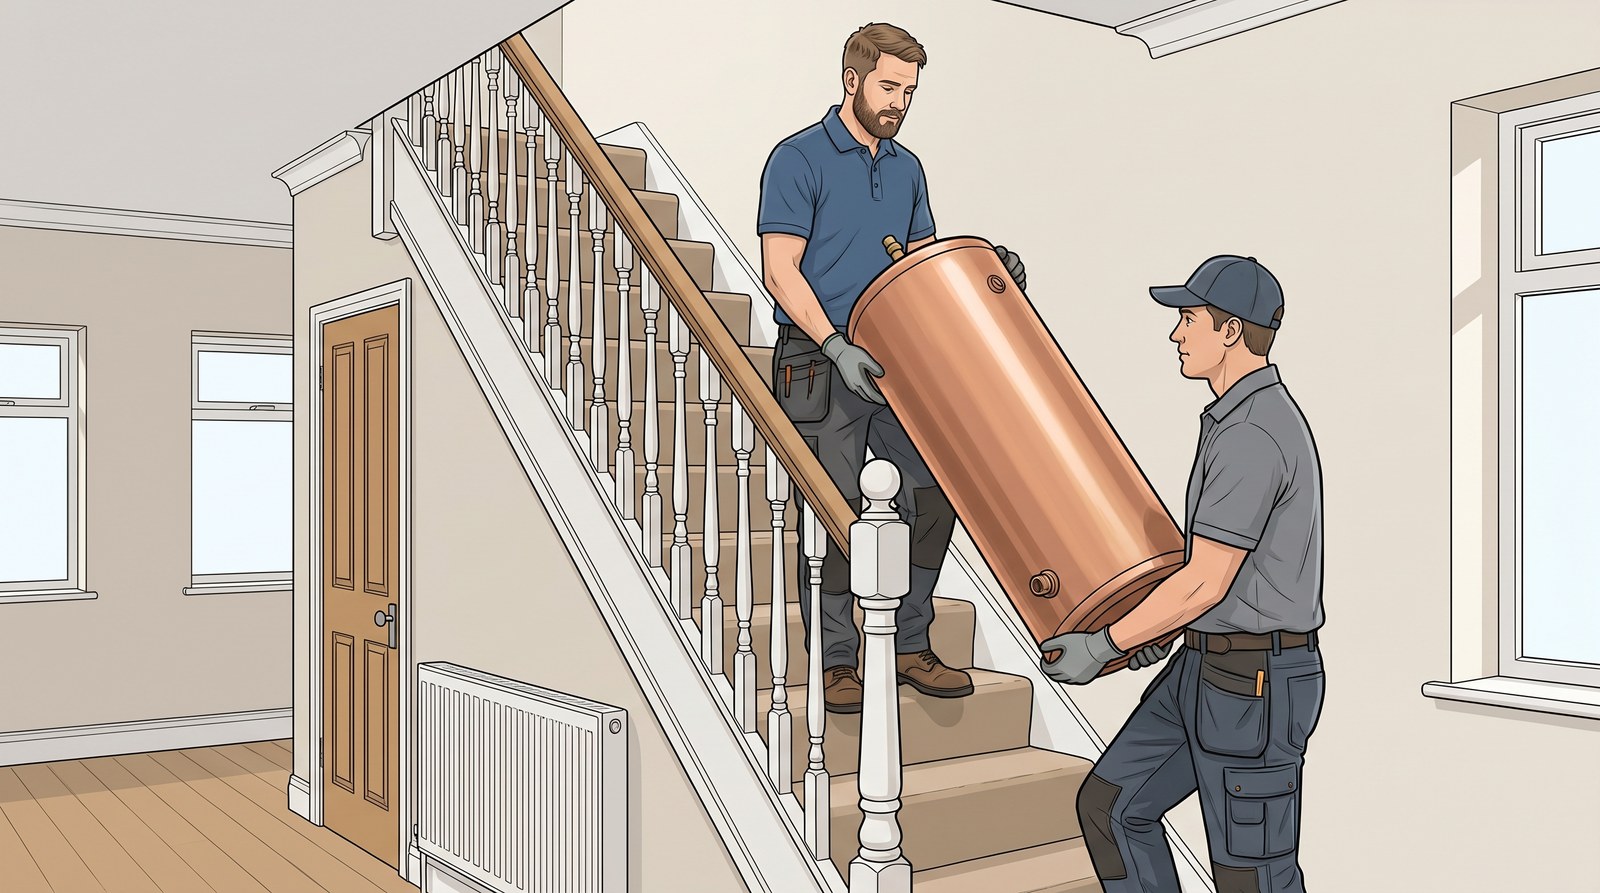
Lifting and carrying — paired with the bricklayer and the plasterer: blocks all day for one, bags for the other. A plumber lifts the worst single items on a site — baths, boilers and cylinders, usually up a staircase — but that is not the pairing marked here. The back goes a little at a time rather than in one lift, which is what manual handling, also called kinetic lifting, is taught to prevent.
Extremes of temperature — a loft in August, an unheated new build in January, a whole day outside on a frost. Not paired with a trade in the matching question either. Cold costs you grip and dexterity, heat brings on exhaustion, and both make every other hazard on this list more likely.
The point most people miss
Cuts and burns hurt straight away, so everyone takes them seriously. Dust, vapours, vibration, noise and asbestos do not — and by the time you notice, it cannot be undone. Those are exactly the ones people skip the mask or the defenders for, and exactly the ones where wearing them matters most.
Which trade meets which
The five groupings. The two that get mixed up most are flagged.
Five groups, five trades. Holding it as five groupings rather than thirteen separate facts is what makes it stick — and it is how you will actually use it, because the question on site is never “name a hazard”, it is “what is the person next to me exposed to, and am I standing in it?”
Cuts, abrasions, working at height, lifting and carrying
Bricklayer
Dust inhalation, lifting and carrying
Plasterer
Two of those are worth a second look, because the obvious answer is not the right one. Dust inhalation pairs with the plasterer and the carpenter — not the bricklayer, however much block cutting they do. And burns pairs with the electrician as well as the plumber: an arc or a short burns just as a blowtorch does.
On a real site everybody meets everything eventually. A plumber lifts the worst single items on the job and a bricklayer cuts block all day, and neither of those is in the five groupings. Learn the groupings, and take the rest as what the work is actually like.
The thirteen
Now: electric shock, burns, cuts and abrasions, slips trips and falls, working at height.
Over years: dust inhalation, asbestos, vibration, noise, solvents, vapours, lifting and carrying, extremes of temperature.
📝
In the assessmentMatching the five hazard groups to the five trades is five of the fifty marks on this unit. The two that catch people are dust inhalation (plasterer and carpenter, not bricklayer) and burns (electrician as well as plumber).
Sole trader, partnership, limited company — and who you might work for
Read the lesson ▶
There are two different questions here that are easy to run together, and they have completely different answers. One is how big a firm is and what part of the job it does. The other is how it is legally owned. A one-man drainage firm can be a sole trader; so can a one-man bathroom fitter. Same legal type, different specialism.
By size and by role
The standard groups organisations six ways. Three are about size: small is fewer than 50 people, medium is 50 to 249, and large is 250 or more. The other three are about what a firm does and who engaged it.
Specialist firms and services do one part of the work and do it properly — drainage, lift installation, water treatment, unvented cylinders. No single firm carries every skill a build needs, which is why they exist. A firm that only does certain specific types of work is also called a specialist contractor, so you will hear it both ways.
Sole traders are one person working for themselves. Sub contractors are firms brought in by the main contractor to do one part of the job.
Main contractor and sub contractor
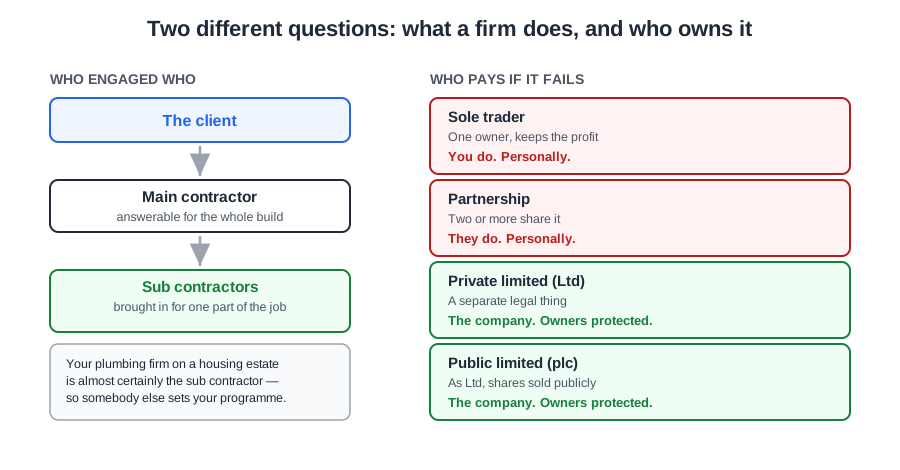
The main contractor holds the contract with the client and is answerable for the whole build. They rarely carry every trade themselves, so they bring in sub contractors for the specialist work and take their instructions from nobody but the client.
This matters to you directly. If you work for a plumbing firm on a new housing estate, your firm is almost certainly the sub contractor — which means your programme, your access and the order you work in are all set by somebody who does not work for your firm.
The legal types
Two separate questions. Who engaged who, and who pays if it fails.
Separately from size, a business has a legal form, and the difference between them is about who pays if it fails.
A sole trader is one person who owns the business. Simple to set up, keeps the profit — and is personally responsible for the debts. If the business owes money, they owe money.
A partnership is two or more people sharing the business, the profits and that same personal responsibility for debts.
A private limited company (Ltd) is a separate legal thing from its owners. That is what “limited” means: the owners’ own money is protected if the company fails. Shares are private, and the company must register at Companies House and file accounts anybody can look up.
A public limited company (plc) is the same, except its shares can be bought by the public on the stock market. The largest contractors work this way.
Specialisms inside our own trades
Within plumbing the standard names five, and the way to hold them is who would you call. Bathroom in a house? The domestic plumber. Boiler or heating system? Heating engineers. Pipework in a factory or on large plant? Industrial plumbers. Blocked or collapsed run below ground? The drainage specialist. Servicing what is already installed, year after year? The maintenance engineer.
Within electrical it names four, and they answer the same way. Rewire in a house? Domestic electricians. Factory, shop or office? Industrial and commercial electricians. Keeping an existing installation running? Maintenance electricians. Alarm and security systems? The alarm engineer.
The pattern is the same on both sides — domestic, larger scale, maintenance, and one true specialism. Learn one list and the other comes nearly free.
The legal types at a glance
Type
What it means
Sole trader
One owner. Keeps the profit, and is personally responsible for the debts.
Partnership
Two or more share the business, the profits and the debts.
Private limited company (Ltd)
Legally separate from its owners, so their own money is protected if it fails. Files accounts at Companies House.
Public limited company (plc)
As Ltd, but shares can be bought by the public.
💡
Read the question twice. “What type of organisation” can mean the size and role list — small, medium, large, specialist firms and services, sole traders, sub contractors — or the legal list. The word limited or partnership in the options tells you which one is wanted.
The job roles you will meet, and what each one decides
Read the lesson ▶
On anything bigger than a house, a team of people plan and run the job before a single pipe is fitted. You need to be able to identify job roles within the construction industry — six of them — and the practical value is knowing who to ask when something is wrong. Asking the wrong person wastes a morning; asking nobody and guessing costs a great deal more.
The six roles
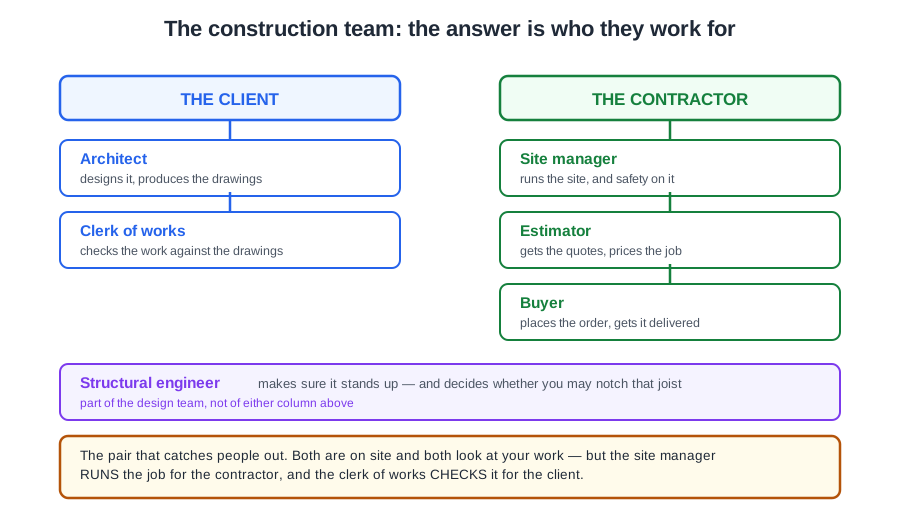
The architect designs the building and produces the drawings everyone works from. If a drawing looks wrong, the architect is the one who answers — not your supervisor, and not the site manager.
The structural engineer makes sure the building stands up: that the structure is strong enough to bear the loads imposed on it. They are the one who decides whether you may cut into a joist or a beam. This is the answer to the most practical question on the whole list, because notching and drilling joists is something you will actually want to do.
The clerk of works works for the client, on site, checking that the work matches the drawings and meets the right standard. Everyone else on this list works for the contractor. That difference is the whole point of the role. They are also called the architect’s on site representative, which is the same idea from the other end — they are there to see the design is built as drawn.
The estimator works out what the job will cost so the firm can price it, which means getting quotes from all the suppliers for materials and pricing the labour to go with them. Their figures become the firm’s bid, which means an error there either loses the job or wins it at a price nobody can build for.
The buyer — also called the procurement officer — orders the materials to arrive on site, in time and at the right price. Note how close that is to the estimator: the estimator gets the quotes, the buyer places the order. When the copper for next week has not turned up, this is whose job it was.
The site manager — also called the site agent or construction manager — is in charge of all on site working operations, including health and safety. Who is working where, progress, deliveries. Three names, one role, and you will hear all three on site.
Who you will actually talk to
Sort them by who pays them and the clerk of works stops looking like the site manager.
As an apprentice, most days it is your own supervisor and the site manager. The others come in when something specific is wrong: a drawing that does not make sense (architect), a joist you want to notch (structural engineer), or an inspection of work you have just finished (often the clerk of works).
The one that catches people out
The clerk of works and the site manager. Both are on site, both look at your work, and it is easy to assume they are two words for the same thing. The site manager runs the job and works for the contractor. The clerk of works checks the job and works for the client. If a question mentions the client, it is the clerk of works.
The six at a glance
Role
What they do
Architect
Designs the building and produces the drawings.
Structural engineer
Makes sure it stands up. Decides what may be cut into.
Clerk of works
Works for the client, checking work against the drawings and the standard.
Estimator
Works out what the job will cost, so the firm can price it.
Buyer
Gets the right materials there in time and at the right price. Also the procurement officer.
Site manager
Runs the site day to day. Also the site agent, or construction manager.
💡
Learn the alternative names as well as the roles. Site manager = site agent = construction manager, and buyer = procurement officer. A question using the second name is testing whether you know it is the same job.
The JIB, the Water Authority, the IET, the ECA, the APHC and the local authority
Read the lesson ▶
Six organisations. You have to be able to name them and state what each one is responsible for, and that is the whole of it. Six names and six jobs, and ten minutes will fix them for good.
It feels like a memory test because it is one. But the six are not a random list. They do three different kinds of job, and once you can see that, six separate things turn into three pairs.
The six, and what each one is for
JIB — the Joint Industry Board. Responsible for grades, wages, allowances, benefits, employment advice and industrial agreements. In one line: the JIB is about pay and conditions. It grades people, which is what a card means when it says what level you are working at.
One to get right: the JIB is the one that covers both trades. The IET and the ECA are electrical; the APHC is plumbing; the JIB sits across the two of them, which is why it is the body that negotiates your grade and your rate whichever of the two you end up in.
WA — the Water Authority. Responsible for water resources and uses, quality of service, infrastructure, and water supply and sanitation. In one line: they supply the water and take the waste away, and they are the body that makes sure water supplied to homes is clean and safe to drink. They are the physical water business — the main in the road, the treatment works, the sewers. When you are told the main is being shut off on Tuesday, that is them.
IET — the Institution of Engineering and Technology. Responsible for the international standardisation of regulations and the wiring regulations. In one line: the IET is about electrical regulations. The wiring regs — the book every electrician works to — come from the IET.
ECA — the Electrical Contractors Association. Responsible for support services to contractors, building a sustainable industry and enhancing the profile of the industry — and, on the fuller list, working closely with government, local authorities and training bodies, offering technical advice on design, installation, inspection and maintenance, and advising on employee relations, recruitment and employment law. In one line: the ECA is for electrical contractors as businesses. Not the rules — the firms.
You should be able to give two responsibilities each for the ECA and the APHC without stopping to think. Learn three of each and you have one in hand.
APHC — the Association of Plumbing and Heating Contractors. Responsible for support to contractors, encouraging training, and knowledge and professional advice. In one line: the APHC is the plumbing and heating version of the ECA. Same job, our trade.
The Local Authority. Responsible for the building regulations. In one line: the council signs off that the building is legal. Building Control is the local authority department that does it, and it is the reason notifiable work has to be told to them and then inspected.
Worth knowing precisely, because it is a mark people drop: asked which organisation makes sure the electricity supplied within homes is safe, the answer is Building Control — not the IET. The IET writes the wiring regulations; Building Control is who checks the installation in a house complies.
Three pairs, not six things
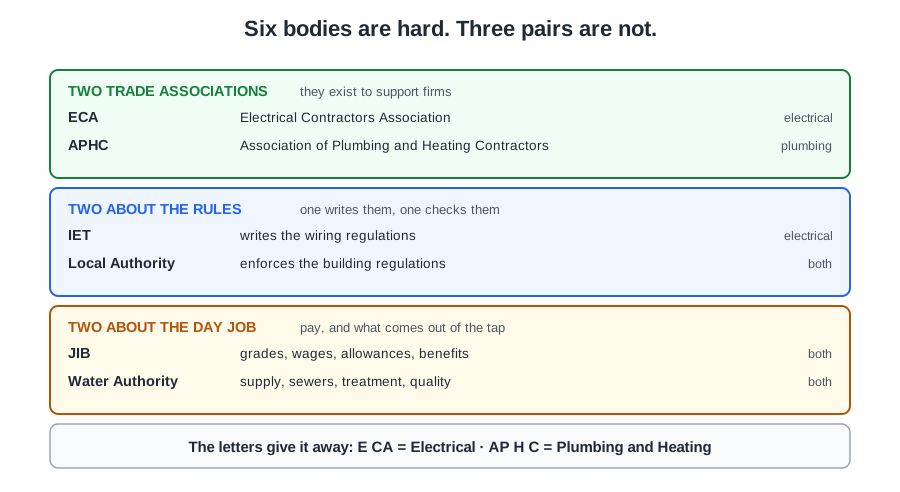
Six separate facts are hard to hold. Three pairs are not.
Six separate facts are harder to hold than three pairs. Sort them like this:
Two trade associations, one for each trade. The ECA for electrical contractors, the APHC for plumbing and heating contractors. Both exist to support firms. Same job, different trade.
Two about the rules. The IET writes the electrical wiring regulations; the Local Authority enforces the building regulations. One writes, one checks.
Two about the day job. The JIB sets what you get paid; the Water Authority supplies what comes out of the tap.
The letters give away more than they look. ECA — Electrical. APHC — Plumbing and Heating Contractors.
The two pairs that get mixed up
The ECA and the IET. Both electrical, so they are easy to swap over. The IET writes the regulations; the ECA represents the contractors. Rules against firms.
The Water Authority and the Local Authority. Both sound like “the authority”. The Water Authority deals with water — supply, sewers, treatment. The Local Authority deals with building regulations. Water against buildings.
Does any of this matter once you are working?
📚
Going further — towards Level 2Three more bodies sit behind the Water Authority, and you will meet all three at Level 2 and beyond. OFWAT is the economic regulator: it sets the price the water companies may charge and holds them to their promises on service. The Drinking Water Inspectorate checks that the water leaving the treatment works and arriving at the tap is fit to drink. DEFRA — the Department for Environment, Food and Rural Affairs — is the government department the whole of it reports into, and the one that writes the Water Regulations. None of the three is named in the Level 1 range, so you are not expected to reproduce them. Knowing they exist is what stops “the Water Authority” sounding like one office with one job.
Some of it more than the rest, honestly. The Local Authority and the Water Authority you will meet directly: notifiable work gets inspected, and water fittings have to comply with the water regulations, which the Water Authority can and does come and check. The APHC becomes real the day you or your employer wants training, advice, or a dispute sorted out without a solicitor. The JIB matters most if you go into electrical work — but the idea behind it, an agreed rate for a stage of training, runs right across construction, and knowing it exists is worth something the first time somebody offers you a wage.
Water resources and uses, quality of service, infrastructure, water supply and sanitation.
IET Institution of Engineering and Technology
International standardisation of regulations, and the wiring regulations.
ECA Electrical Contractors Association
Support services to contractors, build a sustainable industry, and enhance the profile of the industry.
APHC Association of Plumbing and Heating Contractors
Support to contractors, encourage training, knowledge and professional advice.
Local Authority
Building regulations. They check that building work meets the law.
💡
The question is worded “state the key responsibilities of…”, so learn the responsibility words, not just the names. “The JIB deals with pay” will not earn what “grades, wages, allowances, benefits, employment advice and industrial agreements” earns.
Contracts, pay, holiday, sick pay and family leave
Read the lesson ▶
These are rights in law. That is the thing to hold on to: they are not favours, they are not perks, and they do not depend on your employer being decent. They apply whether or not anybody mentions them, and a contract cannot take them away.
Seven of them, and most carry a number. The numbers are what gets asked.
The seven rights
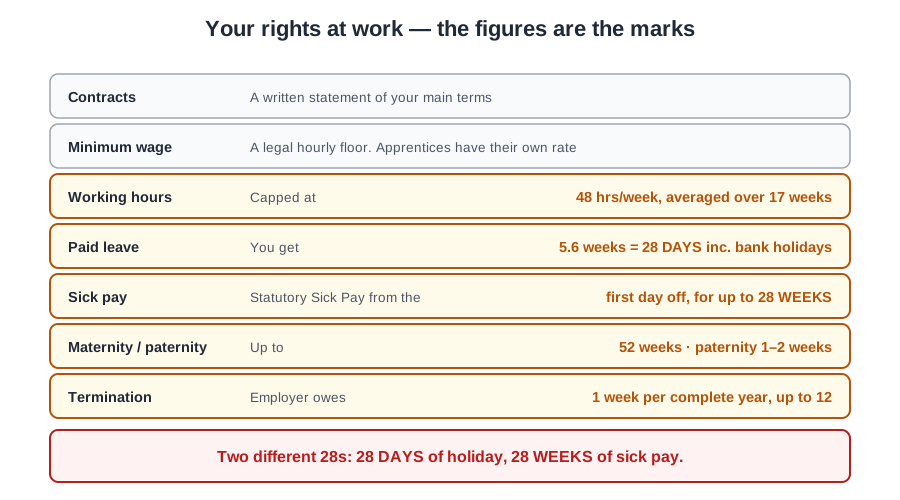
Contracts. You are entitled to a written statement of your main terms — the job, the pay, the hours, the holiday. A verbal promise is not it, and neither is a handshake.
Minimum wage. A legal hourly floor. The rate depends on your age, the higher National Living Wage applies from 21, and apprentices have a lower rate of their own. No agreement, written or otherwise, can go below the floor that applies to you.
Working hours. Normally capped at 48 hours a week, averaged over 17 weeks. You may choose to opt out, but only in writing, and nobody can make you. The averaging is why a long week is not automatically a breach.
Paid leave entitlement.5.6 weeks a year for a full time worker, which is 28 days including bank holidays. Part timers get the same in proportion.
Sick pay.Statutory Sick Pay is paid from the first day you are off sick, and it runs for up to 28 weeks. Since 6 April 2026 there are no unpaid waiting days: 1 day off sick is enough to qualify, and it no longer depends on earning above a minimum. Your contract can give you more than this, never less.
Maternity and paternity leave. Maternity leave can run up to 52 weeks. Paternity leave is normally one or two weeks. The gap between those two figures is large, and that is what makes it a good exam question.
Termination of employment. The rules about ending the job. Notice runs both ways: you owe at least a week once you are past a month’s service, and your employer owes a week for each complete year you have worked, up to twelve. Someone made redundant with under a year’s service is owed the minimum — one week. Dismissal also has to be for a fair reason, following a proper procedure.
Which right covers which situation
The question usually arrives as a situation rather than a name, so practise it that way round. Told to work a seventy hour week? Working hours. Off sick a fortnight and paid nothing? Sick pay. Started a job and never given anything in writing? Contracts. Let go with no notice? Termination of employment. Paid under the legal floor? Minimum wage. Refused your holiday? Paid leave entitlement. Having a baby? Maternity and paternity leave.
Rights come with duties
The same relationship has responsibilities on your side: turn up on time, do the work you are paid for, follow reasonable instructions, work safely, and look after your employer’s tools and materials. Health and safety in particular is a duty on you personally, not only on the firm.
Where to get advice
Two sources, and they do different jobs. The government website — written as Gov.uk now, and as direct.gov in older material — tells you what the law says. ACAS, the Advisory, Conciliation and Arbitration Service, gives free independent advice and helps settle disputes between employers and employees without going to a tribunal.
Asked to state two sources of employment legislation information, the two wanted are Gov.uk and ACAS.
The word in the middle is the useful one: conciliation. ACAS exists to sort things out before they become a court case, which is why going to them early is worth more than going to them late.
The numbers worth learning
The figures are the marks. Keep the two 28s apart.
Right
The figure
Working hours
48 hours a week, averaged over 17 weeks
Paid leave entitlement
5.6 weeks, or 28 days including bank holidays
Sick pay
From the first day off sick, up to 28 weeks
Maternity leave
Up to 52 weeks
Paternity leave
Normally one or two weeks
Notice from your employer
One week per complete year worked, up to twelve
💡
The figures are the marks. 48, 17, 5.6, 28, 52 — and the two 28s are different things, so keep them apart: 28 days of holiday, 28 weeks of sick pay.
What it is, and the characteristics the law protects
Read the lesson ▶
Discrimination means treating somebody worse because of who they are rather than what they do. That distinction is the whole of it. Judging someone on their work is management; judging them on something in the list below is unlawful, and it applies to recruitment, pay, promotion, training, dismissal, and to how people are treated day to day.
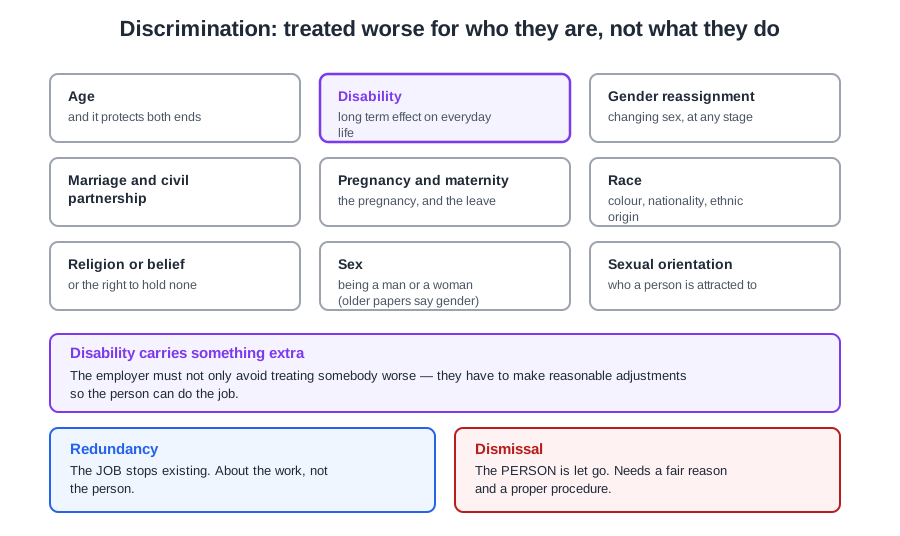
The nine protected characteristics
The Equality Act 2010 names nine. Older material, including some exam papers, lists six — gender, sexual orientation, age, race, disability and religion. Those six are all here; the Act simply names three more, and calls two of them by more precise words.
Age — and it protects both ends. Turning down a 45-year-old for an apprenticeship is age discrimination just as much as pushing a 60-year-old towards retirement. There is no age at which you stop being covered.
Disability — a physical or mental condition with a long term effect on everyday life. This one carries something extra, below.
Gender reassignment — being protected because you are proposing to undergo, are undergoing, or have undergone a process of changing sex. You do not need any medical treatment or certificate to be covered.
Marriage and civil partnership — being married or in a civil partnership. It covers being treated worse for it, which is why questions about a partner do not belong in an interview.
Pregnancy and maternity — and this is a separate characteristic rather than part of sex. It covers the pregnancy itself, maternity leave, and the period after it.
Race — colour, nationality, and ethnic or national origin.
Religion or belief — and equally the right to hold none.
Sex — being a man or a woman. Older material calls this gender; the Act says sex. Still the most visible one in this trade, because the trade is overwhelmingly male, and “we have never had a woman on the tools” is not a reason, it is an admission.
Sexual orientation — which sex or sexes a person is attracted to: heterosexual, homosexual, bisexual. This is a separate characteristic from sex and from gender reassignment, and in law the three are not the same thing.
What it actually looks like on site
It is rarely somebody announcing they will not hire you. Far more often it is small, repeated and witnessed by people who say nothing. What you meet on site is the situation rather than the word, so read these with the label attached:
Passing over a qualified applicant because the firm has never had a woman on the tools — sex.
Banter about who somebody’s partner is, kept up after they have asked for it to stop — sexual orientation.
Turning down an apprentice application because the applicant is 45 — age.
A nickname based on where somebody was born — race.
Refusing to change how a task is done for somebody with a long term back injury — disability.
Refusing time off that everybody else gets, because of what somebody believes — religion or belief.
Dropping somebody off the good jobs once they say they are pregnant — pregnancy and maternity.
Banter about somebody transitioning, or refusing to use their name — gender reassignment.
Leaving one person out of the tea run every day is on the same list, and so is giving somebody the worst job every time. The test is not whether it was meant unkindly. It is whether somebody is being treated worse for a reason on that list.
Reasonable adjustments
Nine protected characteristics. Disability is the one that carries a positive duty as well.
Disability is the one ground that carries a positive duty rather than only a negative one. An employer must not just avoid treating a disabled worker worse — they have to make reasonable adjustments so the person can do the job. Different equipment, a change to how a task is done, a change to hours. “Reasonable” does the work in that phrase, and it depends on the size of the employer and the cost.
Redundancy and dismissal are not the same thing
Redundancy is when the job stops existing — the work has dried up, or the firm is reorganising. It is about the job, not the person, and there are rules on selecting fairly and on redundancy pay.
Dismissal is when the person is let go. The employer needs a fair and reasonable ground and must follow a proper procedure. Dismissing somebody for anything on that list of nine is never fair, whatever procedure was followed.
If it happens to you, or near you
Raise it with your employer first, in writing if you can, because that creates a record. If that goes nowhere, ACAS gives free independent advice and will try to settle it without a tribunal. Witnessing it and saying nothing is its own problem: the law protects people who report it, and a site where it goes unchallenged is a site where it carries on.
💡
Learn the nine as a list — age, disability, gender reassignment, marriage and civil partnership, pregnancy and maternity, race, religion or belief, sex, sexual orientation. If a paper asks for six, every one of the six it wants is in there. Then check you can tell sex, gender reassignment and sexual orientation apart, because all three are separate in law.
CSCS, the NVQ, and where the career goes after that
Read the lesson ▶
You are at the start of a route that leads somewhere specific. It is worth seeing the whole of it now, partly because it is examinable and partly because the decisions that matter come up sooner than people expect.
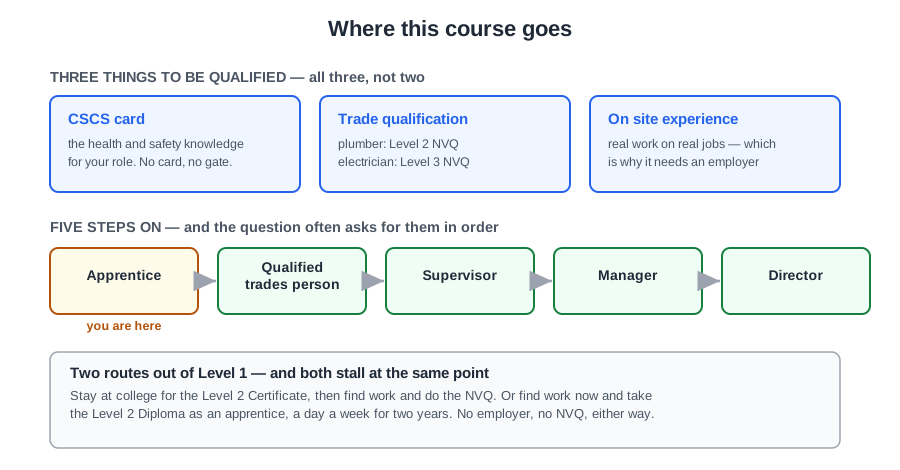
The three things you need
To work as a qualified tradesperson you need three things, and it is all three, not two of them.
A CSCS card — which the spec calls the Construction Safety Certificate Scheme. It shows you have the health and safety knowledge for your role, and most sites will not let you through the gate without one. This is the one that stops being theoretical the first day you turn up somewhere new.
Worth knowing: CSCS actually stands for the Construction Skills Certification Scheme — that is the name on the card and on the scheme’s own website.
📝
In the assessmentThe two names really do differ. The card and the scheme’s own website say Construction Skills Certification Scheme; the Level 1 range prints Construction Safety Certificate Scheme, and that is the version the assessment is marked against. Write the range’s wording there, and use the real one on site.
The relevant trade qualification. For a plumber the minimum is a Level 2 NVQ; for an electrician it is a Level 3 NVQ. Both come up as their own question, and the two levels are different on purpose — do not carry the plumber’s answer across to the electrician.
Relevant trade on site experience — real work on real jobs. This is not a formality bolted onto the other two. An NVQ is assessed partly on what you actually do at work, which is why it cannot be finished in a classroom and why it needs an employer.
What an NVQ is, and how it differs from what you are doing now
The course you are on is assessed on what you know. An NVQ is assessed on what you can do, at work, observed and evidenced. That is the reason the three requirements hang together: the qualification needs the experience, and the experience needs an employer.
Where this course sits
Level 1 is the foundation: safe working, the tools, the materials, and enough knowledge to be useful and safe on a site. It is deliberately not a licence to work unsupervised.
From here there are two routes, and both need you to find work with a plumber. You can stay at college for the Level 2 Certificate, which gives you the technical certificate, and then find work as an apprentice and complete the NVQ. Or you can find work straight away and take the Level 2 Diploma as an apprentice, usually one day a week for two years.
The second route pays you while you learn and finishes sooner. The first buys you time to find the right employer. Neither is the wrong answer, but both come to the same place, and both stall at the same point: no employer, no NVQ.
Where the career goes after qualified
The trade does not stop at qualified. The usual route runs apprentice → qualified trades person → supervisor → manager → director.
Supervisor is the first step into being responsible for other people’s work as well as your own. Manager is running jobs rather than running a team on one job — programme, cost and people. Director is running the business itself.
Plenty of people step off that ladder and work for themselves as a sole trader instead, which is why the types-of-company lesson is not academic. Both are entirely normal. What they have in common is that they start here.
The route at a glance
Three to qualify, five steps on — and the question usually wants them in order.
To qualify: a CSCS card, the relevant trade qualification, and relevant trade on site experience.
To progress: apprentice, qualified trades person, supervisor, manager, director.
💡
Both lists are short and both get asked as lists. Three to qualify, five steps to progress — and the question often asks for them in order, so learn the order rather than just the words.
The Act, the people who enforce it, and the duties it puts on both sides
Read the lesson ▶
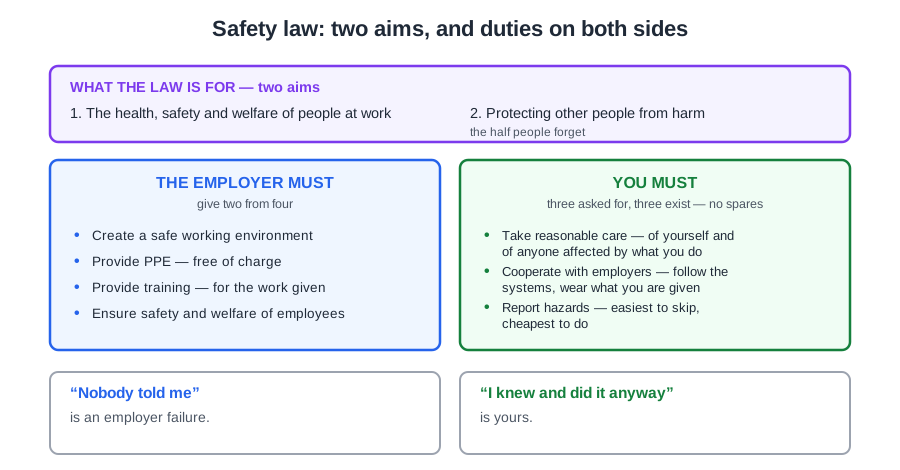
Almost everything in this unit exists because of one piece of law, and it is worth knowing its name: the Health and Safety at Work Act 1974 — usually shortened to HASAWA, or just “the Act”.
The inspector works for the HSE, the body the Act created to enforce it.
Before it, safety on a building site was largely a matter of what the employer felt like paying for. The Act made it a legal duty, put duties on both sides, and created a body to enforce them: the Health and Safety Executive, the HSE. They inspect sites, investigate serious accidents, and prosecute. Everything else you will hear named — COSHH, RIDDOR, the Work at Height Regulations — sits underneath the Act and fills in the detail.
What the law is for
The duty runs past the site boundary: to the public on the pavement and the family in the house.
Two aims, and the wording is worth having exactly: the health, safety and welfare of people at work, and protecting other people from harm.
That second half is the one people forget, and it is half the point of the Act. A site does not only have workers on it. It has the public walking past, the customer in the next room, and the children who live in the house you are working in. The duty runs to them as well.
Welfare is worth a word too. It is not a synonym for safety — it covers toilets, washing facilities, drinking water, somewhere to eat and somewhere to change. Those are legal requirements, not favours.
What the employer must do
The employer is legally required to create a safe working environment, provide PPE, provide training, and ensure the safety and welfare of employees.
Two of those carry a detail worth knowing. PPE has to be provided free of charge — it cannot be stopped out of your wages. And training has to be for the work you are actually given, which is why being handed a tool you have never used is the employer’s problem before it is yours.
What the employee must do
Reporting a split lead is the cheapest duty on your list, and the one most often skipped.
Three, and these are the ones about you:
To take reasonable care — of your own health and safety, and of anyone affected by what you do.
To cooperate with employers — follow the systems they put in place, wear what you are given, do the induction.
To report hazards — the one that is easiest to skip and cheapest to do.
Why it is on you and not just on them
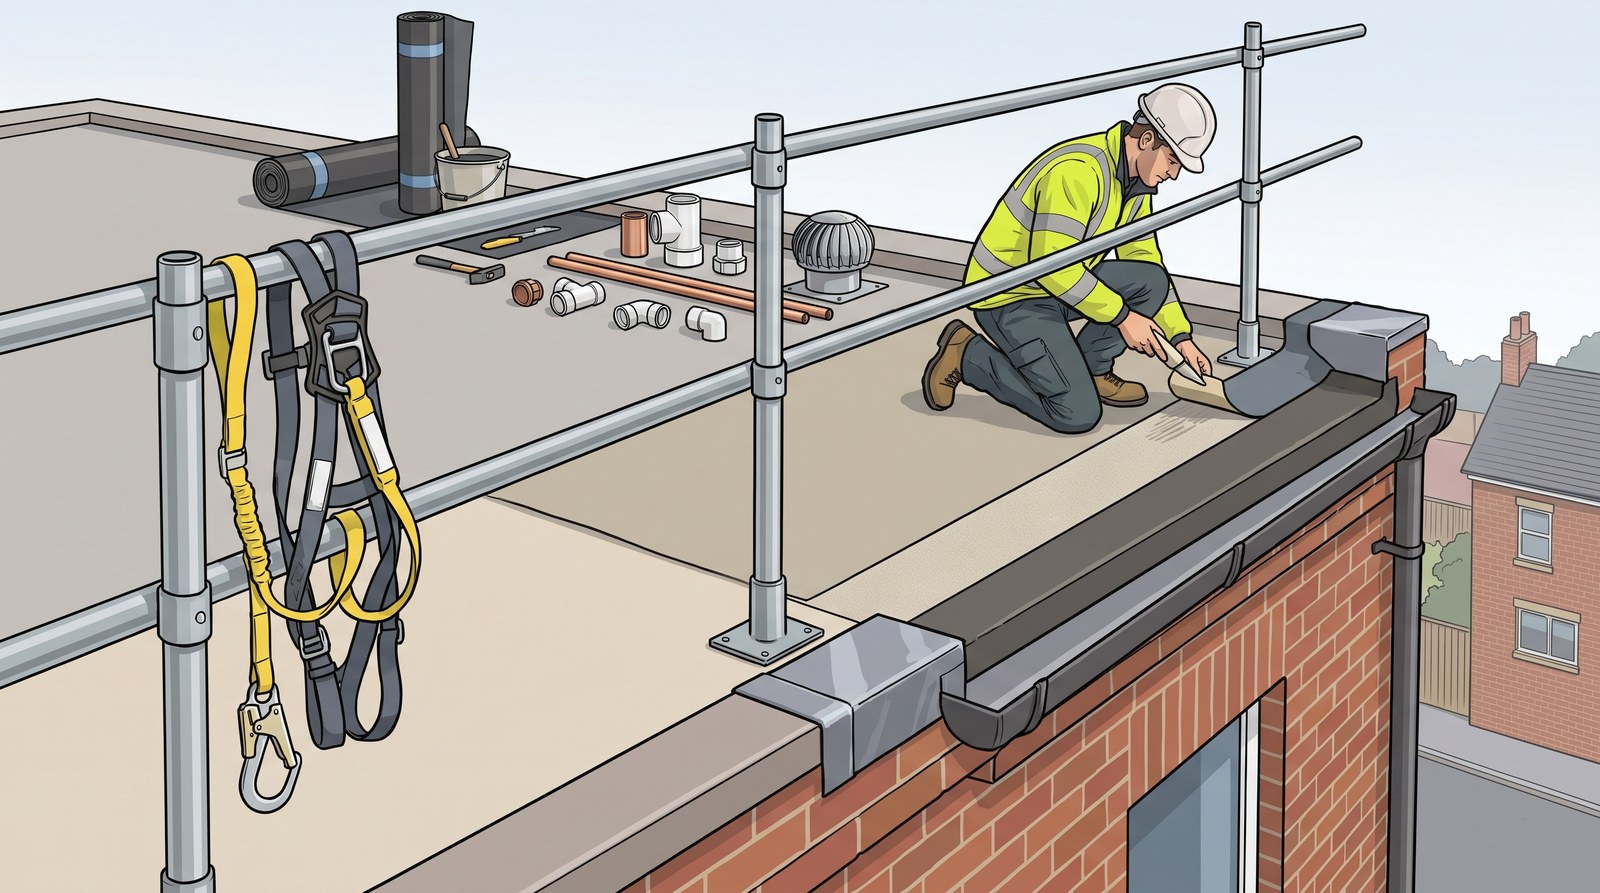
Two aims, four duties on them, three on you. The employee list is the only one with no spares.The harness was provided. Not wearing it is the employee half of the Act.
The Act puts duties on both sides on purpose. An employer can write the safest method statement ever produced and it protects nobody if the person doing the work ignores it. Equally, no amount of care from you fixes a firm that will not buy a harness.
In practice the split matters most when something goes wrong. “Nobody told me” is an employer failure. “I knew and did it anyway” is yours. And both are prosecutable — employees have been fined under the Act, not just firms.
The three lists
Duty
What it covers
The aims of the legislation
The health, safety and welfare of people at work; protecting other people from harm
Employer responsibilities
Create a safe working environment; provide PPE; provide training; ensure the safety and welfare of employees
Employee responsibilities
Take reasonable care; cooperate with employers; report hazards
📚
Towards Level 2Underneath the Act sit sets of Regulations, each covering one thing, and you will hear them by their initials from your first week. COSHH — Control of Substances Hazardous to Health. RIDDOR — Reporting of Injuries, Diseases and Dangerous Occurrences Regulations. PUWER — Provision and Use of Work Equipment Regulations, which is why a tool must be suitable, maintained and used by somebody trained on it. LOLER — Lifting Operations and Lifting Equipment Regulations. The Work at Height Regulations, the Manual Handling Operations Regulations, the Personal Protective Equipment at Work Regulations, the Confined Spaces Regulations, the Control of Asbestos Regulations and the Control of Lead at Work Regulations. And CDM — the Construction (Design and Management) Regulations — which puts duties on the client and the designer as well as the contractor, so safety is designed in rather than bolted on. Each one turns up in this unit beside the thing it governs.
Four shapes, four colours, and the labels on the tin
Read the lesson ▶
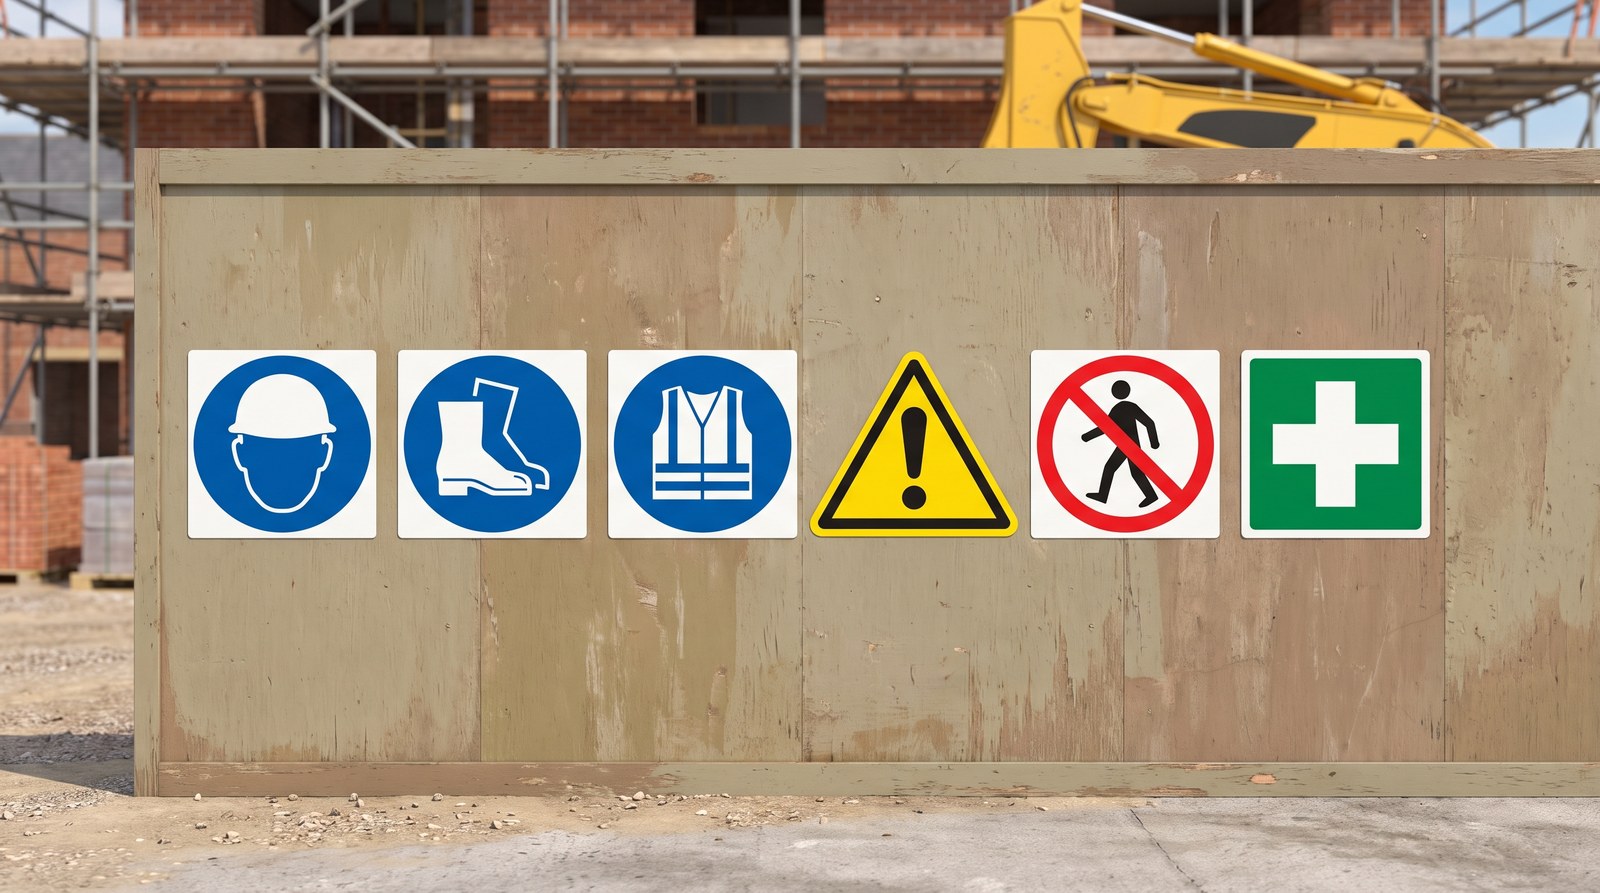
Site signs are governed by the Safety Signs and Signals Regulations, and the point of them is that they work without words — on a site where not everybody reads English, and from further away than you could read anything. Everything is decided by shape and colour, and once you have those you never have to read a sign again.
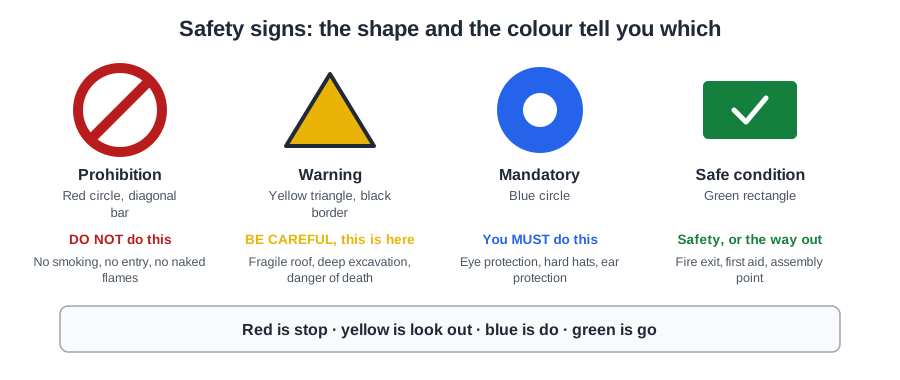
Shape and colour do the work, so a sign reads from further away than any words could.
The four types
Prohibition — a red circle with a diagonal bar. It means do not. No smoking, no entry, no naked flames. The only sign type with the bar through it.
Warning — a yellow triangle with a black border. It means be careful, this is here. Fragile roof, deep excavation, danger of death from electricity. It does not tell you to do anything; it tells you what to watch for.
Mandatory — a solid blue circle. It means you must. Eye protection must be worn, hard hats must be worn, ear protection must be worn. Nearly every PPE sign on site is one of these.
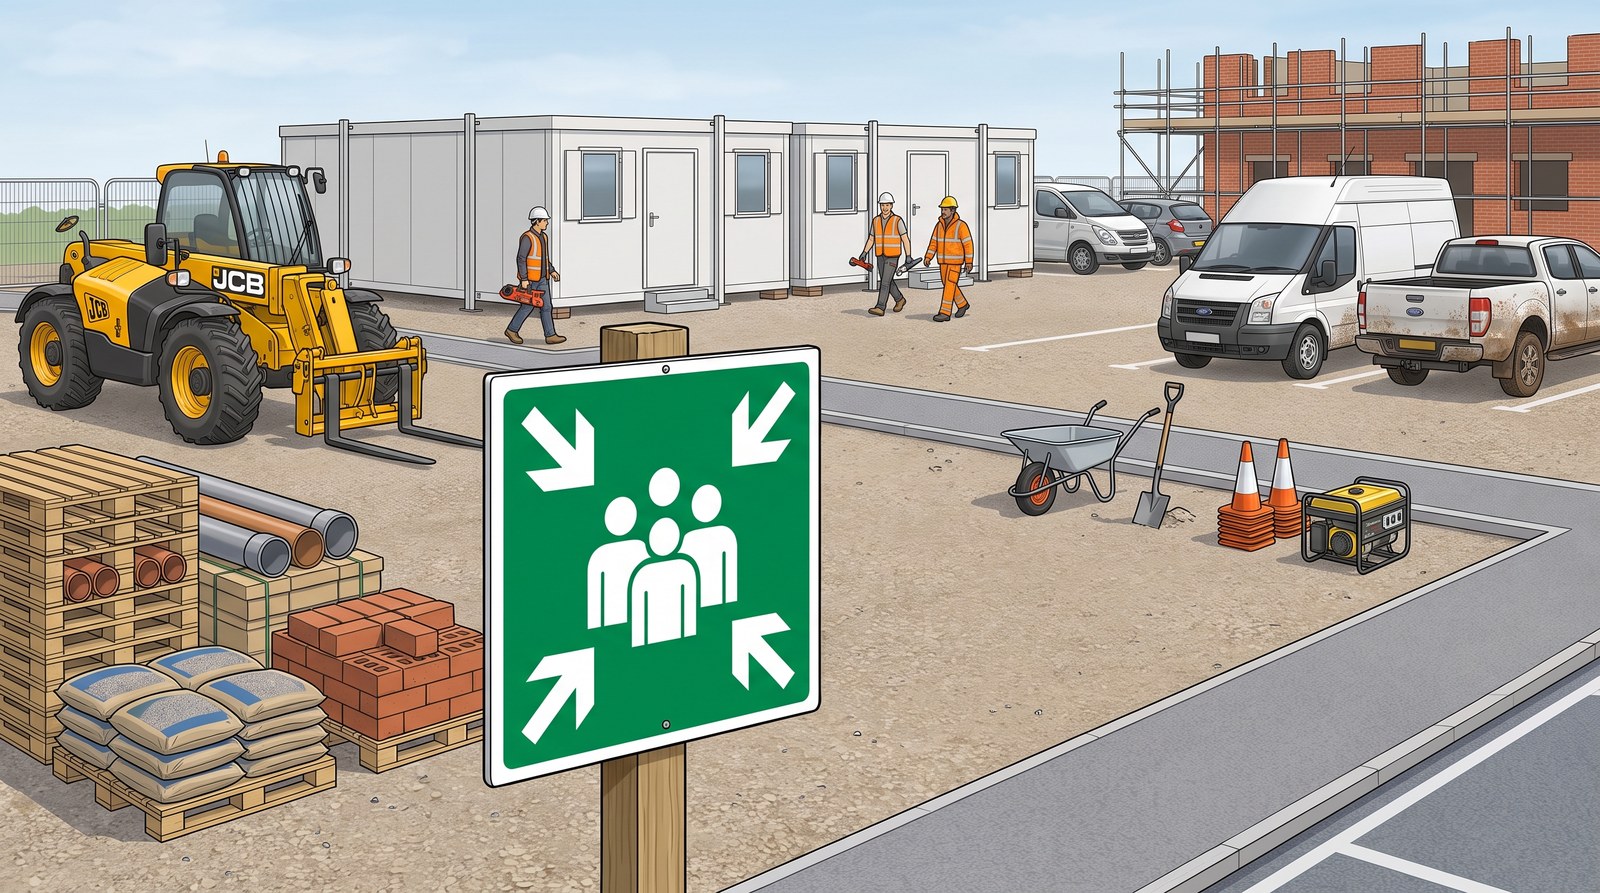
Safe condition — a green rectangle or square. It means this is the safe thing, or the way out. Fire exit, first aid, assembly point.
The shortcut that always works
You do not need to memorise individual signs. Learn the four shapes and colours and you can read any sign on any site:
Red circle with a bar — do not.
Yellow triangle — be careful.
Blue circle — you must.
Green rectangle — safety, or the way out.
Red is stop, blue is do, yellow is look out, green is go. That is the whole system, and it is the same system as the road signs you already know.
The pair people confuse
Prohibition and warning. Both are about danger, and both sit together in a learner’s memory. The difference is the shape: a circle with a bar forbids something; a triangle warns you about something. If it has the diagonal line through it, it is telling you not to.
Fire equipment signs are red too, but they are red squares rather than circles, and they mark where equipment is rather than forbidding anything.
The four, by shape and colour
Red is stop, blue is do, yellow is look out, green is go. That is the whole system.
Type
Shape and colour
Means
Prohibition
Red circle, diagonal bar
Do not do this
Warning
Yellow triangle, black border
Be careful, this is here
Mandatory
Blue circle
You must do this
Safe condition
Green rectangle
Safety equipment, or the way out
Two more you will see
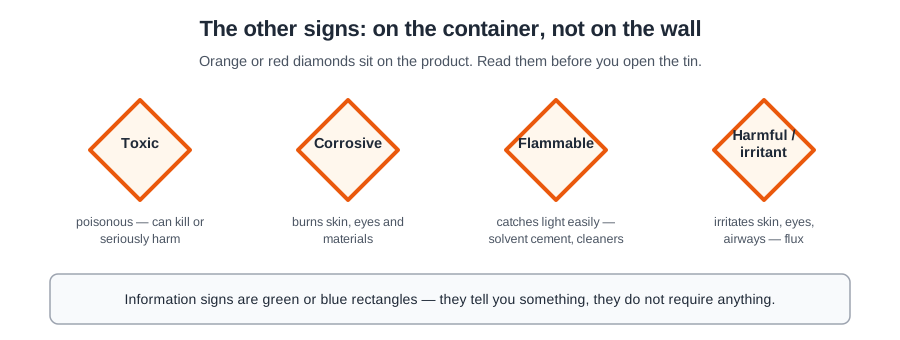
These ones live on the container rather than on the wall - read them before you take the lid off.
Information signs are green or blue rectangles carrying general information rather than an instruction — where the site office is, where to sign in. They tell you something; they do not require anything of you.
And hazardous substances carry their own set: diamonds on the container itself. These are the ones on the product rather than on the wall, and they are what you read before you open a tin of solvent cement, a drum of cleaner or a tub of flux.
Flammable — it will catch fire. Solvent cement, cleaning fluids, LPG.
Corrosive — it will burn skin and eyes, and eat through metal. Descaler, some fluxes.
Toxic — poisonous.
Harmful or irritant — it will do you damage with contact or over time.
Explosive, and oxidising — the second means it feeds a fire even where there is no air.
Long term health hazard — the one that does its damage years later. Lead carries this one.
Reading the sign is the easy half. The point of it is that it tells you what protection to put on before you take the lid off.
📚
Towards Level 2Those diamonds are the front end of COSHH — the Control of Substances Hazardous to Health Regulations. Every hazardous product on site has a safety data sheet behind it saying what is in it, what it does to you, what PPE to wear and what to do if it goes wrong, and your employer has to assess the risk before anybody uses it. You will be handed COSHH assessments for solvent cement, flux and leak detection fluid within your first fortnight. And lead has Regulations of its own — the Control of Lead at Work Regulations — which is why lead bossing and lead welding come with washing facilities and a rule about not eating with your hands unwashed.
What a hazard actually looks like, and the seven ways to stop one becoming an accident
Read the lesson ▶
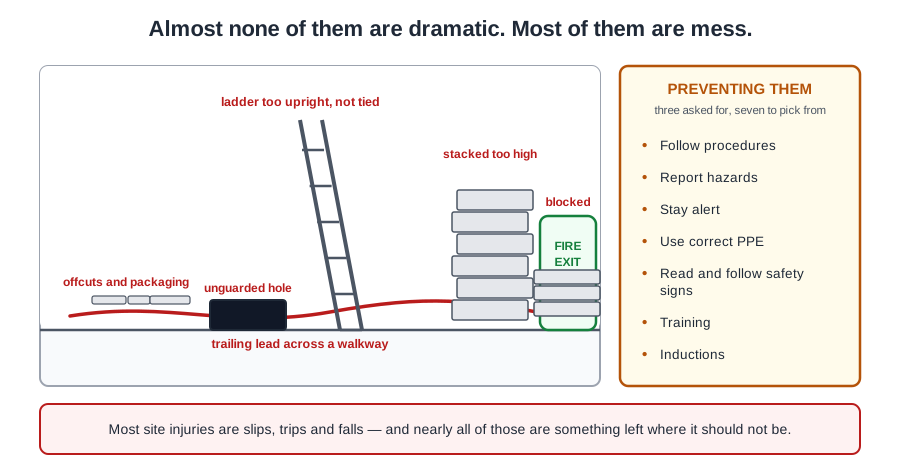
Almost no dangerous situation on a building site is dramatic. They are the ordinary state of an untidy job, and that is exactly why they are missed.
Nobody walks past a fire. Everybody walks past a trailing lead.
What a dangerous situation looks like
The standard names these:
Open holes and trenches — anything you or somebody else can fall into. Barriered and covered, not just noticed.
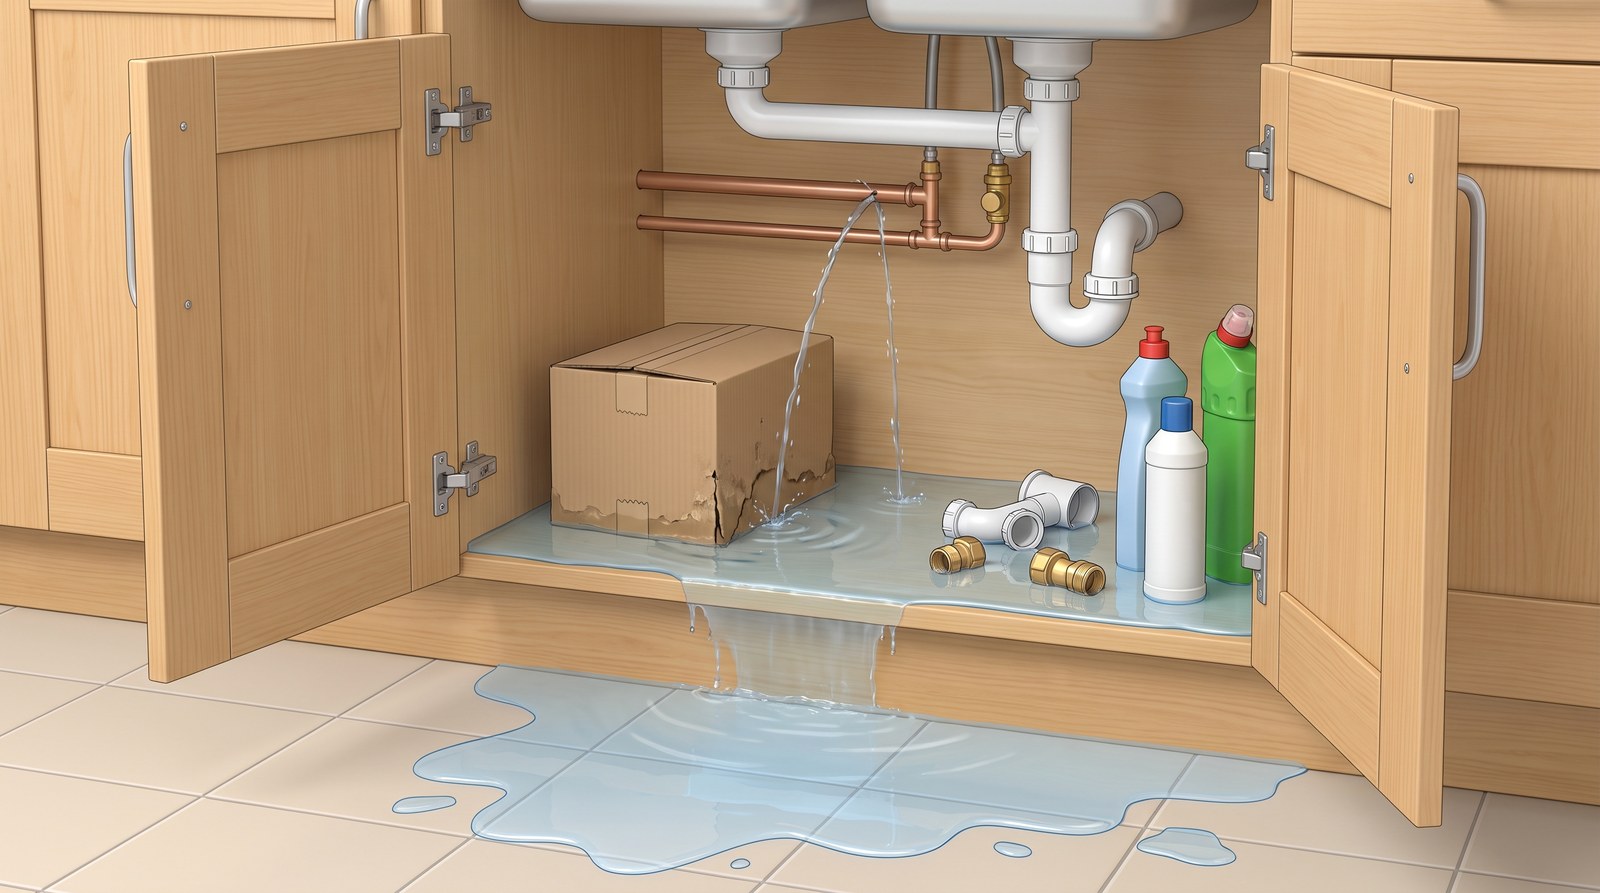
Wet surfaces — the plumber’s speciality. Water on a smooth floor is the most likely thing on this list to put somebody down, and you are usually the one who put it there.
Trip hazards — trailing leads and hoses, offcuts, packaging, tools left on the floor.
Overhead working — somebody working above you, which is why a hard hat is a mandatory sign rather than a suggestion.
Confined space — a duct, a manhole, an excavation, a poorly ventilated loft. Somewhere with limited access where air can go bad.
Working at height — which gets a pair of lessons to itself.
And beyond the named list, the everyday ones: damaged tools and leads, a missing guard, materials stacked too high or where they can topple, blocked fire exits, gas bottles left in the sun, somebody working without the PPE the job needs.
Reading that, the thing to notice is how many are about mess. Most site injuries come from slips, trips and falls, and nearly all of those come from something being left where it should not be.
Preventing accidents
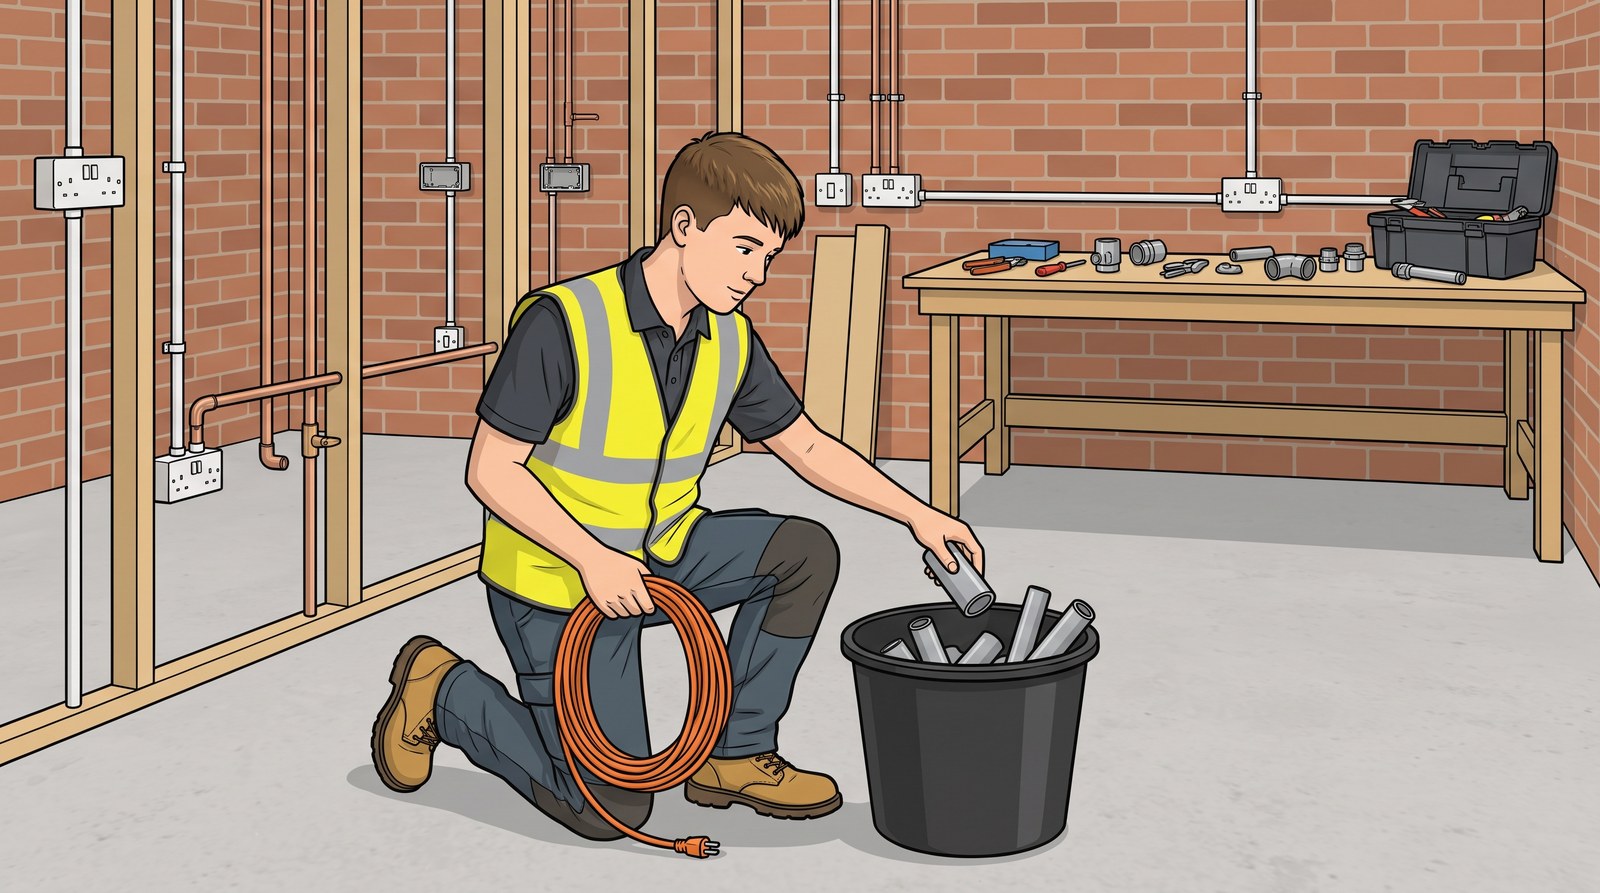
Clearing up as you go needs no budget, no manager and is safe.
Seven ways, and every one of them is something you can do rather than something done to you:
Follow procedures — the method statement exists because somebody already worked out how to do this without anybody getting hurt.
Report hazards — the cheapest thing on the list, and the one most often skipped because it feels like somebody else’s job.
Stay alert — most accidents happen at the end of a shift and on the last job of the week.
Use correct PPE — correct being the word doing the work.
Read and follow safety signs.
Training — not being given a job you have not been taught to do.
Inductions — the site-specific one, which tells you where the exits and the first aider are.
The paperwork that sits behind them
Nothing dramatic. Six ordinary dangerous situations, and seven ways to prevent them.
Three documents run a safe job, and you will meet all three:
A risk assessment lists what could go wrong on a job and what is being done about each one. It is written before the work starts, and it is what “follow procedures” is referring to.
A method statement says how the job will actually be done, step by step, safely. Together they are usually handed over as one document and called a RAMS.
A permit to work is for the jobs dangerous enough that somebody has to sign you in and sign you out — hot works with a naked flame, confined spaces, work on live systems. If a job needs a permit and you have not got one, you are not starting.
And a toolbox talk is the short one: ten minutes on site about one specific risk, usually because something nearly happened last week.
Why the induction matters more than it feels like
Where the assembly point is: one of the things you learn at induction and cannot look up in an emergency.
An induction is twenty minutes of somebody reading a slide, and it is where you find out the two things you will need in an emergency and cannot look up at the time: where the assembly point is, and who the first aider is.
Everything in the list above shares one feature: somebody could have seen it coming. That is why reporting hazards is on the prevention list at all — the accident is the last event in a chain that anybody could have broken earlier.
📚
Towards Level 2Confined spaces have their own law, the Confined Spaces Regulations, and the rules are stricter than most people expect — a manhole, a duct or an unventilated loft can hold gas that displaces the air without any smell at all. The rule is that you do not enter one unless the job cannot be done any other way, and then only with a risk assessment, atmospheric testing, a permit, and somebody outside who can get you out. Every year somebody dies in a chamber, and then a second person dies going in after them.
Three diseases, seven places it hides, and two actions
Read the lesson ▶
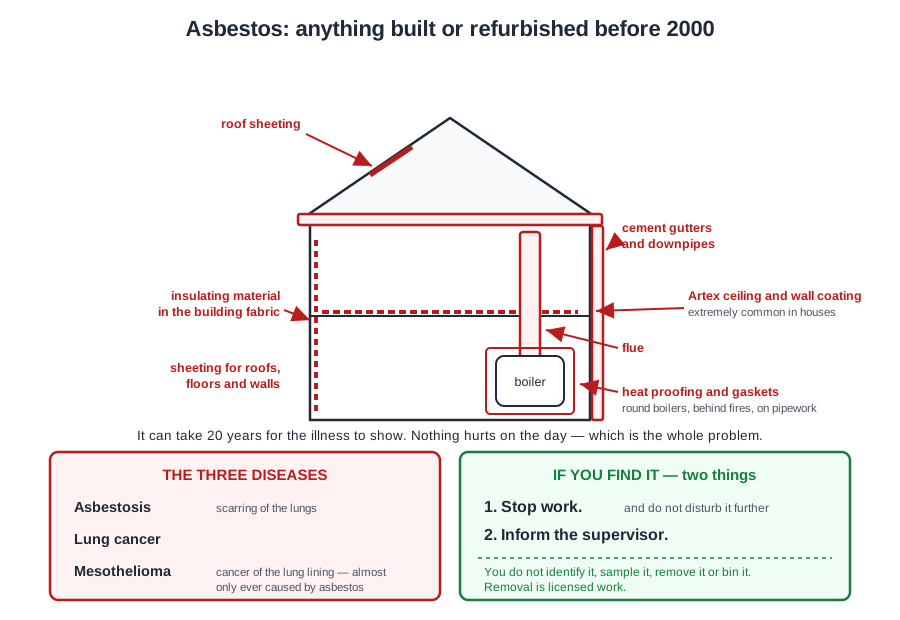
Asbestos is the most dangerous thing on this unit and the most dangerous thing in this trade. Asbestos-related disease still kills around five thousand people a year in Great Britain — more than any other cause of work-related death, and many of them tradespeople — decades after it was banned, because the diseases take thirty or forty years to show.
Stop, do not disturb, inform the supervisor. The drill stays down until somebody knows what is in that ceiling.
The dangers to health
Breathing in the fibres causes disease that cannot be cured and cannot be reversed. The three to know are asbestosis — scarring of the lungs; lung cancer; and mesothelioma, a cancer of the lining of the lungs that is almost only ever caused by asbestos.
The fibres are too small to see, they do not smell, and there is no immediate symptom. Nothing warns you at the time, which is exactly why the rules are absolute rather than a matter of judgement.
Why you cannot spot it
There are three types you may hear named — chrysotile (white), amosite (brown) and crocidolite (blue) — and the colours are worse than useless, because by the time asbestos has been mixed into cement, board or textured coating you cannot tell any of them apart by eye.
That is the single most important practical fact on this page: you cannot identify asbestos by looking at it. Only a laboratory test can. So the rule is not “avoid the asbestos” — it is “treat anything suspicious in a pre-2000 building as though it is asbestos until somebody proves otherwise”.
Where it is found
Anywhere in a building put up or refurbished before 2000. The standard lists these, and a plumber meets most of them:
Insulating material within the building fabric.
Sheeting materials for roofs, floors and walls — cement sheet garage roofs, wall panels.
Coating materials, for example Artex — textured ceiling and wall coatings, extremely common in houses.
Gutters — old cement gutters and downpipes.
Flues — old boiler and fire flues.
Heat proofing materials — around boilers, behind fires, on pipework.
Gaskets — in old pipework and plant.
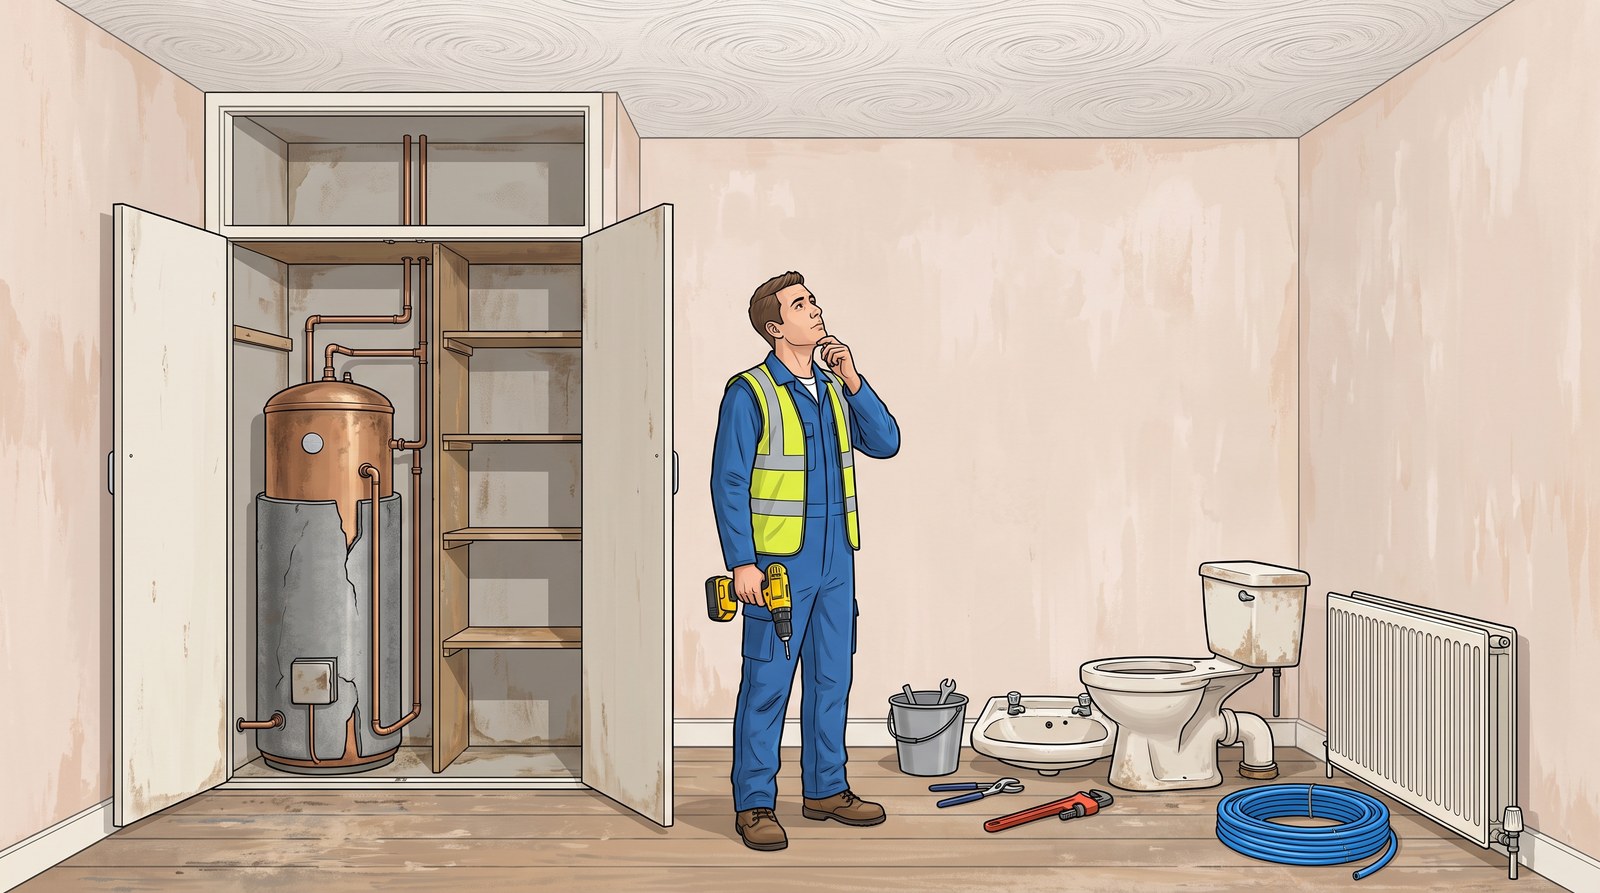
Look at that list from a plumber’s point of view: flues, heat proofing, gaskets and gutters are all our work. Drilling an Artex ceiling to fix a pipe clip is the everyday version of this.
What to do if you find it
Flues, heat proofing, gaskets and gutters are all our work. Stop, do not disturb, inform the supervisor.
Two actions, and they are short on purpose:
Stop work. Immediately, and do not disturb it any further.
Inform the supervisor.
Notice what is not on that list. You do not identify it, you do not sample it, you do not remove it, and you do not bag it up and put it in the skip. Removal is licensed work done by trained people under controlled conditions with equipment you do not have, and the waste goes to a licensed disposal site with paperwork attached.
Why stopping matters more than anything
Asbestos in good condition, left alone, is not releasing fibres. It becomes dangerous the moment it is drilled, cut, broken, sanded or swept up. So the single most useful thing you can do is stop before you make it worse — which means suspecting it before the drill goes in, not after.
If it is a pre-2000 building and you are about to make a hole in something you cannot identify, that is the moment to ask.
Why the rules are absolute
Two facts sit behind all of it. Asbestos exposure can be fatal, and it can take 20 years for illnesses to develop after exposure — often longer.
That gap is the whole problem. Nothing hurts on the day. There is no cough, no rash, no warning, and no way of knowing you have been exposed. The people dying of it now were exposed in the 1980s and 1990s, and many of them never knew it had happened.
It is why this is one of the few topics where there is no judgement call to make and no exception for a small job. Stop, do not disturb, report.
📚
Towards Level 2The law is the Control of Asbestos Regulations, and it puts a duty on whoever manages a non-domestic building to know where the asbestos in it is and to keep an asbestos register. On a commercial job you are entitled to see that register before you start, and asking for it is a normal professional request rather than an awkward one. The Regulations also split the work three ways: licensed work, which needs an HSE licence; notifiable non-licensed work; and non-licensed work. None of the three is anything a Level 1 plumber does — the point of knowing the split is to recognise that all of it is somebody else’s job.
Eight items, what each protects against, and why it is the last line rather than the first
Read the lesson ▶
PPE is the most visible part of site safety and the least effective, and both of those are worth understanding before the list.
PPE is the last line, not the first
Defenders round the neck, a mask over a beard, the wrong gloves. Each one feels like protection and is not.
The order is: get rid of the hazard, then control it at source, then protect the person. A mask is what you use when you cannot cut wet — not instead of cutting wet. Dust extraction on the tool beats a mask, every time, because it stops the dust existing rather than filtering it after it does.
PPE only works when it is the right kind, worn, and fitted. Defenders round the neck, a mask over a beard, or gloves that are wrong for the job are all worse than nothing, because they feel like protection.
Under the Personal Protective Equipment at Work Regulations your employer has to provide it, free, and replace it when it is worn out. You have to wear it, look after it, and report it when it is damaged.
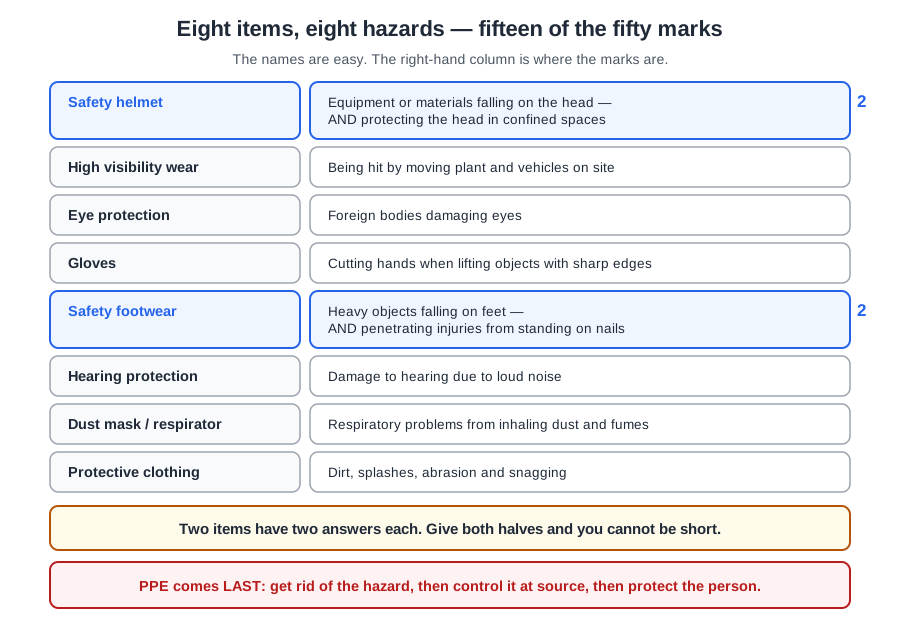
The eight items, and what each protects against
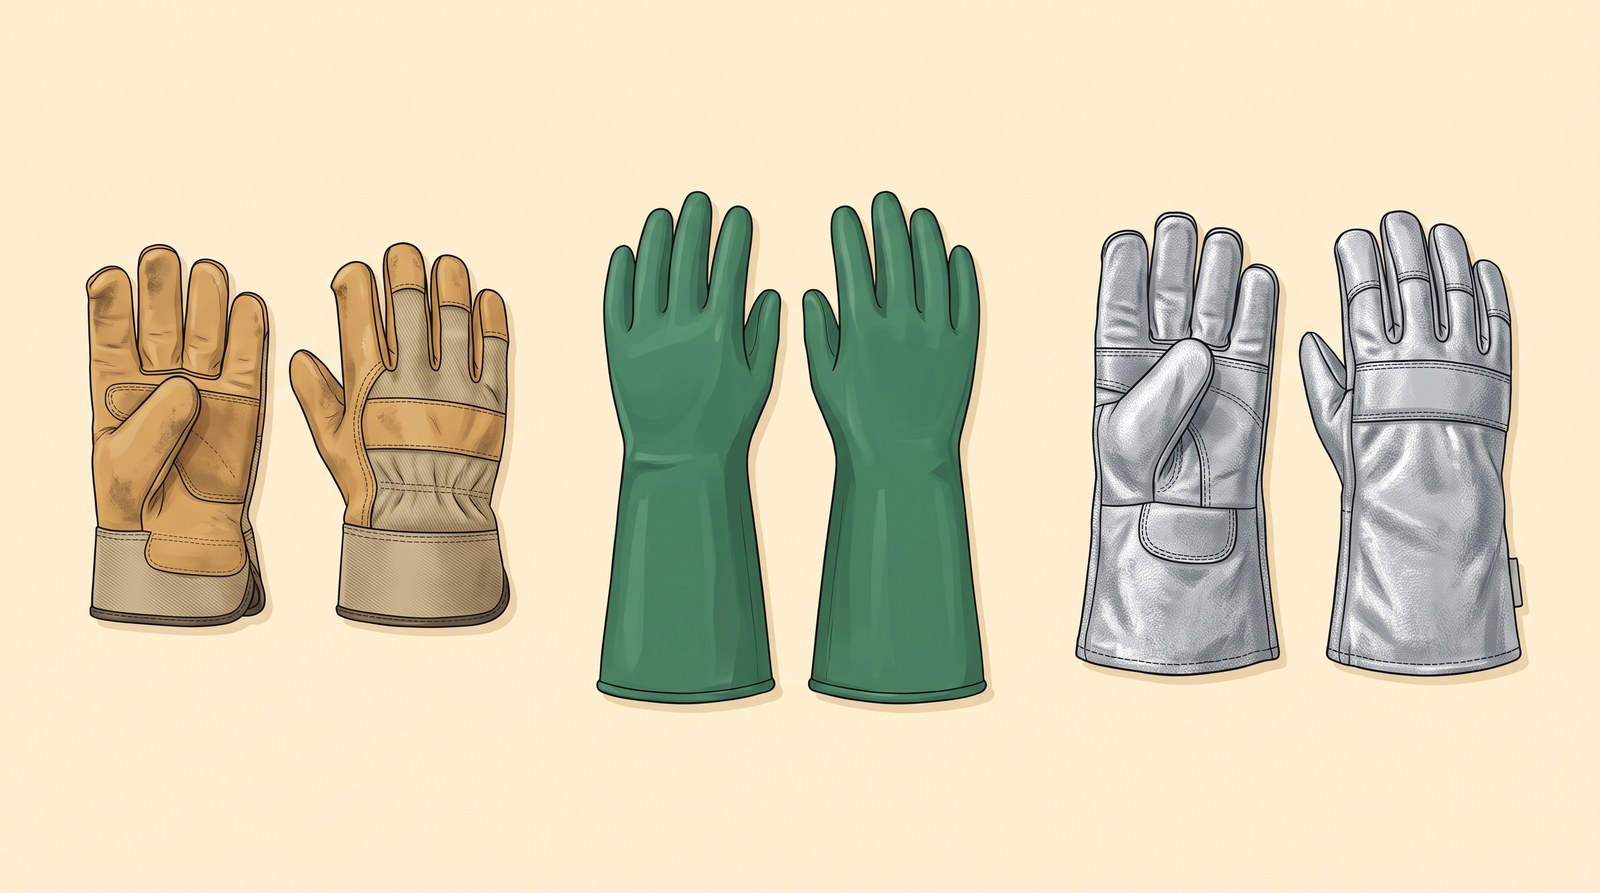
Leather for handling, chemical resistant for solvents, heat resistant near a torch.
Learn these as pairs.
Safety helmet — against the risk of equipment or materials falling on the head, and protecting the head in confined spaces. Both halves: things dropping on you, and you hitting things.
High visibility wear — against the risk of being hit by moving plant and vehicles on site. It does nothing except make you visible, and that is a lot.
Eye protection — against the risk of foreign bodies damaging eyes. Grit, swarf, dust, splashes.
Gloves — against the risk of cutting hands when lifting objects with sharp edges. Cut pipe, sheet metal, broken tile, banded packs — sharp implements and tools, and hot materials too: a soldered joint stays hot long after the flame is off. Leather for handling, chemical-resistant for solvents, and heat-resistant near a torch — three different gloves, and the wrong one is no glove.
Safety footwear — against the risk of heavy objects falling on feet, and penetrating injuries through standing on nails. Two separate features: a toe cap for the first, a midsole plate for the second.
Hearing protection — against the risk of damage to hearing due to loud noise. The damage is gradual and permanent, so it has to be worn before you notice a problem.
Dust mask or respirator — against the risk of respiratory problems due to inhaling dust and fumes.
Protective clothing — overalls and workwear, against dirt, splashes, abrasion and snagging, and specifically protection from oils and grease.
The ones with two answers
The names are the easy half. The right-hand column is the half that matters.
Safety footwear is the item most often half-explained. “Protects your toes” is half of it; the other half is the penetrating injury — standing on a nail that goes up through the sole. A steel toe cap does nothing about that; the plate in the sole does.
Similarly the safety helmet has two: protection from falling objects and bumps. And high visibility wear works because it can be clearly seen around site, in poor light and bad weather, which is when plant is most likely to hit somebody.
The eight, paired
PPE
Protects against
Safety helmet
Equipment or materials falling on the head; protecting the head in confined spaces
High visibility wear
Being hit by moving plant and vehicles on site
Eye protection
Foreign bodies damaging eyes
Gloves
Cutting hands when lifting objects with sharp edges
Safety footwear
Heavy objects falling on feet; penetrating injuries through standing on nails
Hearing protection
Damage to hearing due to loud noise
Dust mask / respirator
Respiratory problems due to inhaling dust and fumes
Protective clothing
Dirt, splashes, abrasion and snagging; protection from oils and grease
The one that is not equipment
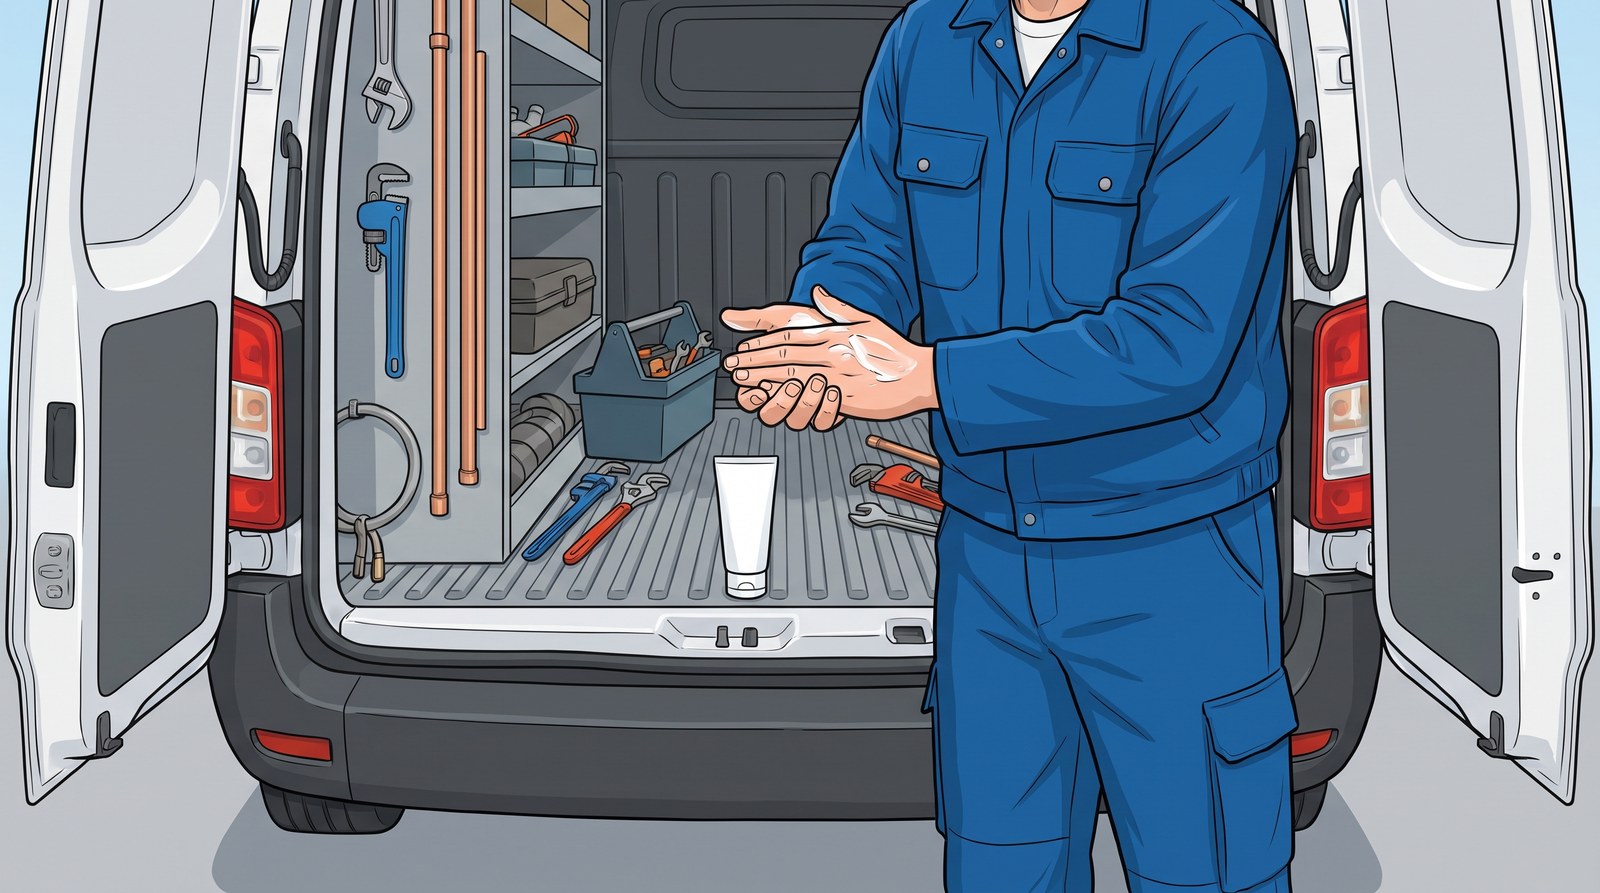
Cream before the job, wash properly after it. Dermatitis is a slow disease, which is why it gets ignored.
Barrier cream is worth adding to the list yourself. Repeated contact with oils, solvents, flux and cement causes dermatitis — cracked, split, painful hands that take months to settle and come back every time. It is a slow injury rather than a cut, which is why nobody takes it seriously until they have it. Cream before the job, wash properly after it.
📚
Towards Level 2Two hazards get Regulations of their own because the damage is permanent and creeps up on you. The Control of Noise at Work Regulations set the levels at which hearing protection has to be provided and then worn — and as a rough test, if you have to raise your voice to be heard two metres away, you are around the level where it starts to matter. And hand arm vibration, from breakers, SDS drills and grinders, causes permanent nerve and circulation damage in the fingers, which is why tools carry a trigger-time limit and why you rotate the job round the gang rather than giving it to the apprentice all day.
Assess it first, then bent knees and a straight back
Read the lesson ▶
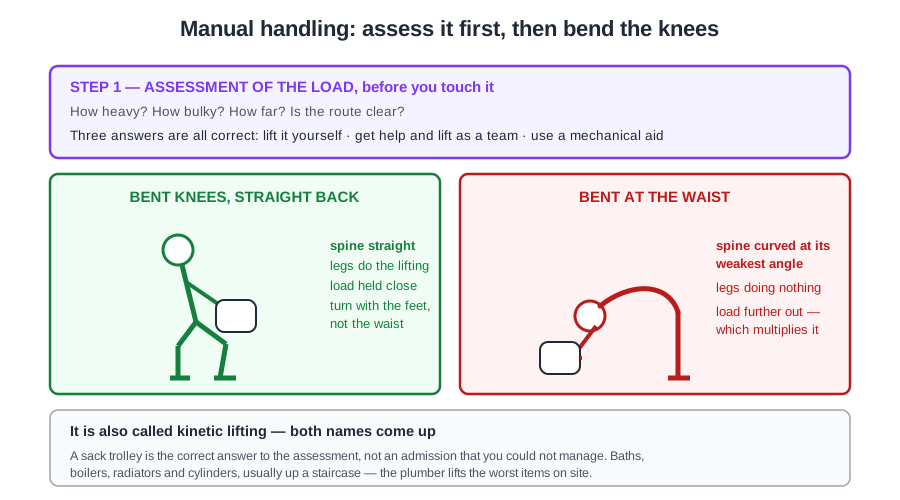
Manual handling is also called kinetic lifting, and both names come up. It has Regulations of its own — the Manual Handling Operations Regulations — whose first rule is not about technique at all: avoid the lift if you reasonably can.
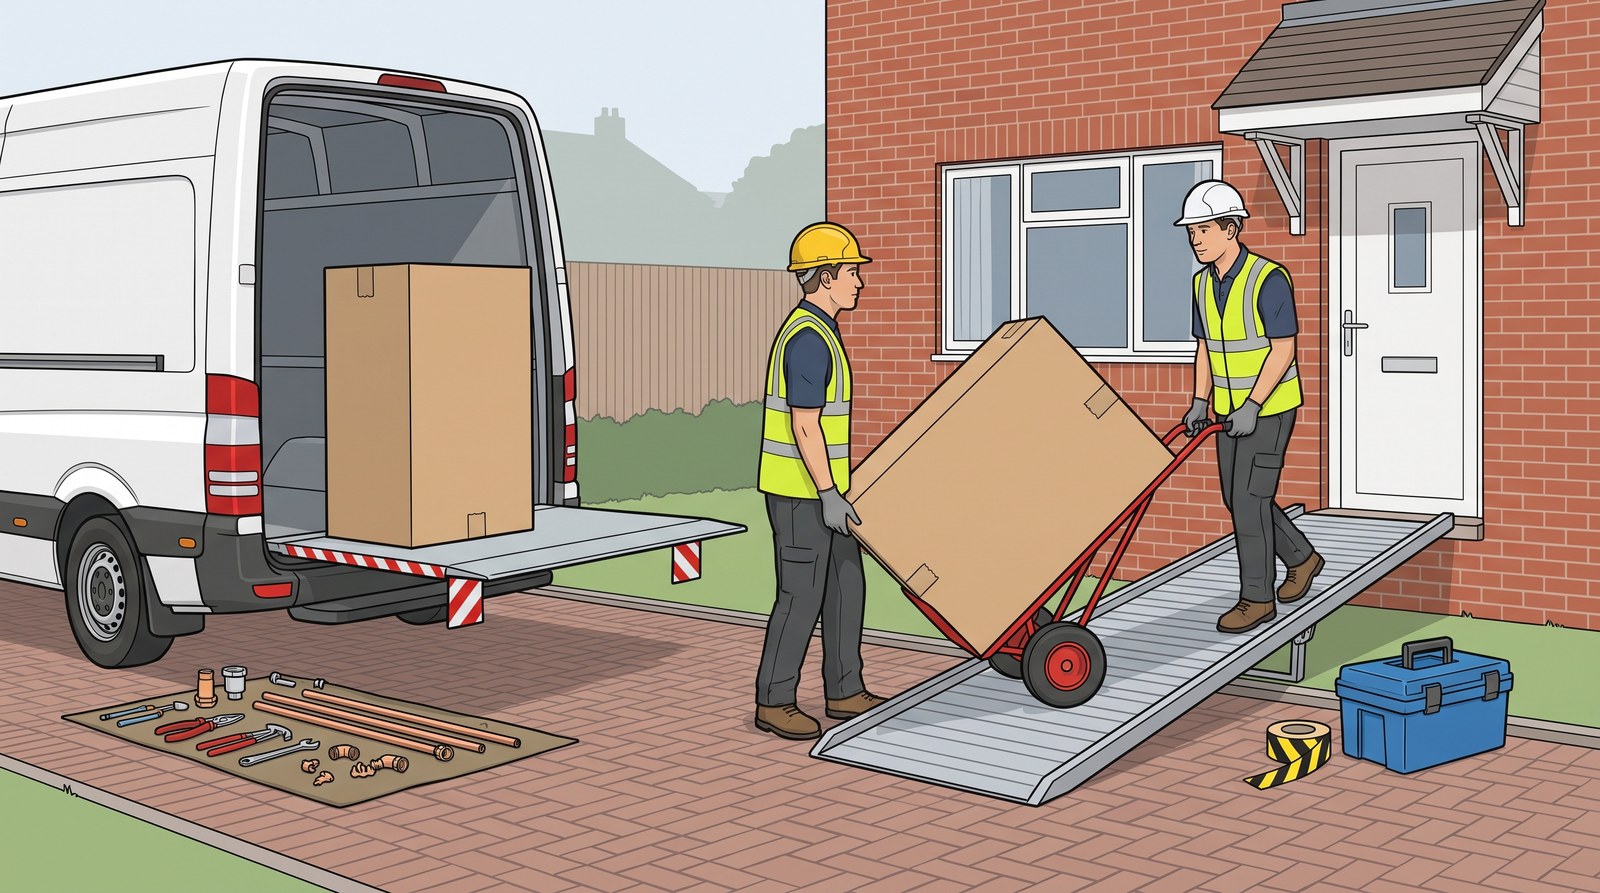
The first rule is to avoid the lift. A sack truck and a ramp mean nobody carries the boiler.
The procedure, in two parts
Assessment of the load. Before you touch it. How heavy, how bulky, how far it is going, whether the route is clear, and whether it needs two people or a mechanical aid.
Application of safe kinetic lifting technique — bent knees, straight back.
Why the assessment comes first
The technique only helps with a load you should be lifting at all. The assessment is where you decide whether to lift it, and it is the step people skip because it feels like standing about doing nothing.
Three outcomes are all correct: lift it yourself, get help and lift as a team, or use a mechanical aid. Deciding halfway through a lift is how backs go.
What bent knees and a straight back actually do
Your back is strong in a straight line and weak when it is curved. Bending at the knees puts the lifting work through your legs, which are the strongest muscles you have, and keeps the spine straight while it happens.
Bending at the waist instead does the opposite: it takes the leg muscles out and loads the lower spine at its weakest angle. It also usually means the load is further from your body, which multiplies the strain.
The rest follows from those two: feet apart with one slightly forward for balance, load held close, no twisting, and turn with your feet rather than your waist. And put it down the same way you picked it up — setting a load down badly hurts as many backs as lifting it.
Why it matters more than it feels like
Assess it first. Then bent knees, straight back - and your legs doing the work, not your spine.Drained first, two people, gloves on. Full, a 210 litre cylinder would carry another 210 kg of water.
Nothing hurts at the time. Back damage from lifting builds up over years, a little at a time, and by the time it is a problem it does not go away. It is one of the commonest reasons people leave this trade before they meant to.
And the plumber’s version is the worst on site: baths, boilers, radiators and cylinders, awkward shapes, usually up a staircase. A 210 litre cylinder full of water weighs 210 kg — which is why you never move one without draining it, and why the number is worth knowing.
When not to lift it at all
The assessment has a third outcome besides lifting it yourself or getting help: use of simple mechanical lifting aids.
A sack trolley is the one you will meet most — a boiler, a cylinder or a stack of radiators moves on one in a fraction of the time and with none of the risk. Pipe trolleys, panel lifters and simple hoists are the same idea.
Using one is not an admission that you could not manage. It is the correct answer to the assessment, and it is what the assessment is for.
📚
Towards Level 2Once the lift stops being manual, two more sets of Regulations apply. PUWER — the Provision and Use of Work Equipment Regulations — says any equipment must be suitable for the job, maintained, and used only by somebody trained on it. LOLER — the Lifting Operations and Lifting Equipment Regulations — adds that anything used for lifting must be strong enough, marked with its safe working load, and thoroughly examined at intervals by a competent person. That is why a hoist, a strop or a genie lift carries a test certificate and a date, and why using one that is out of date is not a paperwork problem but a legal one.
The first minute, and what has to be there before it happens
Read the lesson ▶
When something goes wrong the first minute matters most, and it is not the time to be working out what to do. Everything on this page is meant to be known in advance.
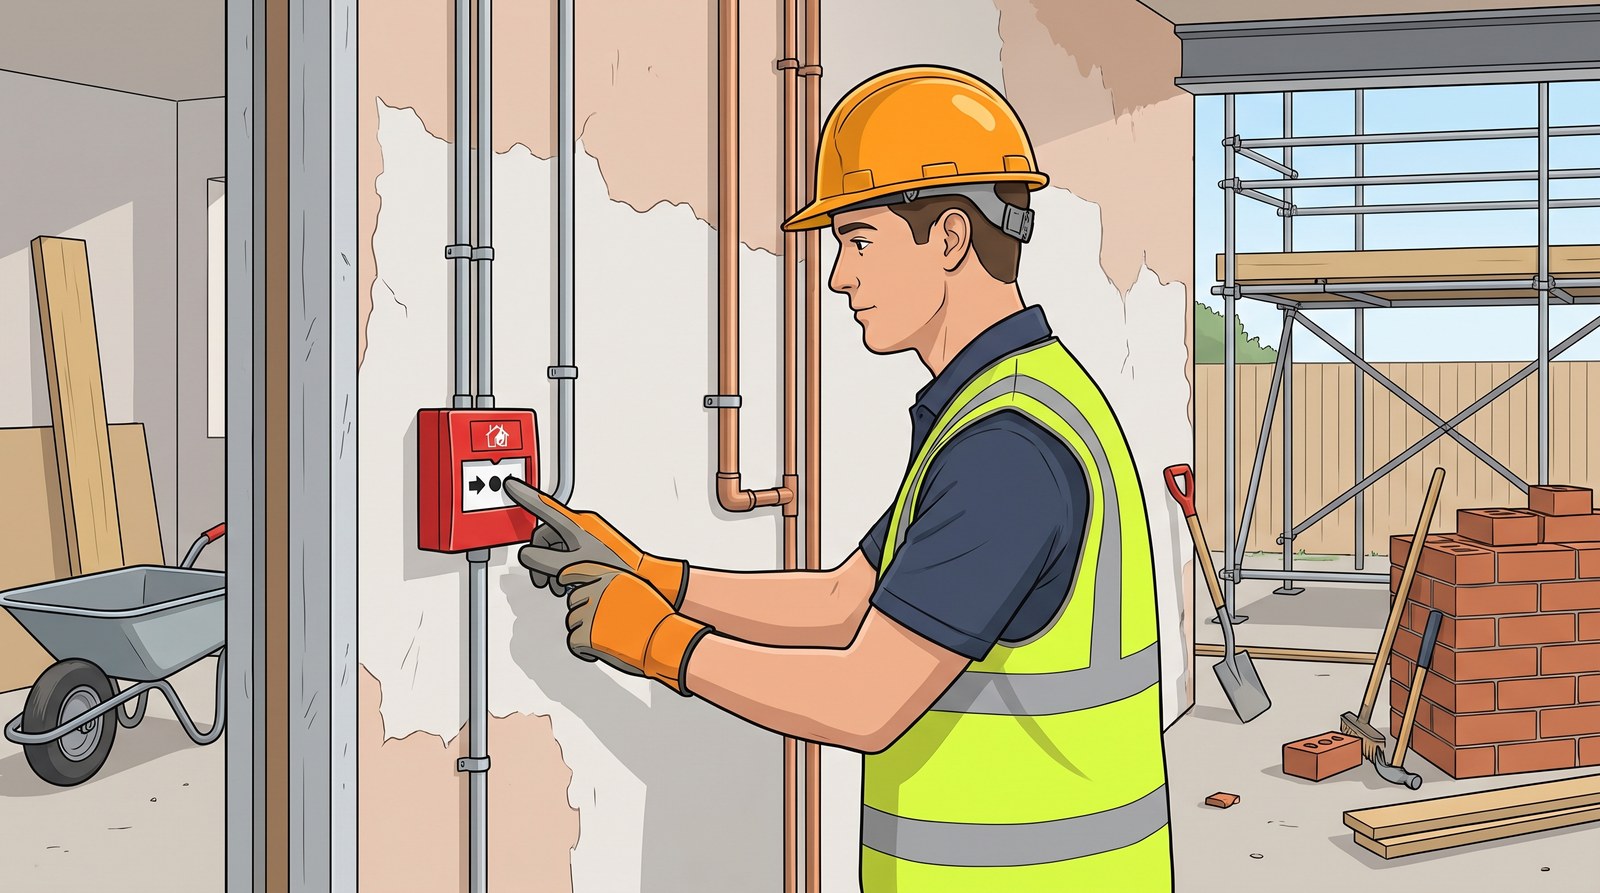
Where the call points are is something to know before you need one.
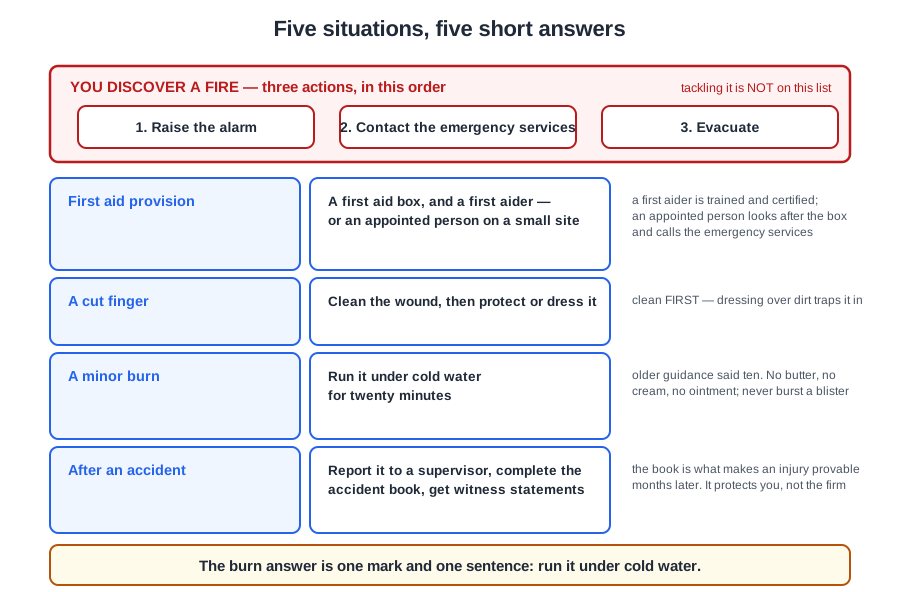
If you discover a fire
Three immediate actions, in this order:
Raise the alarm. First, always. Other people need to know before anything else happens.
Contact the emergency services.
Evacuate the premises.
Notice what is not on the list: tackling it. That is a separate decision, and it comes after the alarm has gone — never instead of it.
The four emergencies named
Fire is one of four the standard names, and the other three are all things a plumber can cause:
Gas leak — smell of gas, hissing, a damaged pipe. Do not switch anything on or off, do not use a phone in the room, ventilate, turn the gas off at the meter if you can reach it safely, get everyone out, and call the National Gas Emergency Service on 0800 111 999.
Fire — the three actions above.
Collapse of buildings — unsupported structure, a wall being taken out, an old building being altered. Get out and keep others out; do not go back in.
Electrocution — do not touch the casualty while they are still in contact with the supply. Isolate it first, at the consumer unit if you can. Somebody trying to pull a person clear becomes the second casualty.
Two things you are expected to be able to do
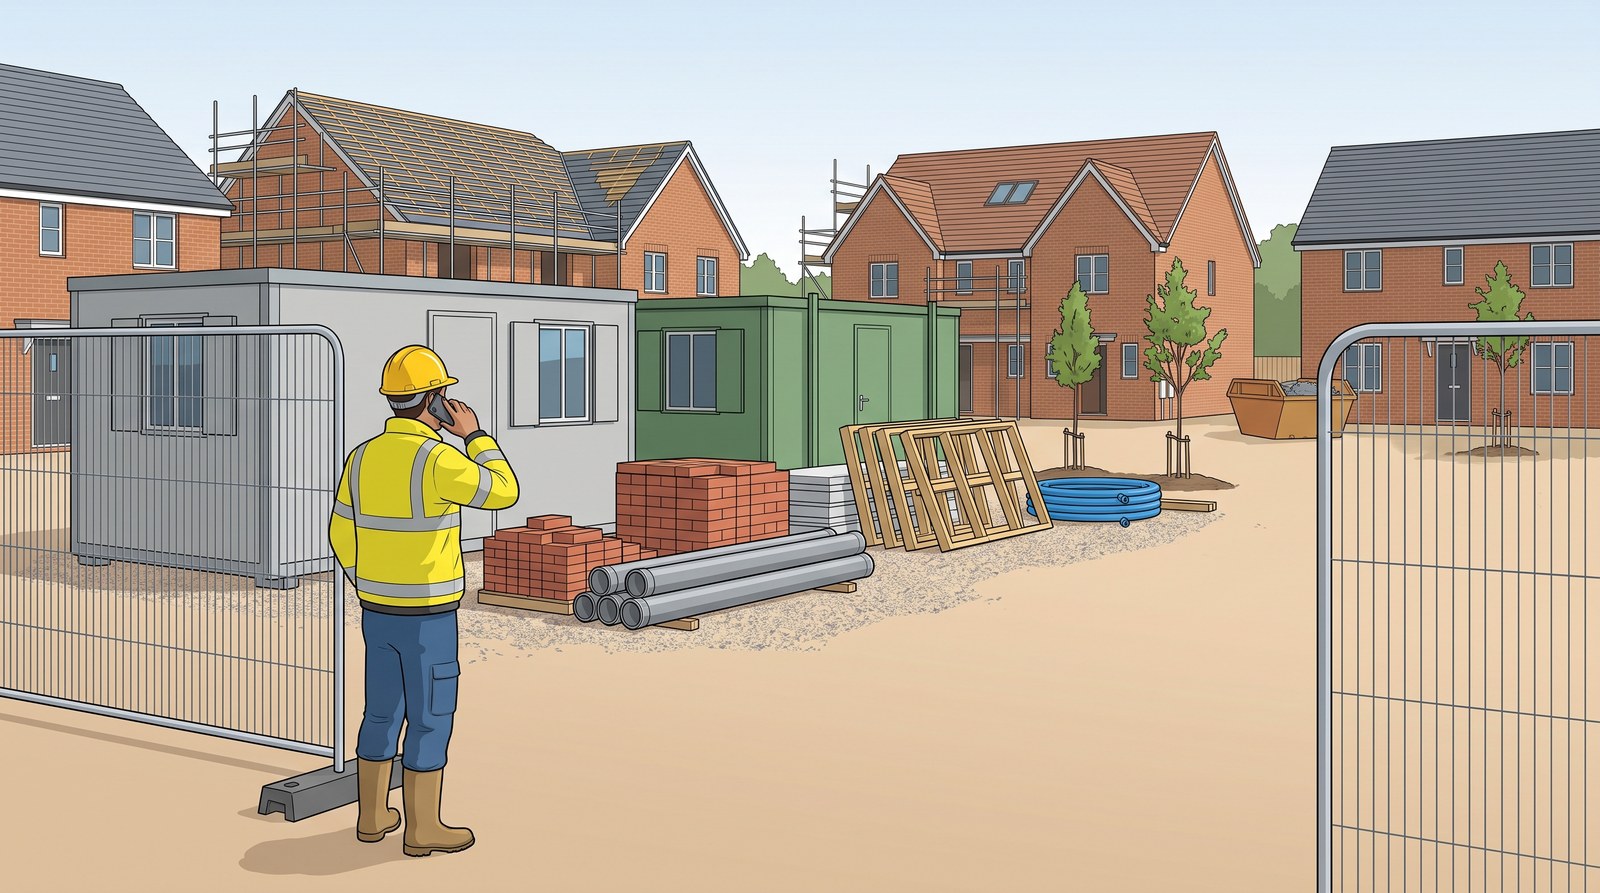
Check the address on the way in. On a new estate with no street signs, it is the part people fumble.
Follow concise instructions for contacting the emergency services. Which number, what they will ask for, and — the part people fumble — the address of the site. Knowing where you actually are is harder than it sounds on a new estate with no street signs up yet, and it is worth checking on the way in rather than on the phone.
Emergency evacuation procedures. The route out, the assembly point, and the rule that you go to it and stay there so somebody can count you. Walking off to your van because the job is over is how a search gets started for somebody who is already at home.
First aid in the workplace
Five situations, five short answers. None of them is the moment to be working it out.
Two requirements: a first aid box, and a first aider — or, on a smaller site, an appointed person.
The difference is worth knowing. A first aider has been trained and holds a certificate. An appointed person has not: their job is to look after the box and to call the emergency services. A small low-risk site may only need the second.
Alongside the box there is often an eyewash station — sterile water for flushing something out of an eye.
All of it comes from the site induction, and all of it is unlookupable at the moment you need it. That is the entire argument for paying attention during twenty boring minutes on your first morning.
Three injuries, three treatments, and why the accident book protects you
Read the lesson ▶
Three common injuries with three short answers, and then the part people skip: writing it down.
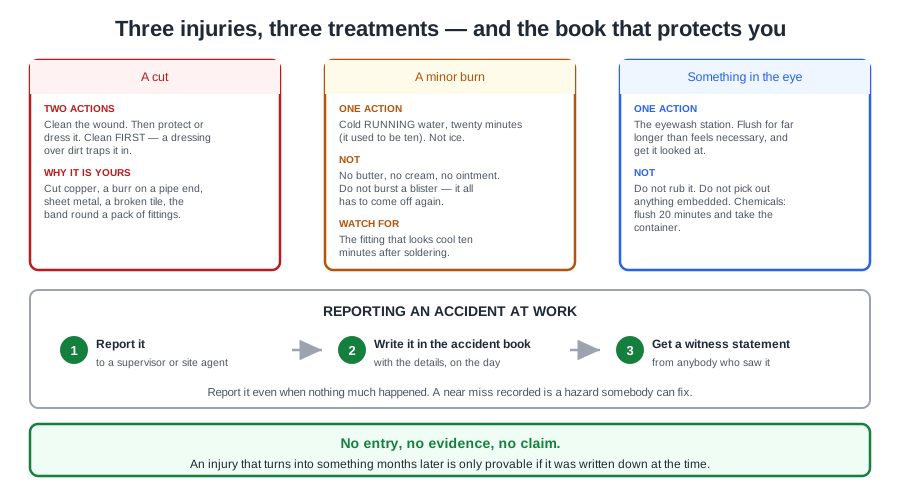
A cut
Three injuries, three treatments. The accident book is the step people skip, and the one that protects you.
Two actions: clean the wound, then protect or dress the cut. Clean first, cover second — dressing over dirt traps it in.
Cuts are the everyday plumbing injury: cut copper is genuinely sharp, and so is a burr on a pipe end, sheet metal, a broken tile and the band round a pack of fittings.
A minor burn
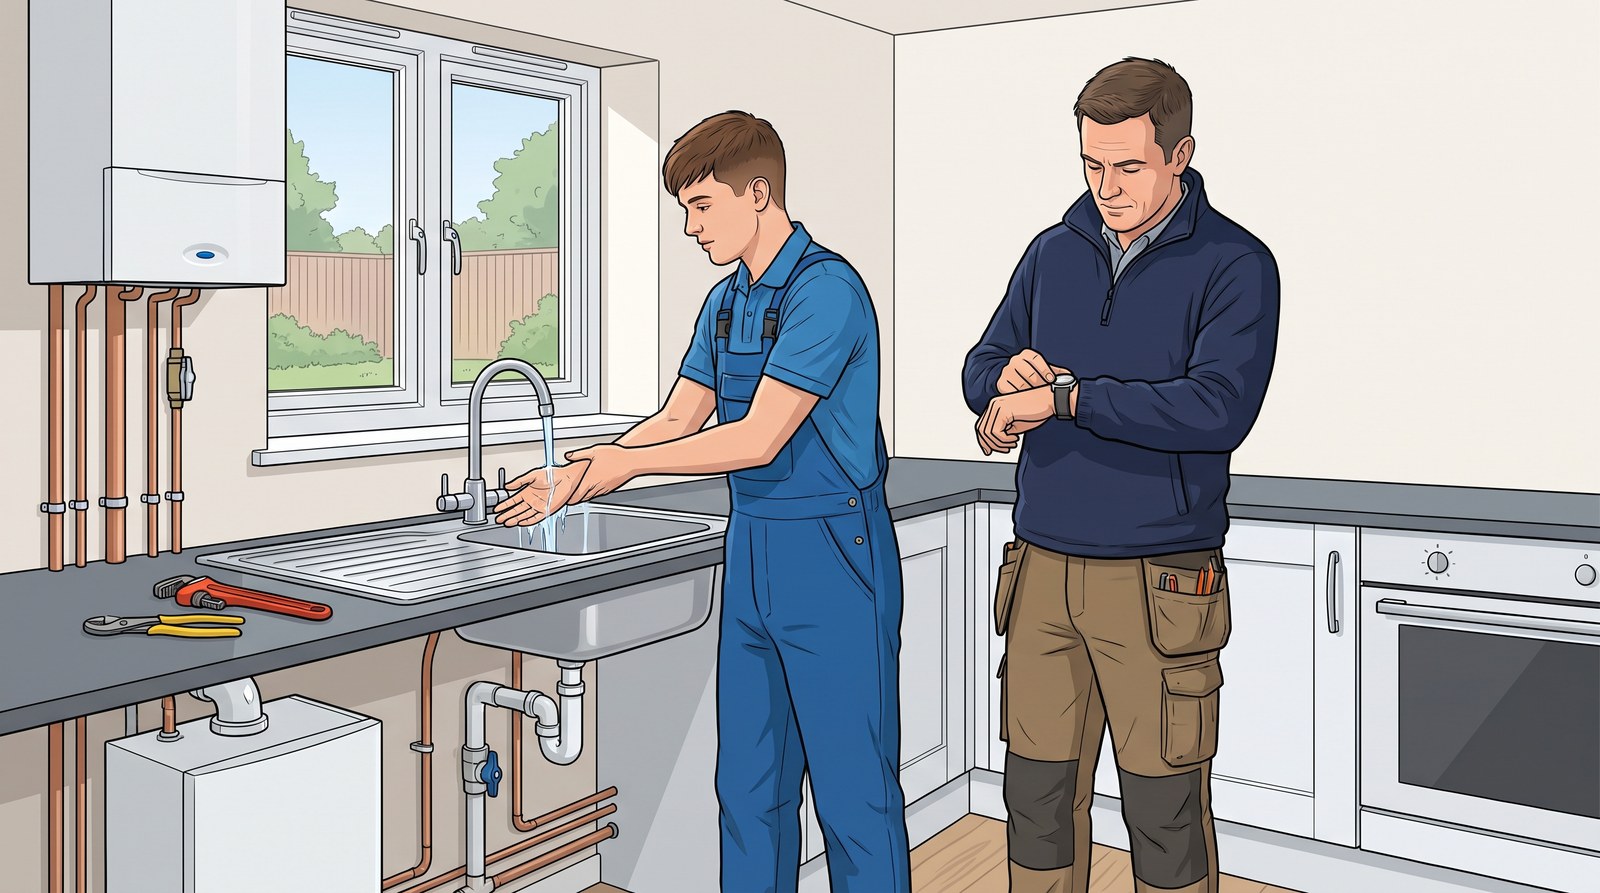
Cool running water for twenty minutes, as the NHS advises. Just water - nothing else.
One action, and it is the one people get wrong: run it under cold water, for twenty minutes, which is what the NHS advises, and cool running water rather than ice. Older guidance said ten minutes, and you may still see that figure, but twenty is the current advice.
What not to do: no butter, no cream, no ointment, and do not burst a blister. Anything you put on the burn has to come off again before it can be treated properly.
This is a plumber’s injury more than most trades’. Blowtorches, hot pipework and hot water, every week — and the one that catches people out is the fitting that looks cool ten minutes after soldering.
An object in the eye
The eyewash station. Flush it, for far longer than feels necessary, and get it looked at.
Do not rub it, and do not try to pick something out that is embedded. Grit, swarf, dust, flux and solvent splashes are all everyday risks, and the treatment for all of them starts the same way. Chemical splashes especially: keep flushing for at least twenty minutes and take the container with you to hospital, so they know what they are treating.
Reporting an accident at work
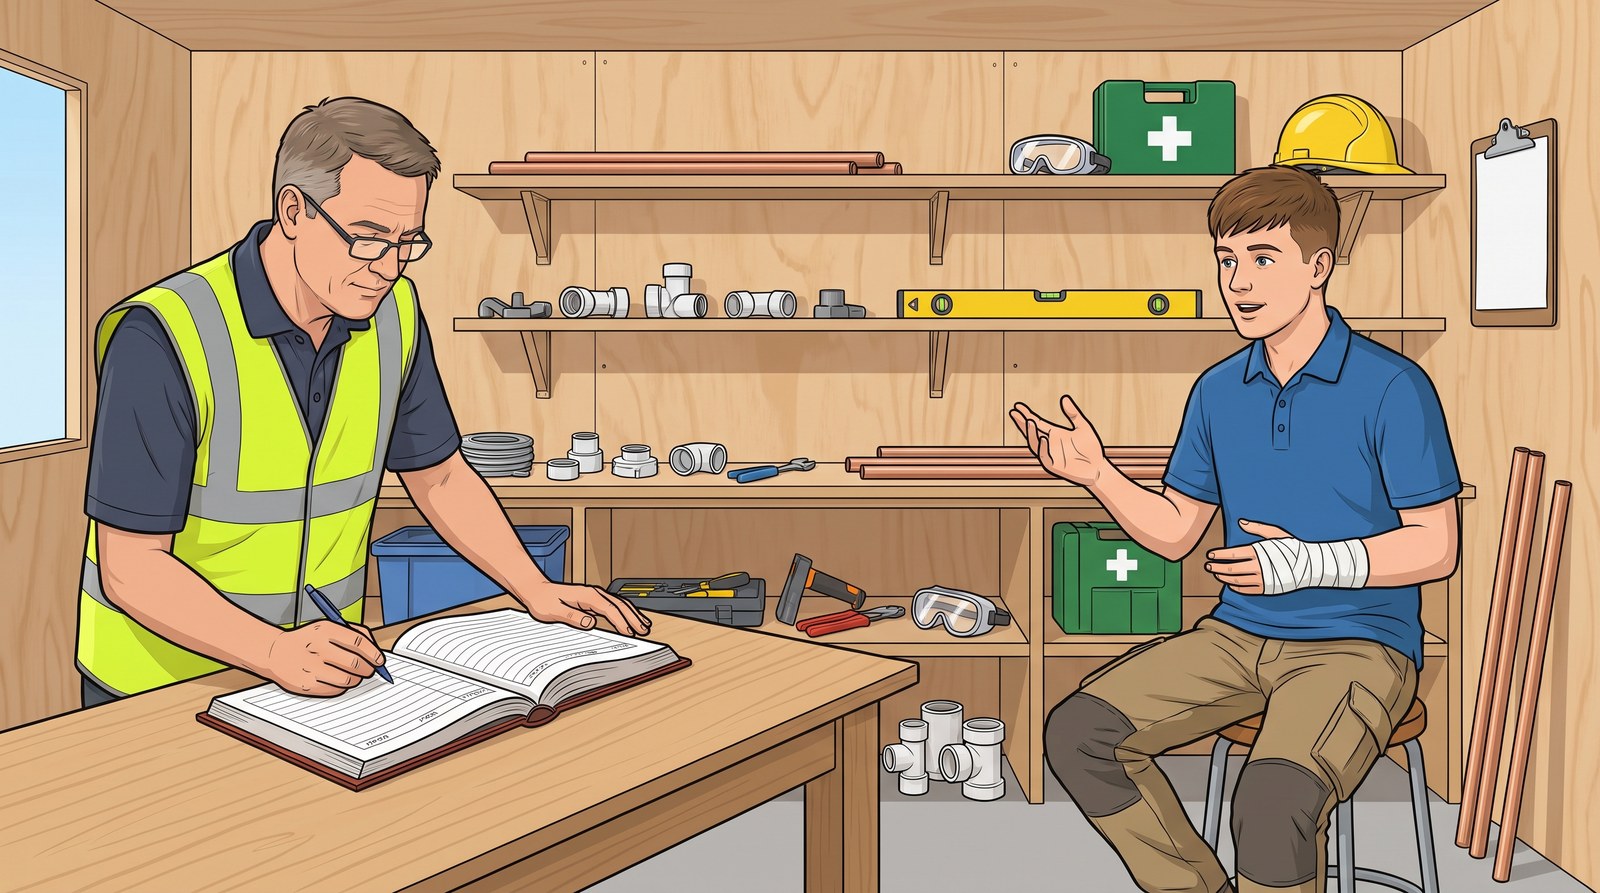
Tell the supervisor, fill in the accident book, and get a witness statement.
Three steps:
Report it to a supervisor or site agent.
Complete the details in the accident book.
Get a witness statement from anybody who saw it.
Why the accident book matters to you
The accident book is the one that counts later, and it is worth being clear about who it protects.
An injury that seemed minor on the day and turns into something months afterwards — a back, a knee, a wrist — is only provable if it was written down at the time. No entry, no evidence, no claim. Recording it protects you, not the firm, and that is why the temptation to shrug it off and get on is the wrong instinct.
Report it even when nothing much happened. A near miss recorded is a hazard somebody can fix; a near miss shrugged off is the same accident happening again next month to somebody less lucky.
📚
Towards Level 2Serious ones go further than the accident book. RIDDOR — the Reporting of Injuries, Diseases and Dangerous Occurrences Regulations — requires the employer to report certain things directly to the HSE: deaths, specified injuries such as fractures and amputations, any injury keeping somebody off their normal work for more than seven days, certain work-related diseases, and dangerous occurrences — near misses serious enough to count even though nobody was hurt, like a scaffold collapse or an accidental gas release. Note the word work-related: a broken arm from falling debris at work is reportable; the same arm broken playing football on Sunday is not.
When you are working at height, and what you stand on
Read the lesson ▶
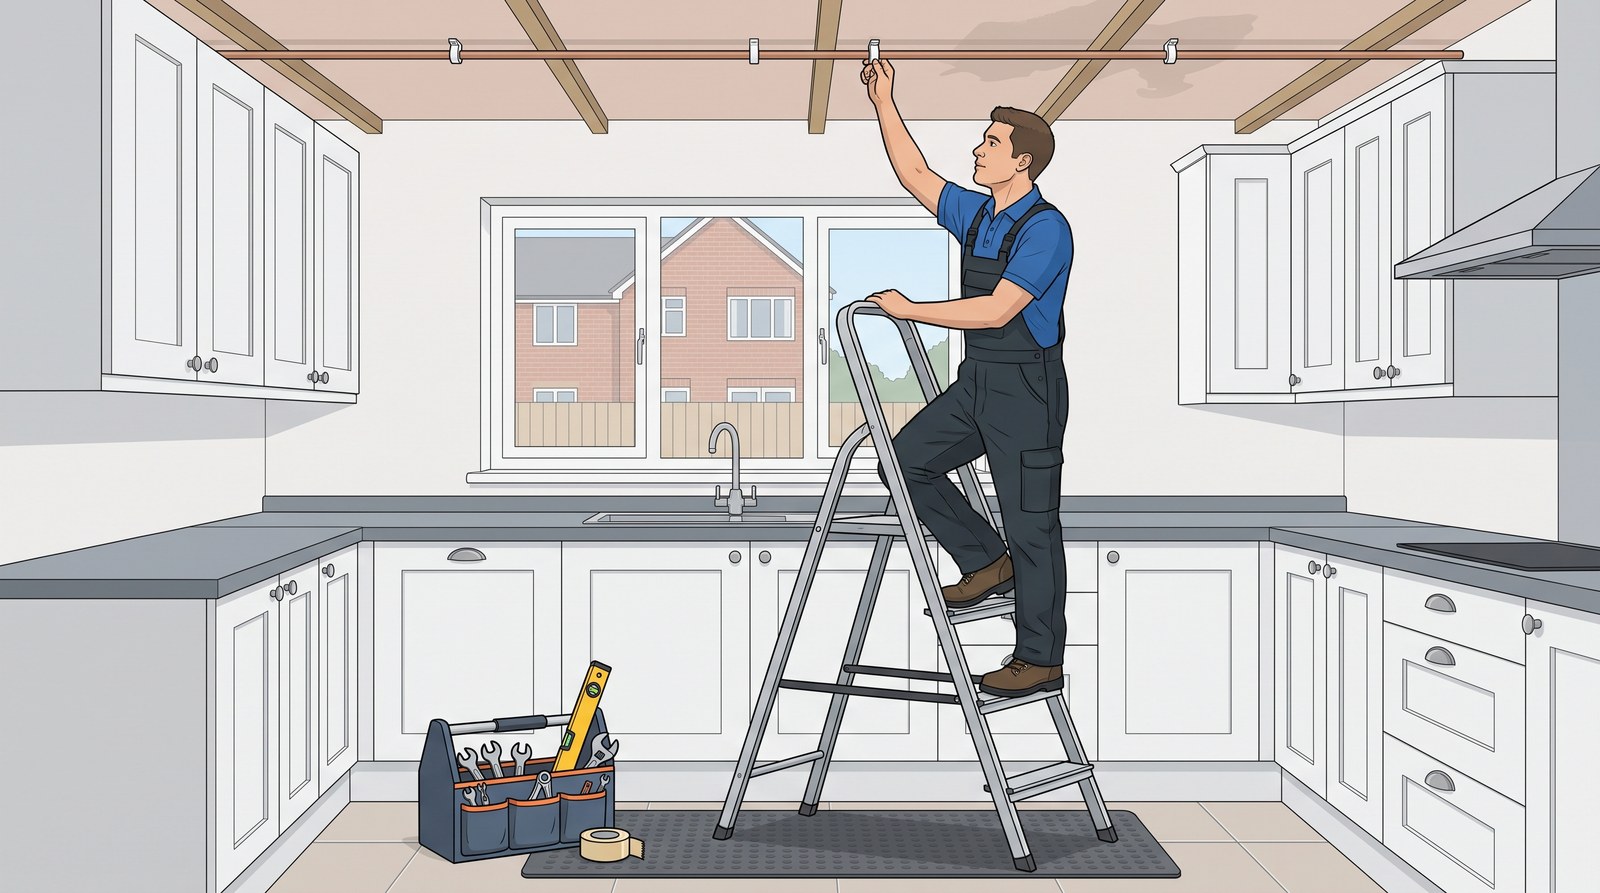
Falls from height kill more construction workers than anything else, and most of them are not from scaffolds. They are from ladders and steps, at heights nobody thought were dangerous — well under half of fatal falls are from above two metres.
This counts as working at height. There is no minimum height in the definition.
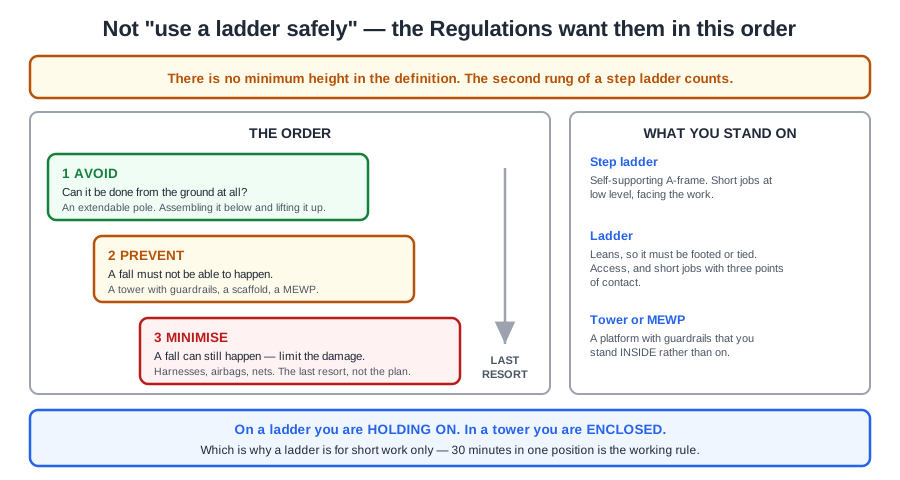
Which is why the Work at Height Regulations define working at height as anywhere a person could fall a distance liable to cause injury. There is no minimum height in the definition. Standing on the second rung of a step ladder counts.
When a plumber works at height
Installing a light fitting — or anything at ceiling level.
Gaining access to a loft space — cisterns, pipework, insulation.
Installing guttering — the classic one, outside and at eaves level.
Any other sensible answer counts, and there are plenty: a boiler flue through an upstairs wall, a shower on a first floor, a soil stack, working off a flat roof, or leaning into a loft hatch from a step ladder.
The order the Regulations want
Avoid, then prevent, then minimise. A ladder sits near the bottom of that order, which is why the honest question is always whether a tower would do.
Not “use a ladder safely”. The order is:
Avoid working at height if the job can be done from the ground. An extendable pole, or assembling something below and lifting it up.
Prevent a fall if you cannot avoid the work — a tower with guardrails, a scaffold, a MEWP.
Minimise the distance and consequences if a fall is still possible — harnesses, airbags, nets.
A ladder sits near the bottom of that order, which is why the honest question is always “could I be doing this off a tower instead?”
The access equipment
A step ladder — self-supporting, A-frame, stands on its own. For short jobs at low level where you can face the work.
A ladder — leans against something, and has to be footed or tied. For access to a height, and for short jobs where you can keep three points of contact.
A mobile elevated work platform, or tower — a platform with guardrails that you stand inside rather than on.
The difference that matters: on a ladder you are holding on; on a tower you are enclosed. That is why a tower is the right answer for anything that takes more than a few minutes or needs both hands — which is most plumbing.
And a ladder is for short duration work. The working rule is no more than 30 minutes in one position; beyond that, something else is the right equipment.
📚
Towards Level 2Three more you will meet, all of which sit above a ladder in the order above. Podium steps — a small platform with a gate and a full guardrail, and by far the best thing for ceiling-height work indoors. Trestles and staging — two supports with a boarded platform between them, for working along a wall. And hop-ups, for the low stuff. Level 2 also covers proper scaffold: the difference between an independent scaffold, which stands on its own two rows of standards, and a putlog, which is tied into the wall — and the rule that you never alter either one yourself.
The three lists, and the checks that take a minute and save a life
Read the lesson ▶
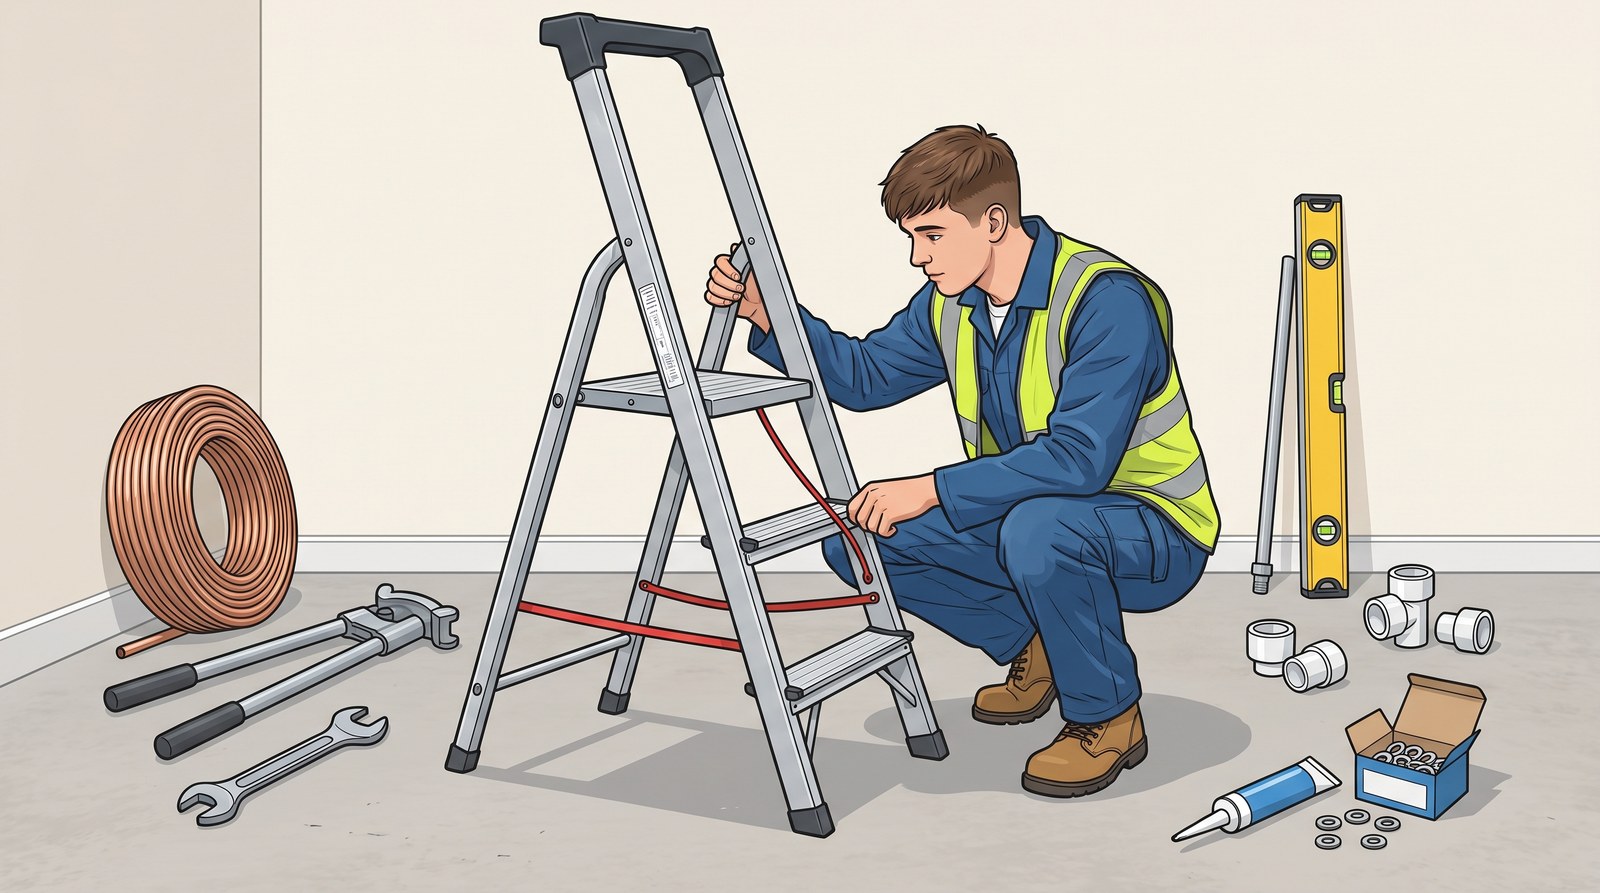
Every piece of access equipment gets checked before it is used, every time, by the person about to stand on it. Not by the last person who used it, and not by whoever put it there.
Checked by the person about to stand on it, every time.
Step ladders
Hinges — they open fully and lock.
Ropes or restraint cords — present, not frayed, and doing their job of stopping the legs splaying.
Fitted on level ground — all four feet down, firm, not on a soft surface and not packed up with an offcut.
Adequate size and height for the job — so you are not standing on the top step reaching sideways.
Check the stiles — the two side rails — for splits, bends and damage.
Ladders
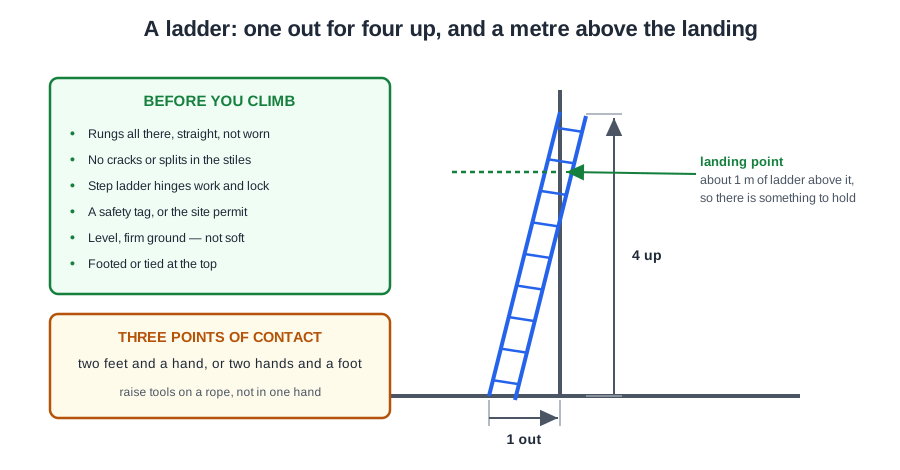
Stiles — straight, undamaged, not bent or twisted.
Rungs — all present, secure, not worn or missing.
Cracks — in the stiles, at the rung joints, anywhere.
Clean — no mud, oil or grease on the rungs. That is what your boots are going on.
Safety tags — the label showing it has been inspected, and in date.
Setting it up: level, firm ground; the right length for the job; extending about a metre above the landing point so there is something to hold at the top; footed or, better, tied at the top. The angle is one out for four up — about 75 degrees — and it is the single most common thing done wrong. Too steep and it tips back; too shallow and the foot slides out.
One out for four up, about a metre above the landing, and three points of contact all the way.
Climbing it: three points of contact — two feet and a hand, or two hands and a foot — all the way up and all the way down. Which is why tools go up on a belt or a rope, not in your hand.
Mobile elevated work platforms and towers
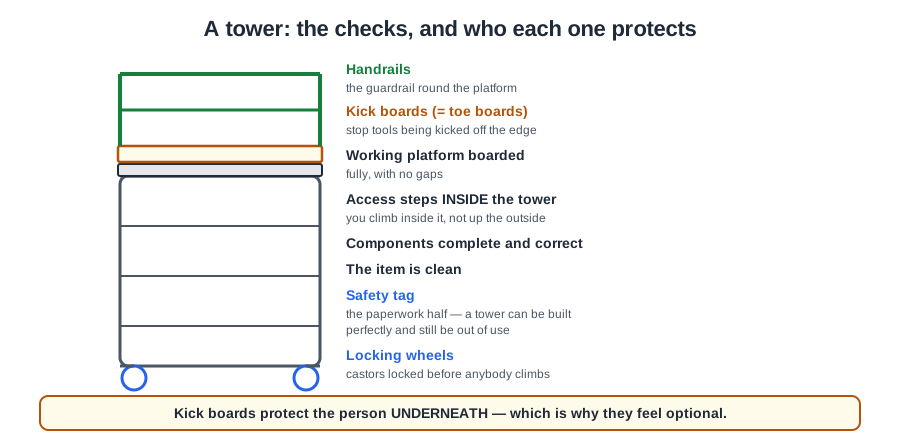
Components are assembled correctly and completely, to the manufacturer’s instructions.
Handrails — the guardrail round the working platform.
Kick boards — also called toe boards. The low board round the edge that stops tools being kicked off onto somebody below.
Working platform boarded — fully, with no gaps.
Locking wheels — the castors locked before anyone climbs it.
Access steps — you climb inside the tower, not up the outside.
Safety tags or permit — showing it has been inspected and is in date.
The two that catch people
Seven checks, and the two people skip protect somebody else: kick boards, and the tag.
Kick boards protect the person underneath, not the person on the platform, which is exactly why they get treated as optional by whoever is standing up there.
Safety tags are the paperwork half of the check. A tower can be assembled perfectly and still be out of use because it has not been inspected. Look for the tag before you climb, and if there is not one, ask.
And if the check fails
Do not use it, and do not let anyone else. Report it, and label or remove it so the next person does not find it and assume it is fine. “It was like that when I got here” is not a defence for the person who fell off it after you.
📚
Towards Level 2Ladders are graded by the load they are built to carry, and the class is on the label. Class 1 is industrial, rated to 175 kg. Class 2 — now usually marked EN 131 — is trade, at 150 kg. Class 3 is domestic, at 125 kg, and has no place on a job at all. Remember that the rating is you plus your tools and whatever you are carrying up, which is closer to the limit than most people assume.
The triangle, the classes, preventing one, and fighting one
Read the lesson ▶
Fire is a plumber’s subject more than most trades’, because you carry a naked flame to work. Soldering near timber, felt or insulation starts fires every year, often hours after the operative has gone home.
A heat mat behind the joint and an extinguisher within reach. Fires from soldering often start hours after the job is finished.
The fire triangle
Three elements must be present for a fire to break out: heat, fuel and oxygen. Take any one away and it goes out.
Fuel — something to burn.
Heat — a source of ignition.
Oxygen — from the air.
Every extinguisher works by removing one of the three. Water cools, taking away the heat. Foam and CO₂ smother, taking away the oxygen. Turning off a gas supply takes away the fuel.
The categories of fire
Heat, fuel and oxygen. Every extinguisher works by taking one of the three away.
Class
Fuel
Examples
A
Solids
Wood, paper, cloth, plastics
B
Flammable liquids
Petrol, oil, solvents, paint
C
Flammable gases
Propane, butane, natural gas
D
Metals
Magnesium, aluminium swarf
E
Electrical apparatus
Live equipment, wiring
F
Cooking oils and fats
Deep fat fryers, chip pans
The order runs from the most ordinary to the most unusual: solids, then liquids, then gases, then metals. Learn it in that order and the letters follow.
Class E is worth knowing because it decides which extinguisher you may use near anything live. Class F is the one added later, and it matters because water on a burning pan of oil is the single most spectacular way of making a fire worse.
Preventing fires
Ordinary to unusual. Learn them in that order and the letters follow.
Three actions, and the standard names these exactly:
Good housekeeping — the single biggest one. Fires need fuel, and a tidy site does not provide it.
Storage of flammables — gas bottles and solvents stored properly, upright, secure and away from heat. LPG is heavier than air, so a leak collects at low level rather than dispersing, which is why cylinders are never stored below ground.
Removal of waste materials — offcuts, packaging and rags cleared away rather than swept into a corner.
When soldering: clear combustible material away first, use a heat mat, keep an extinguisher within reach, and check the area again before you leave. A smouldering joist takes hours to show itself, which is why sites run a hot works permit with a fire watch for an hour after the flame goes out.
Before you tackle a fire
Two things to think about, and the first is the one people skip:
Consider whether it should be tackled at all.
Consider which is the right fire extinguisher to use.
Leave it and get out if it is bigger than about a waste bin, if it is spreading, if the room is filling with smoke, if you are not sure which extinguisher to use, or if you have no clear way out behind you. Raise the alarm and leave. Deciding not to fight a fire is a correct decision, not a failure, and nothing on a site is worth your life.
Choosing the extinguisher
All extinguishers are red; the label colour tells you the type.
Type
Label
Use on
Never on
Water
Red
A
Electrical, liquids
Foam
Cream
A and B
Electrical
Dry powder
Blue
A, B, C and electrical
—
CO₂
Black
B and electrical
—
Wet chemical
Yellow
F — cooking oils
—
Near live electrics use CO₂ or dry powder — never water or foam, because both conduct electricity back to you.
That table is the selection of extinguisher by fire type, and it is a skill rather than a fact: given a fire, pick the extinguisher. The one that catches people is anything electrical, where water and foam are both wrong.
Using one
All extinguishers are red. The label colour is what tells you the type.
The method has four steps, and they spell PASS:
Pull the pin.
Aim at the base of the fire.
Squeeze the handle or lever.
Sweep side to side.
Aiming at the flames rather than the base is the commonest mistake — the flames are the result, and the fuel is where the fire actually is. Keep your back to your way out, and stop and leave if it is not going out.
Why it matters in a house, and the fittings that do it
Read the lesson ▶
There are two separate things to hold here: why water and electricity are worth conserving, and how you go about it. The how is easy to reel off. The why is the one people cannot answer, because it feels too obvious to think about — and it is the half you will need the first time a customer asks whether a flow reducing valve is worth paying for.
Why it matters
Britain feels wet, but south east England has less rainfall per person than many Mediterranean countries.
Five reasons, and you want more than one of them, because different customers care about different ones.
It is less harmful to the environment. The broadest one, and the safest to write down. Everything below is really a version of it.
The release of CO2 into the atmosphere during the production of electricity. Carbon dioxide — CO2 — is the gas meant. This is the one people miss, because they think of electricity as clean — it arrives down a wire with no smoke. But a good share of it is still generated by burning something, and the carbon dioxide comes out at the power station rather than in the house. Using less electricity in a kitchen means less fuel burned somewhere you cannot see.
To prevent water shortages. Britain feels wet and parts of it are not. South-east England has less rainfall per person than many Mediterranean countries, and hosepipe bans are now a normal part of most summers.
The conservation of energy sources during the production of power. Fossil fuels are finite. Every unit not used is a unit still in the ground.
It saves money. Never leave this one out. A metered household pays twice for every litre — once to buy it from the water company and once to have it taken away as waste — and the customer standing next to you cares about this reason more than the other four put together.
Reducing wastage of water
The reasons are a separate question from the methods, and they are the ones people cannot answer.
Flow reducing valves limit how fast an outlet can run. The tap opens as usual and simply cannot deliver more than it needs to, which the user never notices.
Spray taps break the flow into a fine spray. Hands wash perfectly well in a fraction of the water, which is why you find them in every public washroom.
Low volume WC flush. An old single flush cistern uses nine litres or more. A modern dual flush uses around four to six. The WC is the single biggest use of water in most houses, so this is the change that moves the number most.
Regular maintenance of terminal fittings and float valves. Terminal fittings are the taps and outlets at the ends of the pipework. A dripping tap and a float valve passing into the overflow both waste water continuously, day and night, for months, and nobody reports either because neither is dramatic. This is the one that is genuinely your job.
Promoting user awareness. Telling the customer what you have fitted and how to use it. A dual flush is useless if nobody knows which button is which, and a great many are used wrongly for years for exactly that reason.
Reducing wastage of electricity
An LED lamp draws a fraction of what a filament bulb did, and lasts for years rather than months.
Energy efficient lighting — LED lamps draw a fraction of what a filament bulb did and last for years rather than months.
Switching equipment from standby to off. Standby is not nothing. A house full of devices sitting on standby draws power around the clock to do nothing at all.
Energy efficient equipment — appliances designed to use less in the first place.
‘A’ rated cookers and washing machines. The energy label is the everyday version of all of this. The rating is the thing a customer can actually see when they are choosing.
📝
In the assessmentYou will be asked for two reasons, then three methods of conserving water, then three methods of conserving electricity. Learn more than three of each — under pressure the third one is always the one that will not come.
Three groups, and the whole of this criterion is knowing which group a given thing belongs to. High carbon, low carbon, zero carbon.
The way to hold it is to ask one question: is something being burned, and did it recently take carbon out of the air?
High carbon — burning fossil fuel
Electricity is only as clean as whatever made it. From a coal power station like this, it is high carbon.
Natural gas and LPG, fuel oils, solid fuels such as coal and peat, and electricity from non-renewable sources.
These are carbon that has been locked underground for millions of years, and burning it puts that carbon back into the atmosphere where it had not been for a very long time. Note the last item: electricity is only as clean as whatever made it, so electricity from a coal or gas station is high carbon even though nothing burns in the house.
Low carbon — some carbon, but much less
Heat pumps are Low carbon, not zero. A heat pump runs on electricity, but gives several units of heat for every unit of electricity it uses.
Solar thermal, solid fuel in the form of biomass, heat pumps, and combined heat and power (CHP).
Low carbon is not zero, and the reason each one is here is worth a sentence. Biomass burns and does release carbon — but the wood took that carbon out of the air while it was growing, so over the cycle it is close to neutral rather than digging up something ancient. A heat pump uses electricity, so it carries whatever carbon that electricity came with, but it delivers several units of heat for each unit of electricity, so far less of it. Solar thermal has none in use at all and sits here rather than in zero carbon, which catches people out.
Zero carbon — nothing burns
These technologies are Zero carbon: wind and falling water generate the energy, and nothing is burned.
Electricity from wind, electricity from tidal, hydroelectricity, and solar photovoltaic.
Nothing is burned in generating any of these. Wind, water and light do the work.
The two that get mixed up
One question sorts them: is something being burned?
Solar thermal is low carbon; solar photovoltaic is zero carbon. Both are panels on a roof and both are driven by the sun, so the split feels arbitrary until you look at what comes out of each. Solar thermal makes hot water; solar photovoltaic makes electricity. Thermal is the one that ends up connected to a cylinder, so it is the one that becomes your work.
Biomass is low carbon, not zero, even though it is renewable. Something is burning.
Know them by sight, not just by name
Solar thermal is low carbon. It won’t heat the cylinder in the winter so it needs another heat source.
These are things you can point at from a motorway, and being able to name what you are looking at is most of the skill. A hydroelectric dam is zero carbon — falling water, nothing burning. A coal fired power station with its cooling towers is high carbon. A solar thermal panel on a roof is low carbon. One from each group, and you will meet the third of them on a job.
📝
In the assessmentYou are shown pictures and asked to state whether each is a high, low or zero carbon facility, so recognising them by sight matters as much as learning the lists.
Why they matter, and the measures that bring them down
Read the lesson ▶
Two things that look like one: why carbon emissions are worth reducing, and how you reduce them. The first is a reason; the second is a list of measures. Keep them apart, because a customer who asks “why bother?” is not asking for a list of measures.
The bright parts are heat escaping through the roof, windows and door. Heat that leaks away has to be made again.
Why it matters
The short answer is to prevent the release of harmful gases into the atmosphere. Buildings are a very large share of the country’s emissions — heating them is one of the biggest single uses of energy in Britain — so what a plumber does to a heating system genuinely counts.
Damage to the ozone layer is the other reason usually given, and it is worth knowing what it actually refers to, because it is not the same problem: ozone depletion is caused by CFCs and similar refrigerant gases, not by carbon dioxide. They sit together because both are things released from buildings that damage the atmosphere — and the refrigerant one becomes directly your business the day you touch a heat pump or an air conditioning system, where venting the gas to atmosphere is an offence.
The methods, and why each one works
System controls (thermostatic). Named first because it is the cheapest and the most effective. A room thermostat, a programmer and thermostatic radiator valves stop a house being heated when it is already warm enough or when nobody is in. No fabric is touched and nothing is dug up.
Improved insulation. Loft, cavity walls, floors, and the hot water cylinder. Heat that never escapes never had to be paid for. This is the one that reduces the heat loss itself rather than heating more efficiently, and it is the reason a heat pump job always starts with a look at the insulation.
Low energy lighting. LED throughout.
Double glazing. Two panes with a sealed gap between them, which is a far worse conductor than one pane of glass.
Draught proofing. Cheap, quick, and it stops warm air simply leaving around doors, letterboxes and floorboards.
A rated appliances. The energy label again.
The order they come in
Stop the heat escaping first. Fitting an expensive boiler to a house with an empty loft is doing it backwards.
There is a sensible sequence hiding in that list, and it is worth carrying into work: stop the heat escaping first, then control what you put in, then make what you put in efficient. Fitting an expensive boiler to a house with an empty loft is doing it backwards, and it is the single most common mistake in domestic energy work.
📝
In the assessmentYou are given double glazing as the worked example and asked for two other methods — so the one measure you cannot use is the obvious one. Have three others ready.
What is wanted here is the basic operating principle of each installation — outline, not design. One clear sentence about where the energy comes from and what it produces. That is also exactly what a customer wants from you when they point at a neighbour’s roof and ask what those panels are.
The installations
Solar thermal. A collector on the roof absorbs the sun’s heat and passes it, through a coil, into a hot water cylinder. It makes hot water, not electricity. It will do most of a household’s hot water in summer and very little in December, which is why the boiler or immersion stays.
Solar photovoltaic. Panels that turn light directly into electricity. No heat involved at all. The pairing to remember is thermal for water, photovoltaic for power.
Heat pumps. A heat pump takes heat that is already there, in the ground or the air outside, and raises it to a temperature useful for heating the house. It moves heat rather than making it, which is why it delivers several units of heat for one unit of electricity. Ground source takes it from buried pipework; air source takes it from outdoor air, which works even in winter because cold air still holds usable heat.
Biomass. A boiler burning wood — logs, chips, or wood pellets. The pellet is the giveaway word: if a system is fed with pellets, it is biomass.
Combined heat and power. Generating electricity on site and using the waste heat for heating rather than throwing it away. Almost all the energy in the fuel gets used.
Wind, tidal and hydro. Moving air or moving water turns a turbine which turns a generator.
The two that get confused
One sentence each about where the energy comes from. That is what outline means.
Both hinge on a single word, and both catch people who have learned “renewable” as one blurry category.
A heat pump takes its heat from the ground or air. Not from the sun, not from wood, not from wind or waves. Tie it firmly to ground and air and nothing else.
Wood pellets mean biomass. Not air source, not ground source, not solar. Something is being burned, and that is what puts biomass in low carbon rather than zero.
Where to get advice
Energy Saving Trust for homes, Carbon Trust for business.
Two organisations, and they are the ones to point a customer at when they ask a question about grants or savings that is beyond what you can answer.
The Energy Saving Trust — advice aimed at householders and the people who work in their homes: what measures are worth doing, what grants exist, what a measure will actually save.
The Carbon Trust — the same territory but for businesses and larger organisations, working on carbon reduction at that scale.
They are easy to mix up because the names are similar in shape. Energy Saving Trust for homes, Carbon Trust for business, and if you can only remember one, remember there are two and that both have “Trust” in the name.
The habits on site that cut waste before it happens
Read the lesson ▶
Two criteria: working practices that conserve energy and protect the environment, and methods for reducing material wastage. They overlap, and they are two separate ideas, so keep them apart in your head: one is about the energy spent getting materials to you, the other about how much of the material you then throw away.
One idea is the energy spent getting materials to site. The other is how much of them gets thrown away.
Working practices — the thinking behind them
A second trip to the merchants is half an hour, half a tank of diesel and wasted time.
Nearly all of this is about the energy spent getting materials to site rather than the energy spent using them, which is not where most people look first.
Reduce transportation costs. The one to lead with. Fewer journeys, fuller loads, better planning. It is also the one that costs a firm real money, which is why it is the environmental measure employers actually enforce — a second trip to the merchants is half an hour, a tank of diesel and a van standing on site doing nothing.
Source materials locally. A fitting made forty miles away carries a fraction of the transport of one shipped across the world, and buying from the cheapest country is the wrong answer even though it sounds like good business.
Use renewable sources.
Use lighter materials where they will do the job, because lighter loads move with less fuel.
Avoid transporting materials by air, which carries far more carbon per tonne than road or sea.
Use low energy appliances where possible — the same energy label logic, applied to what you install rather than what the customer buys.
Rainwater harvesting and grey water recycling. Rainwater harvesting collects roof water into a tank and uses it for WC flushing and the garden. Grey water recycling reuses the water from baths, basins and showers for the same jobs. Both replace treated drinking water with water that never needed treating, which is the largest single saving available in a house — a WC does not need water that is fit to drink.
Reducing material wastage
The largest single saving available in a house. A WC does not need water fit to drink.
Five methods, and every one of them is an ordinary habit rather than a policy.
Measure, cut and set out pipe, cable and trunking runs accurately. The biggest single source of waste on a plumbing job is material cut to the wrong length. Measure twice.
Plan work activities carefully. Knowing the run before you start means fewer offcuts, fewer wasted fittings and fewer second trips.
Reuse off cuts of pipe and cable. A 300 mm offcut is a tail, a loop or a short branch. Keep a box.
Take care when fixing appliances, because a damaged appliance has to be replaced — and that is not an offcut, it is the whole item. Scratching a bath or cracking a basin during installation wastes far more than a careless cut ever will.
Avoid leaving plugs, screws and other fixings lying around, because once they are trodden into the floor and swept up they have to be replaced. Small, constant, and it adds up over a job.
Follow good housekeeping — keep the site tidy, so materials are not lost, damaged or walked on. Most of the waste above is really this one wearing different clothes: a tidy site loses very little, and an untidy one loses something every day.
Six ordinary habits. Most of the others are good housekeeping wearing different clothes.
📝
In the assessmentThree short questions and one written one. Which is a good working practice (reduce transportation costs); which shows energy conservation (sourcing materials locally and using renewable sources — note that one option names two things); and a true or false on measuring, cutting and setting out accurately, which is true. Then two methods of reducing material wastage in your own words, so know more than two.
The duty of care, the licences, and what can be recycled
Read the lesson ▶
Waste leaving a site is regulated from the moment it is created to the moment it is finally disposed of, and the person who created it stays responsible the whole way. That principle is called the duty of care, and everything in this lesson comes from it.
Carrying waste — the licence
A firm carrying waste must be a registered waste carrier. Keep the waste transfer note.
You cannot simply put a bath and a load of old pipe in a van and drive it to the tip as a business. For a company vehicle to carry waste legally the operator must hold a licence — registration as a waste carrier with the environmental regulator.
This one matters in practice more than most Level 1 facts. Firms are fined for it. So are householders whose builder fly-tipped their bathroom, because the duty of care followed the waste and they could not show where it went.
The paperwork side is the waste transfer note, which records what the waste was, who handed it over and who took it. Keep it.
What can be recycled
It follows the waste, and it stays with whoever created it.Copper, brass and lead kept apart. The they are all worth money and can also be recycled.
Metal is the part of this that pays. Scrap has real value, and on a strip-out the metal is worth separating rather than skipping.
The metals worth separating are copper pipe, copper cable, low carbon steel, metal conduit, brass, galvanised metal trunking and lead.
Copper is the one you will handle most and it is worth the most. Old copper pipe, cylinder scrap and stripped cable all have a price at the yard. Brass turns up as old fittings, valves and taps. Low carbon steel is ordinary steel pipe and radiators.
The two most likely to end up in a skip by mistake are trunking, because it looks like rubbish, and lead, because it looks like nothing. Both are worth money.
Lead is hazardous to work with, but clean scrap lead (List of Wastes code 17 04 03) is not hazardous waste: it goes to a metal recycler on a normal waste transfer note, kept apart from the other scrap because it is priced separately. Lead paint debris, lead-contaminated waste and lead-acid batteries are hazardous waste. Exam note: the qualification’s list puts lead under hazardous waste, so an assessment question may expect that answer. While you work with lead it has regulations of its own, the Control of Lead at Work Regulations: wash your hands before you eat, drink or smoke.
The regulations
The one to name is the Site Waste Management Plans Regulations, which required larger construction projects to plan in advance what waste they would create and how it would be dealt with.
Worth knowing alongside it, because it is what actually governs your working life: the duty of care itself sits in the Environmental Protection Act 1990, and hazardous waste has its own regulations on top of that. Site Waste Management Plans are the construction-specific one, though the regulations requiring them were revoked in England in 2013 — the plan is still widely used, and still the name the answer guide wants. The Environmental Protection Act, with the Waste (England and Wales) Regulations 2011, is the law underneath everything on this page.
📝
In the assessmentThree short questions: what is required for a vehicle to carry waste (a licence), three metals that can be recycled other than galvanised trunking and lead, and one piece of legislation. None needs a long answer — they need the right noun.
The three classes, and the appliances covered by WEEE
Read the lesson ▶
Three classes of waste, and the reason they exist is cost and safety: each class goes to a different place, at a different price, under different paperwork. Putting waste in the wrong class is how firms get fined.
The three classes
Inert: it will not burn, rot, react or leach. Picture it in the ground unchanged for a century.
Hazardous — waste that can harm people or the environment. It needs separating, labelling, a licensed carrier and a licensed site, and it is by far the most expensive to get rid of.
Non-hazardous — ordinary waste that will not harm anyone but will rot, break down or react over time. Most general site waste is here.
Packaging is the everyday example — paper and cardboard come off almost every item you install, and both are non-hazardous and readily recycled.
Inert — waste that does nothing at all. It will not burn, will not rot, will not react and will not leach into the ground. Rubble, hardcore, ceramics, glass. The cheapest to dispose of, because a landfill can take it without anything happening.
Bricks, and sand and gravel, are inert for the same reason tiles are: they are already mineral, and there is no chemical change left in them to happen.
The word to hang onto is inert: it means chemically dead. If you can picture it sitting in the ground unchanged for a century, it is inert.
The four that catch people out
Different place, different price, different paperwork — which is why putting waste in the wrong class costs money.Solvent hazardous, tiles inert, water based glue non-hazardous, and the old drill hazardous.
Four items a plumber handles constantly, and every one of them is easy to put in the wrong place.
Solvents — hazardous. Flammable, harmful to breathe, harmful to the ground if they get into it. This covers a lot of what a plumber carries: cleaning fluids, solvent cement, some flux.
Tiles — inert. Fired ceramic. Nothing will ever happen to it.
Electrical equipment — hazardous. The one people get wrong, because a dead motor or an old light fitting looks like scrap rather than a hazard. It counts as hazardous because of what is inside — heavy metals, capacitors, and in older equipment worse than that.
Water based glue — non-hazardous. The pairing with solvents is deliberate. Solvent based products are hazardous; the water based version of the same product is not. That distinction is the whole point of the question, and it is why water based adhesives and paints have taken over.
WEEE
A circuit board, a motor and a fluorescent tube: the three to have in mind, and all three are WEEE.
The Waste Electrical and Electronic Equipment Regulations, known as WEEE, cover the disposal of anything electrical, so that it is recovered and recycled rather than buried.
The three to have in mind are motors, fluorescent tubes and printed circuit boards — a pump motor, a strip light, and the board out of a boiler or a controller. All three come out of houses on ordinary plumbing jobs, and all three get skipped when they should not.
The rule is wider than those three. Anything with a plug, a battery or a circuit in it is covered, and that includes your own tools — a dead drill is WEEE, not scrap metal, and so are chargers, kettles, fridges and lamps.
Fluorescent tubes deserve a line of their own: they contain mercury, they break easily, and they should never go in a skip or a bin. They are the most likely of the three to be disposed of wrongly on an ordinary job. A fluorescent tube is both hazardous waste and covered by the WEEE regulations.
📝
In the assessmentYou are given four items and asked to classify each — four separate marks, so a wrong guess only costs one. Then which regulation covers motors, fluorescent tubes and printed circuit boards: WEEE. Write the full name if you can and put the initials after it.
What each one is for, the faults to look for, and keeping them safe
Read the lesson ▶
A tradesperson can name every tool in their bag, say what it is for, spot when one has gone bad, and put it right. That is not a formality — a tool with a fault in it is the thing most likely to injure you today, and the person who notices is whoever picked it up.
So for every tool there are four things worth having: the name, the use, the common fault, and the maintenance. The first two are easy. The fault and the maintenance are where people dry up, because nobody thinks about them until something goes wrong.
The tools to know by sight
The two pairs that get confused for years, and the one fault you can spot across a room.
Lump or claw hammer, bolster or cold chisel, hacksaw, junior hacksaw, spirit level, tape measure, chalk line, adjustable spanner, wood chisel, steel chisel, flat head screwdriver, cross head screwdriver, pad saw, wood saw.
Two pairs in there are worth separating now, because they get confused for years otherwise. A lump hammer is the short heavy one you hit a chisel with; a claw hammer is for nails and has the claw for pulling them. A bolster is the wide chisel for cutting brick and lifting tiles; a wood chisel is narrow, sharp and never hit with anything but a mallet.
Four worked examples
What it is for, its common fault, and the maintenance. Every tool answer takes that shape.
Four tools, in the shape every answer takes.
The junior hacksaw is for cutting metal components. Its common fault is teeth missing on the blade, and the maintenance is to replace the blade as required. It is a consumable — you do not sharpen a hacksaw blade, you change it.
The claw hammer is for inserting nails on clips, removing unwanted nails, and general fabrication. Its common faults are a loose hammer head and a damaged handle or shaft, and you repair or replace as required. A loose head is the dangerous one: it comes off mid-swing.
The tape measure is for measuring components and areas for installation. Its faults are a loose clasp and a damaged or broken tape, and you replace it. A tape with a loose clasp reads short every time and you will not notice until something does not fit.
The steel chisel is for chopping out holes and chases in bricks and blocks. Its fault is a mushroom head — the struck end spreads out into a mushroom shape after enough hammering — and the maintenance is to grind it away and repair or replace as required. A mushroomed head throws steel splinters, which is why it is not left.
The pattern, so you can do it with any tool
Say it in four parts. The fault and the maintenance are where people dry up.
Every answer has the same shape, and once you see it you can build one for a tool you were not expecting:
Use — what it cuts, drives, measures or chops.
Fault — the working end wears out, or the handle comes loose, or the striking end spreads.
Maintenance — replace the consumable part, tighten or replace the handle, grind back the struck end.
Blades and tapes get replaced. Handles get repaired or replaced. Struck ends get ground back. That covers nearly everything on the list.
Safety, which is its own thing
Eye protection and gloves for a tool that throws fragments, and the risk assessment read first. Say both halves.
Using a hand tool safely comes down to two habits: select the right PPE for that tool and that job, and follow the risk assessment and the instructions on use.
Say both. “Wear gloves” on its own is half an answer — the other half is that somebody has already worked out what the risks are and written it down, and your job is to read it.
The four, side by side
Tool
Use
Fault and maintenance
Junior hacksaw
Cutting metal components
Teeth missing on the blade. Replace the blade.
Claw hammer
Inserting and removing nails, general fabrication
Loose hammer head, damaged handle or shaft. Repair or replace.
Tape measure
Measuring components and areas
Loose clasp, damaged or broken tape. Replace it.
Steel chisel
Chopping out holes and chases in bricks and blocks
Mushroom head. Grind it away, repair or replace.
Two more faults worth naming
A blunt edge needs more force, and more force is how a tool slips.
Blunt is a fault in its own right, and the commonest one of all. A blunt chisel or saw does not just work slowly — it needs more force, and more force is how a tool slips. Sharpen or replace.
And select appropriate PPE is a choice made per job rather than a habit: gloves for sharp edges, eye protection for anything that chips or throws. The bolster and the steel chisel both throw fragments, and a lump hammer missing a chisel finds a hand.
The plumber’s own hand tools
Beyond the general list, three you will use every day and which follow exactly the same pattern.
A pipe cutter or pipe slice cuts copper square, which a hacksaw struggles to do. Its fault is a blunt cutting wheel — it stops cutting and starts crushing — and the maintenance is to replace the wheel and keep the thread lubricated.
A deburring tool or a file takes the burr off the cut end. That burr is a real fault, not a cosmetic one: left on, it restricts the flow and can cut into a push-fit seal. Blunt is the fault; replace or re-sharpen is the answer.
An adjustable spanner tightens compression fittings. Its fault is worn jaws or an adjusting wheel that will not hold, and a spanner that slips rounds the nut and skins your knuckles.
💡
Practise saying a tool out loud in four parts — name, use, fault, maintenance. In the task you are talking, not writing, and the people who struggle are the ones who know the tool perfectly well and have never had to describe it.
The tools, what they cut, and the faults that make them dangerous
Read the lesson ▶
Four power tools, named, with what each is used for. Same identification task as the hand tools, and the same trap: knowing what a thing is called is only a third of the answer.
The four
The reciprocating saw drives its blade back and forth. The angle grinder chases walls and cuts metal and masonry.
The battery drill — used for drilling and fixing screws. Cordless, so no lead to trip over and no lead to damage, which is why it is the one that comes out first on most jobs.
The corded drill — used for drilling holes in wood and brickwork. More power than a battery drill and it does not run out, which is what you want going into masonry.
The reciprocating saw — used for cutting through pipes, timber, sheet metal and conduit. The blade drives back and forth rather than round. It is the demolition and first fix saw: it will get through almost anything you point it at, which is exactly why you check what is behind first.
The angle grinder, also called a disc cutter — used for chasing walls and cutting through metals and masonry. Chasing is cutting the channel that pipe or cable is buried in. It is the tool that produces the most dust and the most noise of anything on this list.
The three faults
The task puts a faulty power tool in front of you and asks you to find three things wrong. The answer guide names them, and they are the same three every time because they are the three that matter:
An out of date PAT label. PAT is portable appliance testing — the label carries the date it was last tested, and an expired one means the tool is not to be used.
A damaged lead. A nick in the outer sheath is enough.
A damaged plug. Cracked casing, bent pin, loose cord grip.
All three are things you can see without switching anything on, which is the point — the check happens before the tool is plugged in.
Why these three and not others
All three faults are visible without switching anything on. That is the point of the check.
They are the three that turn a working tool into an electrocution. The lead and the plug are the physical path for a fault to reach you, and the PAT label is the evidence that somebody has checked the inside of the tool, which you cannot do by looking.
A tool failing any of the three is taken out of use and labelled so nobody else picks it up. Not put back on the van to deal with later.
The four tools and their uses
Power tool
Used for
Battery drill
Drilling, fixing screws
Corded drill
Drilling holes in wood and brickwork
Reciprocating saw
Cutting through pipes, timber, sheet metal and conduit
Angle grinder / disc cutter
Chasing walls, cutting through metals and masonry
Three more you will meet
The jig saw cuts curves and shapes in timber and sheet material, with a short blade that moves up and down. It is the saw for cutting a hole in a worktop for a sink.
The circular saw cuts straight lines in timber, fast, with a spinning blade. Powerful and unforgiving — it kicks back if the cut closes on the blade.
And a word about chucks. Most drills hold the bit in a keyless or keyed chuck, but a hammer drill for masonry uses an SDS chuck, where the bit slides and locks in rather than being gripped. That is why an SDS bit will not fit an ordinary drill, and why you cannot put an ordinary bit in an SDS machine.
⚠️
The three faults are an out of date PAT label, a damaged lead, a damaged plug. Learn them as a set of three, because the task asks for three and there are three.
The practices, the checks before you switch on, and the electrical dangers
Read the lesson ▶
You will be handed a 110 V or a 230 V power tool and asked two things: the procedure for using it safely, and the common dangers of electrical tools. Both have short, specific answers.
110 V and 230 V
230 V is ordinary mains — what comes out of a socket at home. 110 V is the site voltage, run through a transformer, and the tools and leads are yellow so you can tell at a glance. It is lower voltage precisely so that a shock from it is far less likely to kill you, which is why construction sites use it.
If you are handed a yellow tool, it is 110 V and it needs a transformer. If you are handed a blue or black one, it is 230 V.
The procedure
The checks come first, before the tool is live: casing, lead, plug and PAT label.
Two steps, and the answer guide wants both:
Preliminary safety checks. Before it is plugged in: casing, lead, plug, PAT label, and the right blade or bit fitted.
Selection of PPE. Chosen for the tool and the job — eye protection for anything that throws material, ear defenders for anything loud, a rated mask for anything that makes dust.
The word preliminary is doing work there. The checks come first, before the tool is live, because a check you do afterwards has already let the thing happen.
The dangers
Yellow is site voltage. Lower precisely so that a shock is far less likely to kill you.Trailing cables: the most likely of the three dangers by a distance, and the easiest to fix.
Three, and again the guide names them:
Trip hazards — trailing cables. The most likely of the three by a distance, and the easiest to fix.
Electric shock — from a damaged lead, a damaged plug, or a fault inside.
Moving parts — disks, drills and blades. Anything spinning or reciprocating will take a finger or catch a sleeve.
The safety checks per tool
Each tool has its own list, and they overlap heavily. The common ones are no damage to the casing, no damage to the flexible cord or plug top, and that it is PAT tested.
On top of that: a battery drill needs to be clean and have the correct battery; a reciprocating saw and an angle grinder need the correct saw blade. The right blade is a safety check, not a convenience — a wood blade in a metal cut snatches.
The checks, tool by tool
Tool
Safety checks
Battery drill
No damage, it is clean, it is the correct battery
Corded drill
No damage to casing, no damage to flexible cord or plug top, it is PAT tested
Reciprocating saw
As the corded drill, plus the correct saw blade
Angle grinder / disc cutter
As the corded drill, plus the correct blade
What protects you electrically
Three things between you and a fault, doing three different jobs. Only one of them is protecting you.
Three things sit between you and a fault, and they do different jobs.
A fuse protects the cable. If too much current flows it melts and breaks the circuit. It is slow, and it is there to stop a fire rather than to save a person.
A Residual Current Device (RCD) protects the person. It compares the current going out with the current coming back, and if some has gone missing — through you, to earth — it cuts off in a fraction of a second. On site, power tools should be fed through one.
A Current Portable Appliance Test (PAT) is the periodic inspection that proves the tool itself is sound inside. The label carries the date; out of date means out of use.
The checks before you start
The order is always the same, and the phrases are worth having:
Select appropriate tool for task. The right tool needs less force, and force is what causes accidents.
Carry out visual inspection. Look for signs of damaged or worn electrical cables — nicks, exposed conductors, taped repairs — and at the casing and plug.
Use appropriate PPE for the tool and the job.
Two situations deserve naming. A damp or wet work area makes every electrical risk worse, because water gives the current a path through you. And power tools and the property’s hard wiring system are a combination to think about before you drill: the hard wiring is buried in the walls and floors you are about to make holes in.
💡
Procedure is preliminary safety checks then selection of PPE. Dangers are trip hazards from trailing cables, electric shock, and moving parts. Two answers, five phrases, and they come up every time.
Matching the bit to the material, and the screwdriver to the screw
Read the lesson ▶
Two identification questions here, both done from pictures or from the real thing. Which material a drill bit is for, and what a screw head is called. Neither is hard; both are lost by people who have used them for months and never learned the names.
Name the bit by the material it is for, and the screw head by its shape.
Drill bits, by what they cut
The question puts six bits in front of you and asks what material each is for. The answers the guide gives are:
Brick or masonry — a masonry bit, with a wider tip brazed onto the end.
Wood — usually a spur point, with a sharp centre point so it does not wander.
Metal — a twist bit, high speed steel.
Ceramic tiles or glass — a spear point, which scrapes rather than cuts so the glaze does not chip.
Concrete and masonry — an SDS bit, for a hammer drill.
Wood or plastic or metal — a general purpose bit that will do all three.
Notice two of the six are masonry answers and one covers three materials at once. The question is about the material, not the bit’s name, so answer with the material.
The three screw heads
The question is about the material, not the name of the bit — so answer with the material.
Three, and the names are exact:
Slotted — one straight slot. The oldest kind, and the one a driver slips out of most easily.
Phillips — a cross, with tapered sides. Designed to let the driver cam out under load, which was deliberate.
Pozi Drive — also a cross, but with four extra small lines between the arms. It grips far better than a Phillips and is what most modern screws use.
Phillips and Pozi Drive, which is the confusion
Look for the four small lines between the arms of the cross.
They look the same at a glance and they are not interchangeable. Look for the four small lines between the arms of the cross — if they are there, it is Pozi Drive.
Using a Phillips driver in a Pozi Drive screw is the commonest way of chewing out a screw head, and once it is rounded off it is a job to get out.
The bits and what they are for
Bit
Material
Masonry bit
Brick or masonry
Spur point
Wood
Twist bit
Metal
Spear point
Ceramic tiles or glass
SDS bit
Concrete and masonry
General purpose
Wood or plastic or metal
Three more bits
A diamond core drill grinds through masonry. A flat bit and a hole saw cut through timber.
Diamond tipped core drills cut large diameter holes through masonry, tile and concrete — the tool for putting a flue or a soil pipe through a wall. The cutting edge is diamond, and it grinds rather than cuts.
A wood boring bit — a flat bit or an auger — makes large holes in timber quickly, which is what you use to get pipe through a joist.
A hole saw is a shallow cylinder of saw teeth on an arbor, with a pilot drill through the middle. It cuts a clean large-diameter hole through timber, plasterboard, plastic or thin sheet metal, and it is what makes the hole for a waste pipe through a cupboard side or a flue through a plasterboard wall. Unlike a core drill it cuts rather than grinds, so it is for softer material — and it comes as a set of sizes on one arbor.
Two more screw heads
Pozidrive is also written as one word; it is the same head as Pozi Drive, and you will see it both ways.
A roundhead screw stays proud of the surface rather than sinking flush, so it can clamp something down. And a mirror screw is a countersunk screw with a threaded hole in the head for a chrome dome cap — used for fixing bath panels and mirrors, where the fixing is on show.
💡
Screw heads: slotted, Phillips, Pozi Drive. Three names, and the marks go to whoever can tell the last two apart.
The fixings to know, why the material matters, and matching them to the wall
Read the lesson ▶
Choosing a fixing is one decision made over and over: what is this surface actually like, and what will hold in it? Get that habit and you can fix to a wall you have never met.
Yellow, red and brown: the colour of the plug tells you the drill bit as well as the screw.
The four pairs
A wall plug goes in brick walls. The plug expands as the screw goes into it and grips the sides of the hole. Masonry is solid, so an expanding fixing works.
A cavity fixing goes in plasterboard. Plasterboard is a thin sheet with nothing behind it, so an expanding plug has nothing to expand against. A cavity fixing works the other way round: it opens out or toggles behind the board and pulls back against it.
A cut clasp nail goes into wooden floor boards. Square-sided and tapered, so it crushes the timber fibres rather than parting them, and grips hard.
A brass screw is for outdoors and external fixings. Brass does not rust, which is the whole reason — a steel screw outside will bleed rust down the wall and eventually fail.
The rule underneath
Every one of those pairs comes from the same question: what is the surface actually like?
Solid and thick, so something can expand inside it — a plug.
Thin with a void behind, so nothing can expand — a cavity fixing.
Timber, which grips a shaft directly — a nail or a wood screw.
Wet, so it will corrode — a material that does not rust.
Work it out that way and you can answer for a surface that is not on the list.
The screw types
Work it out from the surface and you can answer for one that is not on the list.
Alongside the fixings there is a matching question on screws, and four names to know:
Countersunk wood screw — a flat, tapered head that sits level with the surface.
Round headed wood screw — a domed head that stays proud, used to clamp something down, like a pipe clip.
Self tapping screw — cuts its own thread as it goes, for sheet metal.
Plasterboard fixing — the cavity fixing again, in its screw form.
Countersunk and round headed is the pair worth keeping straight: countersunk goes in flush, round headed stays on top.
Plugs and plasterboard fixings, in more detail
Light loads on a self-drive fixing, heavier ones on a toggle or cavity anchor. A radiator or a boiler goes on timber.
Wall plugs are colour coded by size, and the colour tells you the drill bit as well as the screw. The common three are yellow (5 mm hole), red (6 mm) and brown (7 mm). Drill the hole the plug is made for — oversize and it spins, undersize and it will not go in.
Plasterboard has more than one answer, and the weight decides which. A plastic plasterboard plug or a self-drive fixing is for light things — a pipe clip, a small bracket. A spring toggle or a metal cavity anchor opens out behind the board and spreads the load, so it is for light and medium loads. A heavy load such as a radiator, a basin or a boiler goes on the timber behind the board, or on a noggin.
And the honest answer for anything heavy on plasterboard is not a fixing at all: find the timber behind it, or fit a noggin. A cylinder or a boiler goes on structure, never on board.
Fixing to surface
Fixing
Where it goes
Wall plug
Brick walls
Cavity fixing
Plasterboard
Cut clasp nail
Wooden floor boards
Brass screw
Outdoors, external fixings
What decides which fixing
The surface decides most of it, but three other things come into a real choice.
Corrosive properties. Some metals attack each other when they touch and get wet, and some just rust. That is the reason for brass and stainless outdoors, and the reason a steel screw in a damp wall fails while the wall is still fine.
Cost. Brass and stainless cost several times what steel costs. Using them everywhere is waste; using them where it is wet is the job.
Different applications. A fixing that will be seen, a fixing that carries weight, a fixing that has to come out again, and a fixing that will never be touched are four different problems, and the same screw is not the right answer to all of them.
💡
The reason for choosing a screw or a fixing is always the same: it has to suit the surface it is going into. If you can say why as well as which, you have the harder mark as well as the easier one.
Five documents, what each one answers, and how to read a scale
Read the lesson ▶
Nobody starts a job by looking at the pipes. They start by reading, and there are five documents that between them say what is being built, where it goes, how big it is, how it works and when it happens. Each answers a different question, and reaching for the wrong one wastes an afternoon.
The five information sources
The work schedule gives you the sequence of work from start on site to completion of the contract. It is the order and the timing — what happens when, and who is waiting on you.
The site planshows the location of the site. Where it is, how you get in, where things sit on the ground. Not what is inside the building.
The scale drawingshows the size of rooms and the position of equipment, accessories and appliances. This is the one you work from: it is drawn to a ratio, so a measurement taken off the drawing converts to a real measurement on the wall.
The schematicshows how a system works. Not where anything is and not what size — how it connects. A schematic of a heating system tells you what feeds what, with the pipe runs straightened out to make it readable.
Manufacturer’s instructionsdescribe how to assemble or install appliances and equipment. The one document specific to the thing in the box, and the one that overrides your habits.
The pair that gets confused
Same bathroom, two drawings. The scale drawing answers WHERE and HOW BIG; the schematic answers HOW IT WORKS.
Scale drawing and schematic. Both are drawings of the same building and they answer different questions. A scale drawing is about where and how big. A schematic is about how it works. If the question is about sizes or positions, it is the scale drawing; if it is about how a system operates, it is the schematic.
Reading a scale
Five documents, five different questions. Reaching for the wrong one wastes an afternoon.
A scale is written as a ratio, and it tells you how many real millimetres one drawn millimetre stands for.
1:50 — one on the drawing is fifty in the building. Common for a room layout. So 40 mm measured off the drawing is 2000 mm on the wall.
1:100 — a whole floor plan.
1:20 or 1:10 — a detail, like a plant room or a bathroom.
Two habits are worth forming now. Always work from a written dimension if there is one, because a printed drawing may have been scaled up or down on a photocopier and the ratio no longer holds. And check the ratio on every sheet: a set of drawings often mixes 1:50 and 1:20 without saying so twice.
The job specification
Alongside the drawings there is a job specification — the written half of the information. It says what materials and standards are to be used where the drawing only shows position and size. If the drawing says a radiator goes there, the specification says which radiator.
Which is the answer to the question apprentices ask most: what do I do when the drawing and the spec disagree? You do not choose. You ask, and you get the answer in writing, because one of the two is out of date and somebody needs to know which.
The five sources
Source
Purpose
Work schedule
The sequence of work from start on site to completion of the contract
Site plan
Shows the location of the site
Scale drawing
Shows the size of rooms, position of equipment, accessories and appliances
Schematic
Shows how a system works
Manufacturer’s instructions
Describe how to assemble or install appliances and equipment
The eight stages of building, and where first and second fix sit in them
Read the lesson ▶
Two ways of arriving at a job, and they could not be more different. On a new build you are one trade in a sequence that has been planned for months. In an existing house you are on your own in somebody’s home, working round what is already there.
On a new build you are one trade in a sequence that was planned months ago.
The eight stages of construction, in order
The order is not arbitrary — each stage needs the one before it finished — so learn the reasons and the order comes with them.
Setting out structure position. Marking on the ground where the building goes. Nothing can start until this is right.
Laying building foundations. The base goes in before anything is built on it.
Brick walls to roof line. The walls go up off the foundations, as far as where the roof will sit.
Installing roof structure. The roof goes on the walls, and the building becomes watertight — which is what lets the inside trades start.
1st fixing of pipes and cables. Yours. In while the walls and floors are still open.
Dry lining / plastering internal walls. The walls are closed up over your first fix.
Fitting kitchen units. Second fix work, onto finished walls.
Testing and commissioning systems. Last, because you cannot test a system until it is complete.
How to hold the order
Outside in, then bottom up. The line between first and second fix is the plasterer.
Outside in, then bottom up. Ground, foundations, walls, roof — that is the shell, in the only order it can be built. Then first fix, plaster, second fix, test — and that is the order every trade works in on every job, so it is worth knowing anyway.
The two places people slip: putting first fix after plastering, which is backwards, and putting testing anywhere but last.
First fix and second fix
1st fix requirements are everything that has to be in before the walls and floors are closed up: pipework run and clipped, holes made good, and the system left ready to be tested. Anything forgotten here comes out of a finished wall later.
2nd fix tasks are everything that goes on afterwards, once the plastering and decorating are done: taps, radiators, sanitaryware, and the connections that make the system work.
The line between them is the plasterer. Before the plasterer is first fix; after the plasterer is second fix. That is the whole distinction and it holds for every trade on the job.
Working in an existing property
Protect the property before a bag comes in. In an existing home the order of work is yours to set.
Almost nothing above applies. There is no sequence, no programme and nobody else on site — and instead there is a family, a carpet, and forty years of somebody else’s pipework in the walls.
The order becomes yours to set, and it runs roughly:
Survey what is there. What system is it, where does it run, where is the stop valve, what is the floor made of.
Agree the work and the disruption with the customer, including what has to come up and what will not go back looking the same.
Protect the property — dust sheets down, and a walk round noting existing damage, before a bag comes in.
Isolate, then work, leaving the property usable at the end of each day where you can.
Test, clean up and hand over, showing them what you have done and where the isolation points are.
The difference that matters most: on a new build a mistake costs time, and in somebody’s house it costs their evening. A family with no water overnight is not an inconvenience to them, it is the whole job.
What floors are made of, and the seven steps of getting a board up
Read the lesson ▶
A plumber spends more time under floors than any other trade, because that is where the pipework runs. Which floor you are standing on decides whether that is possible at all.
The two floor types
Solid, or concrete, floor. Poured, no void underneath. You cannot lift it, so pipework goes in a chase, in a screed, or above the floor.
Wooden, chipboard or sheet flooring. Boards or sheets on joists, with a void underneath. This is the one you lift, and it is where pipework and cable run.
The difference matters to a plumber more than anyone: one of them you can get under, the other you cannot.
What is laid on top
One of them you can get under. The other you cannot, which decides where the pipework goes.
The two types above are the structure. What is over them changes the job, and it is the part the customer cares about.
Wooden floor boards are the easiest: individual boards, tongued and grooved, and one can be lifted and put back.
Chipboard sheets are large, tongued and grooved on all four edges, and screwed or nailed down. You cannot lift a sheet — you cut a section out over the joists and screw it back, and it never quite disappears.
Carpets are rolled back, off the area, before anything else. Grippers round the edge come up with them; putting a carpet back badly is a job in itself.
Vinyl floor coverings are stuck down, usually in one continuous sheet and often under the units as well. Lifting a board underneath means cutting the vinyl, and it rarely goes back invisibly — so the conversation with the customer happens before the knife comes out.
Laminate flooring is clicked together as a floating floor. It has to be taken up from the edge of the room inwards, in order, and put back the same way. You cannot lift one plank out of the middle, and finding that out halfway through is expensive.
Lifting a floorboard, in order
De-nailed and barriered off. When the boards go back, screws rather than nails, so the next person can lift them.
Seven steps. Each one is there because of the step before it, so the reasons carry the order.
Roll back carpets. Off the area first, so nothing gets cut or dirty.
Check for pipes and cables. Before any blade touches the board. This is the step that stops you cutting through what you came to work on.
Cut tongue joint and groove joint. Boards are tongued and grooved into each other; until the joint is cut, the board is locked to its neighbours and will not come up.
Cross cut the board. Cut across it, over a joist, so the cut end has something to sit back down on.
Lift the board to expose the joists. Now it will come.
De-nail the boards and joists. Pull the old nails out of both, so nothing is left standing up.
Barrier off the exposed open area to protect the customer. Last, because the hole only exists once the board is out.
The two that get swapped
Each step is there because of the one before it, so the reasons carry the order.
Checking for pipes and cables is second, not fifth. It goes before you cut, not after you have lifted the board and can see — because by then the damage is done.
Cutting the tongue and groove comes before the cross cut. Free the board along its length first, then cut across it.
The tools for it
A pad saw or a flooring saw for the cross cut, a bolster and a claw hammer to lift and de-nail, and a multi-tool for the tongue if you have one — it cuts a clean line without a plunge into whatever is beneath. And putting it back down: screws rather than nails, so the next person can get it up without splitting it.
The order, to learn
#
Step
1
Roll back carpets
2
Check for pipes and cables
3
Cut tongue joint and groove joint
4
Cross cut the board
5
Lift the board to expose the joists
6
De-nail the boards and joists
7
Barrier off the exposed open area to protect the customer
What is behind the wall, the hole you have made, and the loft above it
Read the lesson ▶
Working in an existing dwelling has its own set of risks, and none of them exists on a new build. The building is full of things somebody else put there, and there is a family living round you while you work.
A family lives round you while you work, and none of these risks exists on a new build.
Drilling into existing pipes and cables
Sweep, mark, and sweep again across the other axis. A socket on the wall means something runs to it.
The one that costs the most and happens the most. A wall you are about to drill may have a cable buried in it, a pipe chased into it, or both, and you cannot see either.
Three things reduce it to almost nothing:
Use a cable and pipe detector. A cheap one finds live cable and metal; a better one finds cable, metal and timber studs. Sweep the area, mark it, and sweep again across the other axis — a single pass along one direction misses a cable running the same way.
Know the safe zones. Cables in a wall are supposed to run vertically or horizontally from a socket or switch, and within 150 mm of the corner or the ceiling. So directly above and below an outlet is exactly where not to drill — and “supposed to” is doing a lot of work in an old house.
Look at what the room tells you. A socket on the other side of the wall, a radiator below, a boiler above — all of them have something running to them.
And if you do hit something: stop, isolate, and tell somebody. A nicked cable that still works is a fire waiting for a year to happen.
The open floor
Detector before the hole, a look before the cut, a light before the step.Your hole, in their house. Barrier it, and never leave it open overnight.
Once boards are up you have made a hole in somebody’s house, and it is your hole. The risks are:
Falling through the open gaps — the obvious one, and far worse in a house with children or an elderly person in it.
Nails penetrating through the board — which is why you de-nail rather than leaving them standing up.
Blocking access routes — lifted boards, tools and pipe across a hallway in somebody’s home.
Barrier it, cover it when you break, and never leave an open floor in an occupied house overnight without something solid over it. If the job runs to a second day, screw the boards back down.
Working in a loft space
Step on the joists and nowhere else. What looks like a floor is a soft layer over nothing.
Much of a plumber’s under-floor work has a mirror image above the ceiling, and a loft is the least forgiving place in the house.
No boarded floor in most houses. The ceiling below is plasterboard and it will not take your weight — step on the joists, and know where they are before you move.
Insulation hides the joists, which is exactly the problem: what looks like a floor is a soft layer over nothing.
No fixed lighting. Take a light, and take one that leaves both hands free.
Low headroom, nails through the roof felt, and no ventilation in summer.
Asbestos in the insulation or round an old flue, in anything pre-2000.
Board out before you start moving about, and never work in a loft alone in a house where nobody knows you are up there.
The pattern
Every risk on this page is the same shape: something is hidden, and you find it with the tool rather than with the drill. A detector before the hole, a look before the cut, and a light before the step.
Pipework has to cross joists, and a joist is holding up the floor somebody is standing on. There are rules about where you may cut one, and this is one of the few places on the course where getting it wrong weakens a house.
A joist is holding up a floor somebody stands on, so where you may cut it is set by rules.
Which law covers it
The Building Regulations — Part A, the part dealing with structure. Not the Water Regulations, and not the wiring regulations. Anything to do with whether the building stands up is Part A.
Why there are rules at all
A joist carries load along its length, and it does that by being deep. Cut into it and you take strength out. Where you cut matters as much as how much:
The top and bottom edges do the most work. A notch in the top edge is the most damaging cut you can make.
The middle, top to bottom, does the least. A hole drilled through the centre line takes out very little strength.
Near the ends, over the supporting wall, the joist is doing less bending, so cuts are tolerated closer in.
In the middle of the span the joist is working hardest, and that is where cuts do most harm.
Which gives the rule of thumb: notch shallow and near the ends; drill through the centre, not the edges.
Notch shallow and near the ends; drill through the centre, not the edges.
Notch or drill
A notch is a cut into the edge of the joist, open at the top. Easy to drop a pipe into, and the more damaging of the two, because it removes material from where the strength is.
A hole is drilled through the middle. More work — you have to thread the pipe through — and much kinder to the joist.
Given a choice, drill. And on an engineered joist, an I-beam or a metal web, the rules are completely different and set by the manufacturer: never cut one on the basis of what you know about solid timber.
What this means on the job
You will want to run pipe across joists constantly, and it is one of the few places on this course where getting it wrong weakens somebody’s house. If a run cannot be done inside the rules, the answer is not a deeper notch — it is a different route, or the structural engineer, who is the one who decides what may be cut.
At Level 2 you learn the permitted zones as actual measurements, expressed as fractions of the joist depth and of the span. At Level 1 the point is that the limits exist, that they come from the Building Regulations, and that they are not yours to bend.
The limits themselves
The Building Regulations set a maximum depth of notch and a maximum size of holes, both expressed as fractions of the joist depth, and both restricted to a zone measured from the support.
At Level 1 you are not asked for the figures. What you are asked for is that the limits exist and where they come from. What is worth carrying now is the shape of them: a notch may only be shallow and only near the ends; a hole may be larger but must be on the centre line and away from both the very end and the middle of the span.
At Level 2 you learn the fractions and the zones as numbers, and you will use them constantly. Getting the principle straight now makes that a formality rather than a new topic.
💡
The law is the Building Regulations. The working rule is drill through the middle, notch shallow and near the ends — and when in doubt, ask the structural engineer, because it is their decision and not yours.
📚
Towards Level 2The limits are fractions, and they are worth meeting now because you will use them constantly. A notch may be no deeper than one eighth (0.125) of the joist depth, and only between 0.07 and 0.25 of the span from a support. A hole may be up to one quarter (0.25) of the depth, drilled on the centre line, between 0.25 and 0.4 of the span — and holes must be at least three diameters apart, centre to centre. So on a 200 mm joist that is a 25 mm notch or a 50 mm hole. A hole may be twice the size of a notch because it goes through the middle, where the timber is doing least work.
Behaving well in someone's home, and working alongside everyone else
Read the lesson ▶
Four marks, two questions, and both are about behaviour rather than technique. They are also the two most useful things on the unit for anyone who ends up working for themselves.
Working in an occupied dwelling
Ask the customer to move the valuables. If you pick one up and it breaks, it becomes your responsibility to pay for.
Someone lives here. They have let you in, and they will judge your firm on what the place looks like at four o’clock. The guide names three actions and the question wants two:
Lay dust sheets. Before anything else, over the floor and over anything that stays in the room.
Ask for valuable items to be removed. Ask — do not move them yourself. If you pick up an ornament and it breaks, it becomes your responsibility to pay for it.
Check and record existing damage or marks. Walk the room with the customer before you start and note what is already there. This is the one people skip, and it is the one that saves you: a mark you did not make is impossible to argue about afterwards if it was written down before.
Why recording damage matters more than it sounds
Two minutes and a note at the start settles an argument you could not otherwise win.
Most disputes in domestic work are not about the plumbing. They are about a scratch on a floor or a chip on a door frame, and about nobody being able to say whether it was there on Monday. Two minutes and a note at the start settles it.
Working with other trades
Tell the carpenter where your pipes run before the floor goes down.
Two marks, and the guide gives three answers: good communication, resolving disputes, and site meetings.
Good communication is telling people what you are doing before you do it. Where your pipes run before the carpenter boards. When you need access. What you have left uncovered.
Resolving disputes means sorting a disagreement out on site, between the two of you, rather than letting it become a complaint upwards. Most of them are about access and sequence, and most of them can be settled in a minute.
Site meetings are where the programme gets agreed and where problems get raised in front of everyone who is affected. Turning up to them, and saying something when you are there, is how you stop being the trade everybody else works around.
Why this is on a plumbing course
Both questions want two, and there are three of each. Learn all three and you have one in reserve.
Because your work sits inside other people’s. The plasterer covers it, the carpenter boards over it, the electrician shares the wall with it. Nearly everything that goes wrong on a site goes wrong at the joins between trades, and the joins are managed by talking.
The answers
Occupied dwelling: lay dust sheets; ask for valuable items to be removed; check and record existing damage or marks.
Other trades: good communication; resolving disputes; site meetings.
Conduct in somebody’s home
Protecting the customer’s property is the heading all of this sits under, and checking for pre-installation damage is the specific step that saves arguments — the walk round before you start, with the marks noted.
Beyond the property there is how you behave in it. Using appropriate language and behaviour means what it says: it is somebody’s home, with their family in it, and the way a van full of tradespeople talks to each other is not how you talk in a customer’s kitchen.
Dress code and timekeeping sound trivial and are the two things customers actually comment on. Clean workwear, and turning up when you said you would — or ringing when you cannot.
Methods of communication
Methods of communication is its own topic: face to face on site, by telephone, in writing by email or text, and through drawings and the job specification. Which one you choose matters. Anything that changes the job — a variation, an extra, a delay — goes in writing, because a verbal agreement nobody wrote down is worth nothing when the invoice is questioned.
Passing on information is the part apprentices are most involved in, and the easiest to get wrong. If a customer tells you something while your supervisor is out of the room, it has not been told to the firm until you pass it on.
💡
Both questions want two, and there are three of each. Learn all three and you have one in reserve if one goes out of your head under exam conditions.
Six tools, what each is for, and keeping them fit to use
Read the lesson ▶
Six hand tools do almost everything on this unit, and the whole of the work is cutting plastic square, deburring it, marking how far it goes into the fitting, and setting the run to a line.
Cutting square, deburring, and inserting to the line: that is key for drainage.
The six tools, and what each is for
Multipurpose saw — cutting waste pipe and guttering. A fine-toothed saw that will go through plastic without tearing it or wandering off the line.
Plumb line — setting out a vertical line. A weight on a string: gravity gives you true vertical, and it is what you drop down a wall to set a downpipe.
String line — setting out a horizontal line. Pulled tight between two points, it is what you set the gutter brackets to.
Those two are the pair that get swapped. Plumb line hangs, so it gives vertical. String line stretches, so it gives horizontal.
Deburring tool — removing rough internal edges left by the saw.
File — removing rough edges internally or externally. Broader than the deburring tool, and it is what you use to take the sharp corner off a cut end so it slides past a seal instead of shaving it.
Screwdriver — for the screws in brackets. Every fascia bracket and every pipe clip on this unit is screwed to something.
Why the deburring matters more here than anywhere
One hangs and one stretches. That is the whole of the difference.
Every joint in this unit seals on a rubber ring or on solvent, against the outside of a plastic pipe. A burr or a sharp edge on the cut end does not just look untidy: it drags across the seal as the pipe is pushed home and cuts a groove in it. The joint holds when you test it and weeps six months later.
That is why the deburring tool and the file are on the tool list of a unit that is otherwise about fittings. The sequence is always the same: measure, cut square, deburr, chamfer, then joint.
Chamfering is the step people skip. A deburred end is smooth; a chamfered end has a slight taper on the outside corner, and it is the taper that lets the pipe enter the seal without lifting it. On a push fit joint it is the difference between a joint that lasts and one that does not.
Maintenance requirements
Every joint on this unit seals on the outside of the pipe. The cut end decides whether it holds.A tool used on an existing drain gets washed before it goes back in the bag.
Four things, and they apply to every tool on the list:
Ensure tools are clean and safe to use. On this unit that has a second meaning — a tool used on an existing drain gets washed before it goes back in the bag.
Ensure all cutting edges and blades are sharp. A blunt saw wanders off square, and a square cut is the whole point.
Ensure all moving parts are well oiled and move easily.
Ensure any damaged parts are repaired or renewed.
Learn all four. The third is the one that never comes when you want it.
📚
Towards Level 2Unit 209 keeps every tool on this page and adds the testing kit: a manometer to read the pressure in a drainage system, hand bellows to put it there, and a set of drain plugs to seal the pipe while you do. The setting-out pair carry straight through — a string line still sets a gutter, and it still sets the fall on a soil branch.
What is in an existing drain, how it gets into you, and what stops it
Read the lesson ▶
Everything else on this unit is about plastic and fittings. This lesson is about the one thing that makes drainage different from every other kind of plumbing: with the exception of rainwater pipework, an existing drainage system contains sewage.
Apart from rainwater pipework, an existing drain contains sewage.
What is actually in there
Weil’s disease is carried in rat urine, so it is a risk anywhere rats have been, which is most drains.
Five things worth being able to name, because they are why the rules exist:
Hepatitis — a liver infection.
Tetanus — caused by poisons produced by bacteria found in sewage, and the reason a cut matters.
Bacterial infections such as E. coli.
Leptospirosis, also known as Weil’s disease — carried in rat urine, so it is a risk anywhere rats have been, which is most drains.
Parasites of various kinds living in sewage.
None of these announces itself. There is no smell that tells you which drain is the bad one, and nothing hurts at the time.
Three ways in
Wash before every break, a smoke break included. Swallowing it is the route chemicals and bacteria often take into your body.
They get into you in exactly three ways, and each one has its own answer:
Inhaled — breathing in spray, dust or aerosol from a drain being cleared. Answer: a mask or respirator, and ventilation.
Ingested — taken in through the mouth, and almost never deliberately. It is touching your face, eating a sandwich, or rolling a cigarette with hands that have been on a soil pipe. Answer: do not eat, drink or smoke in a contaminated area, and wash before every break — including a smoke break.
Through a cut or graze — any break in the skin, however small. Answer: waterproof gloves, and cover cuts before you start.
That second one is worth sitting with, because it is the route people actually take. Almost nobody gets ill from being splashed. They get ill from a sandwich.
The PPE for drainage work
The middle one is the route people actually take. Almost nobody gets ill from a splash.Everything waterproof: boots, gauntlets and overalls, with a mask where there is spray.
Ordinary site PPE is not the same as drainage PPE, and the difference is that everything here has to be waterproof:
Feet — sturdy waterproof boots. Not trainers.
Hands — waterproof gloves or gauntlets. Leather gloves soak it up and hold it against your skin, which is worse than nothing.
Respiratory system — a face mask or respirator where there is spray or dust.
Torso, arms and legs — overalls, covering the skin.
Face and eyes — goggles or a visor, because a drain that lets go does so upwards.
And the rule that goes with it: the more sewage there is, and the longer you are near it, the more precautions you take. Clearing a blocked gully is not the same job as replacing a bath waste.
After the job
Four habits, and they are the ones that actually keep people well:
Wash immediately with soap and water — and under your fingernails.
Wash the tools and equipment you used.
Change your clothes before leaving the area if you can.
Wash thoroughly before any break, every time.
Rainwater is not exempt
Gutters and downpipes carry no sewage, and they are still not clean. They are full of bird droppings, which carry parasites that can damage your eyes and lungs — and clearing a blocked gutter puts the whole lot straight into the air in front of your face. Eye protection and a mask on a gutter clearance is not being careful; it is the job.
The other hazards
Three more that come with drainage work rather than with the drain itself:
Weight. Old gutters, downpipes and soil pipe were made of cast iron, and a length of it is far heavier than it looks. Assess it, get help, and never cut one while somebody is underneath.
Working at height. Gutters, downpipes and soil stacks are all outside and up. Use a tower or a scaffold rather than a ladder for anything that takes both hands.
Confined spaces. A manhole counts as a confined space, and so does a duct or an under-floor void. You do not enter one on your own judgement.
The three safety requirements
Asked what the safety requirements are for using the tools on this unit, the three answers are:
Correct use of tools — used per the manufacturer’s instructions, and for the job they were made for.
Tools well maintained and in good condition.
Appropriate PPE — which on this unit means the waterproof list above rather than the usual one.
Why a gutter exists, the four profiles, and the seven fittings on a run
Read the lesson ▶
A gutter looks like the least important thing on a house and it is protecting the most important. Without one, rain runs off the roof, down the wall and into the ground at the base of it — where it erodes the soil and gets into the foundations. Everything else on this page follows from that job.
Without a gutter the rain runs down the wall and into the ground at its base, where the foundations are.
The four gutter profiles
Gutter can be made of almost any rigid material, and used to be cast iron, asbestos or lead. Now it is almost always plastic, and it comes in four shapes:
Half round — the common one, a semicircle.
Square — square section, a more modern look.
Ogee — a decorative moulded front, flat at the back so it fits against the fascia. Common on older and traditional houses.
Deepflow, or high capacity — deeper than half round, for a big roof or a heavy rainfall area.
Which you fit is decided by two things: what is already on the house, and how much water the roof will shed. A larger roof needs more capacity, which means a deeper gutter, more downpipes, or both.
The profiles pair with the downpipe shape. Ogee and square gutter take square downpipe; half round and deepflow take round. Rainwater pipe is normally about 68 mm in diameter. Adaptors exist to change from one to the other, and needing one usually means somebody ordered the wrong thing.
The seven fittings, along the gutter
Ogee and square take square downpipe. Half round and deepflow take round.
Union bracket — joins two lengths of gutter and supports them at the same time. It is a bracket and a joint in one, which is why it has both words in the name.
Running outlet — takes the water out of the gutter and down into the downpipe. It sits along the run rather than at the end, which is what running means here.
External stop end — closes the end of a gutter, fitting over the outside of it.
Internal stop end — closes the end of a gutter, fitting inside it. Which one you need depends on whether the gutter ends at a bare edge or runs into something.
The two stop ends are the pair people mix up. External goes over the outside; internal sits inside.
And down the wall
Downpipe connector — joins lengths of downpipe together.
Offset bend — also called a swan neck. It brings the downpipe back from the gutter line, which overhangs the roof, to the face of the wall. Every house with an overhanging eave needs one at the top of every downpipe.
Shoe — the last fitting at the bottom, which turns the water away from the wall and into the gully. Leave it off and the water runs straight down the brickwork and into the ground at the base of the wall — which is the exact problem the gutter was fitted to prevent.
Reading a run
Along the gutter, then down the wall. Read a real run and the order tells you itself.
Work along a real house and the order tells you itself: stop end, brackets, union brackets where lengths meet, a running outlet above the downpipe position, more brackets, stop end. Then offset bend, downpipe, clips, and a shoe at the bottom.
📚
Towards Level 2Unit 209 adds the sizing, and it is arithmetic rather than habit: you work out the effective roof area the gutter is draining, apply a rainfall intensity, and choose a gutter profile and a number of downpipes to carry it — rather than fitting 112 mm half round because that is what is on the van. It also picks up the gully your shoe discharges into, and where that water goes afterwards, which is where below-ground drainage begins.
What holds the gutter up, and what holds the downpipe on
Read the lesson ▶
A gutter full of water is heavy, and it is fixed to the outside of a building where nobody looks at it for twenty years. What holds it up is worth knowing properly.
A full gutter is heavy, and nobody looks at what holds it up for twenty years.
Holding the gutter
Three brackets for three situations, and a clip that matches the pipe. A round clip on a square pipe holds at four points and rattles.The union bracket is a support and a joint at once, so the joint never sits unsupported between brackets.
Guttering fascia support brackets are the standard answer and the usual fixing. They screw to the fascia board — the board fixed to the ends of the rafters along the edge of the roof — and the gutter clips into them.
The written standard spells the word facia: guttering facia support brackets. Do not be thrown when you read it that way.
Two others turn up when there is no fascia to screw to, or when the roof is already tiled:
Drive-in brackets — a spike driven into the timber or the mortar joint, for a building with no fascia board at all.
Side fix rafter brackets — screwed to the side of the rafter itself, used where the gutter has to sit under the tiles rather than in front of them.
The union bracket from the last lesson belongs on this list too: it is a support and a joint at once, so a joint never sits unsupported between two brackets.
Holding the downpipe
A one-piece clip with a lug either side, screwed into plugs in the brick and not into the mortar joint.
Downpipe clips fix the downpipe to the wall, and they come in the two shapes the downpipe does: round downpipe clips and square downpipe clips. Match the clip to the pipe — a round clip on a square pipe holds at four points and rattles in the wind.
Most are a one-piece clip: a band that wraps round the pipe with a lug either side, screwed to the wall. The screws go into plugs in the brickwork, not into the mortar joint, and they are brass or stainless because they are outside for the life of the house.
Where they go
Downpipe clips go at every joint and at the top and bottom of the run, and they hold the pipe a little way off the wall so water running down the face of it can get past.
And leave the clip slightly loose rather than crushing the pipe into it. Plastic downpipe expands in the sun exactly the way gutter does, and a clip done up hard is the thing it bows against.
Three numbers, one reason, and the order the job is done in
Read the lesson ▶
Three figures decide whether a gutter works, and all three are the kind of thing you either know or you get wrong for the life of the building.
Bracket spacing
The maximum recommended spacing for fascia brackets is 1.0 m.
A metre is easy to picture: a standard gutter length is four metres and it wants five brackets.
Put a bracket within 150 mm of every joint, every stop end and every outlet as well. Plastic gutter is floppy and it sags between supports exactly the way plastic pipe does — and a sagging gutter holds standing water, which is what makes a gutter smell, grow things and freeze solid in January.
The gradient
The fall for plastic rainwater guttering is 1:600.
That means one unit of drop for every six hundred along — a millimetre for every 600 mm. Over a ten metre run it is about 17 mm, barely more than the thickness of a fascia board, and far less than people expect.
A gutter can technically be fitted level, and 1:600 is what is recommended, because a level gutter holds a film of water along its whole length and anything that lands in it stays there.
Set it with the string line: mark the high end, mark the low end, pull the line between them, and set every bracket to it.
The expansion gap
Where two pieces of guttering join, a gap is left — about 10 mm. The reason: to allow the gutter to expand when it is heated by the outside air temperature.
This is worth understanding rather than memorising, because it is the same fact as the clip spacing. Plastic moves a great deal with temperature — a black gutter in July is far hotter than the air around it, and a four metre length can grow several millimetres. Butt it hard against the next one and it has nowhere to go, so it bows out of the brackets, lifts, and eventually splits at the joint.
Every union bracket and stop end has a moulded insert gutter to here mark inside it. Bring the gutter up to that line rather than pushing it fully home — the gap it leaves behind is the expansion allowance, already worked out for you.
And note the trap in it: the weather does not change where the gutter sits. The line is about 10 mm short of the stop, and that 10 mm is the allowance. Stop short of the line and the gutter has less to hold on to and can pull out of the joint; push past it and there is nowhere for it to grow. Fit to the line in January and in July alike.
The order of work
A metre between brackets, 150 mm from every joint, and a fall of 1 in 600.
Highest point first, because everything falls away from it.
Check the tower or scaffold before you go up it.
Fix the highest bracket first, at the end furthest from where the downpipe will run.
Fix the running outlet at the low end, above where the downpipe drops.
Pull a string line between the two and check the fall.
Fix the intermediate brackets to the line, at maximum 1.0 m centres.
Clip the gutter in, to the expansion mark at every joint.
Offset bend, downpipe, clips, shoe.
Test it — a bucket of water at the far end, and watch the whole run.
📚
Towards Level 2The visual inspection of a finished rainwater system checks four things, and they are the four numbers on this page: every joint and fitting fitted correctly and to its expansion mark, a fall along the gutter towards the outlet, fascia brackets no more than 1.0 m apart, and downpipe clips at the right spacing for 68 mm pipe. Then the water test: pour it in at the highest point and watch every joint on the way down.
Why each appliance gets the size it does, and the plastics that look identical
Read the lesson ▶
Three sizes cover almost all of domestic drainage, and they are not arbitrary. Each is chosen for what the appliance actually discharges — how much, how fast, and whether there is anything solid in it.
The three sizes
Size
Used on
32 mm
Wash basin
40 mm
Bath, sink, shower, washing machine, dishwasher
110 mm
WC, and the soil stack
Bath 40 mm, wash basin 32 mm. That is the pairing to have cold, and 21.5 mm turns up as well, for an overflow.
Why each appliance gets what it gets
The 110 mm soil stack carries solids, which is why it is nearly three times the size of the next pipe down.
Work through it and the table stops needing to be memorised:
A wash basin holds very little and nothing has to leave in a hurry. 32 mm.
A bath holds eighty litres. It does not need to empty instantly, but there is a lot of it. 40 mm.
A shower tray is shallow, so water has to leave as fast as it arrives or it comes over the lip. 40 mm.
A kitchen sink carries food particles and grease, which will settle out of a slow narrow run. 40 mm.
A washing machine or dishwasher pumps out in bursts, and a dishwasher carries food debris too. 40 mm.
A WC has to move everything in the bowl in one go, solids included. 110 mm.
110 mm is the odd one out and it is not really a waste at all — it is soil pipe, carrying the WC and the stack. 50 mm and 82 mm exist and turn up less often.
The plastics, which all look the same
Each size is chosen for what the appliance discharges, not by habit.Colour tells you nothing. The plastic type decides how you may join it.
Waste pipe comes in several plastics, and they can all be made black, white, grey or brown, so colour tells you nothing. The differences matter because they decide how you may join it.
Polypropylene (PP) — made to a slightly different external diameter from the others, and it can only be joined by push fit or compression. Solvent will not touch it. Most push fit waste is PP.
ABS — can be joined by any of the three methods, though it will not fit a push fit fitting made for PP.
PVC, and its relatives uPVC and MuPVC — the most common discharge pipe, joined by any method, and with rather better resistance to sunlight.
The practical consequence is one line worth carrying: if it is polypropylene, solvent cement is not an option and a PVC push fit fitting will not seal on it either. Read the pipe before you reach for the tin, because the joint will look perfect and fail on the test.
Copper and cast iron drainage still exist, on old and listed buildings, and below ground you will meet clay. On a new build it is plastic throughout.
The shapes, the special ones, and why the curves are swept
Read the lesson ▶
Waste fittings carry low pressure water using nothing but gravity, and that single fact explains their shape.
No pump and no pressure: only gravity, and the fall you give the pipe.
Why the curves are gentle
Gravity has no energy to spare. That one fact explains the swept curves, and the rule that the pipe never gets smaller in the direction of flow.
Waste fittings are made with smooth sweeping curves rather than sharp corners, because water moving under gravity has very little energy and anything that slows it down lets solids settle out.
Tighter fittings exist — a knuckle bend turns 90° in almost no space, against a swept 90° bend that takes a wide curve to do it. Use the tight one only where there is genuinely no room, and never on a run carrying anything but clean waste.
The ordinary shapes
The tee is swept in the direction of flow, so the branch joins pointing downstream.
The same family you know from pressure pipework, and each comes in all three jointing types — push fit waste, compression and solvent weld:
Straight coupling — joins two lengths in line.
Elbow — turns a corner. 90° swept, 90° knuckle, or 45°.
Tee — brings a second appliance into the run. Swept in the direction of flow, so the branch joins the main run pointing downstream rather than straight at it.
Reducer — steps 40 mm down to 32 mm.
The ones that belong to drainage alone
Strap on boss — a saddle that straps around a soil pipe and gives you a boss to connect a waste into. It is what you use to bring a basin waste into an existing stack without cutting the stack out and fitting a new branch.
Plug fittings, or blanking caps — they cap an unused boss or a spare inlet, and every stack has one or two. A stack with an open boss is a stack venting drain air into a cupboard.
Soil manifold — a fitting with several inlets, for bringing more than one waste into the stack at the same level without a row of separate bosses.
The reducer is the one to think about
You may step a pipe up in the direction of flow. You must not step it down.
A 40 mm bath waste reduced to 32 mm before the stack will block, and it will block with hair and grease at exactly the point you cannot reach. The rule is simple and absolute: the pipe never gets smaller in the direction the water is going.
📚
Towards Level 2Everything above connects into a soil stack, and there are four types. A primary ventilated stack is the common one — a single trunk with branches off it, vented at the top through the roof. A secondary ventilated stack has a second pipe running parallel to add ventilation. A branch ventilated discharge stack vents the branches as well, and is the least likely of all to lose a trap seal. A stub stack does not vent to atmosphere at all and is fitted with an air admittance valve instead — the shortest type, and the one you meet in a downstairs cloakroom. The stack is thought of in two halves: the wet part, where water flows, and the dry vent above the highest branch.
Push fit, solvent weld and compression — and when each is the right one
Read the lesson ▶
Three methods: push fit, solvent weld and compression. Knowing all three is a list; knowing when each is used is the job.
Push fit
The pipe pushes into a socket holding a rubber ring seal. Quick, no tools, and it can be taken apart again.
Two things matter. Cut square, deburr and chamfer — the cut end has to slide past the seal without cutting it. And do not push it fully home: push it to the stop, then pull it back about 10 mm. That gap is the expansion allowance, and it is the same idea as the gutter joint.
A silicone lubricant on the pipe end makes it go in without dragging the ring out of its groove. Never use oil or grease — it attacks the rubber.
Solvent weld
Not a glue. The cement dissolves both surfaces, and they set as one piece of plastic.
Not a glue. The cement dissolves the surface of both the pipe and the fitting, they flow together, and when the solvent evaporates it is one piece of plastic. That is why it is called welding, and it is why the joint is stronger than the pipe.
The order matters, and the cement dries fast enough that hesitating ruins the joint:
Cut square, deburr and chamfer. Clean both surfaces with the cleaner, which removes the shine as well as the dirt.
Dry-fit and mark the pipe and the fitting, so you know how far it goes in and which way round it points.
Apply cement to the inside of the fitting.
Apply cement to the outside of the pipe end.
Push together with a quarter turn to spread the cement evenly, line up the marks, and hold firmly for at least 30 seconds.
Because it is rigid it has no expansion allowance at all, so a long solvent welded run needs an expansion coupling built into it.
And it only works on the right plastics: ABS and the PVC family, never polypropylene.
Compression
Hand tight means hand tight. Grips on a plastic nut distort the washer and split the thread.
A nut, a rubber washer and a body. Deburr the pipe with a file, push it in, and tighten the nut firmly by hand — the nut squashes the rubber seal into the gap and that makes the seal.
Hand tight is the instruction and it means it. A plastic compression nut over-tightened with grips distorts the washer and splits the thread.
Compression is also the answer when two pipes are slightly different diameters — polypropylene to ABS or PVC — because the seal is a squashed rubber ring rather than a moulded fit.
Choosing
Each one is chosen by what is around the joint rather than by preference.
Push fit where it may need dismantling and where the run moves. Solvent weld where it is buried, boxed in, or wants to be permanent and slim. Compression at the appliance, where a human will one day want to undo it with no tools to clear a blockage.
📚
Towards Level 2Finished pipework gets an air test, and the method is in BS EN 12056. Visual inspection first — no damage, no rubble dropped in, no open ends. Then seal the system with drain plugs, pump air in with hand bellows until a manometer reads 38 mm water gauge, and the pressure must hold for at least three minutes with no drop at all. Find a leak with soap solution brushed on the joints, watching for bubbles — and never with a smoke test on plastic pipework, because the smoke damages it.
The clips, the spacings, and the surprise about how steep a drain should be
Read the lesson ▶
Waste pipe is unpressurised and light, so it is easy to think the clips do not matter much. They decide whether the pipe drains at all.
The clips
Clips match the pipe:
An overflow pipe clip for 21.5 mm.
A 32 mm waste pipe clip and a 40 mm waste pipe clip — the everyday two, and worth being able to tell apart by eye.
A 110 mm waste pipe clip, or soil pipe clip — a much heavier bracket, because it is carrying a soil stack rather than a basin waste.
The spacings
Pipe
Horizontal
Vertical
21.5 mm
0.5 m
0.8 m
32 mm
0.5 m
1.2 m
40 mm
0.5 m
1.2 m
110 mm
1 m
2 m
A 40 mm vertical waste pipe has a maximum clipping distance of 1.2 m, and that is the figure to have.
The pattern behind the table is the one that holds for copper, plastic and steel as well: vertical spacing is wider than horizontal, and bigger pipe needs fewer clips. Horizontal pipe is fighting gravity along its whole length; vertical pipe is only being stopped from sliding down.
A sagging waste run holds water between the dips. That standing water is where the smell comes from, and where the blockage starts.
Self-cleansing velocity, and the surprise in it
Vertical is always wider than horizontal, and bigger pipe needs fewer clips.
Horizontal waste needs a fall towards the stack, and the water has to move at a particular sort of speed — fast enough to carry the solids along with it. That speed has a name: self-cleansing velocity.
Three things can happen, and only one of them is right:
No fall — nothing drains. Water sits in the pipe.
Too much fall — and this is the one nobody expects. The liquid runs away fast and leaves the solids behind, stranded in an empty pipe. The pipe blocks even though the fall looks generous.
The right fall — liquid and solids move together, and the flow scours the pipe as it goes.
So steeper is not safer with drainage, which is the opposite of what instinct says.
The figures
Steeper is not safer. Too much fall leaves the solids behind in an empty pipe.
The permitted fall is a range, and it depends on the pipe size:
32 mm — between 18 mm and 22 mm per metre on a full 1.7 m basin run. A shorter basin run may fall more steeply.
40 mm — between 18 mm and 90 mm per metre.
110 mm — between 18 mm and 90 mm per metre.
So a bath three metres from the stack, in 40 mm pipe, may drop between 54 mm and 270 mm over that run. A wide range — and both ends of it are limits, not suggestions.
Clip to a string line the way you set gutter brackets, and put a clip either side of every fitting so a bend cannot pull itself out of line.
📚
Towards Level 2All of this exists to protect one thing: the trap seal. Every appliance has a trap holding a plug of water that keeps drain air out of the room, and if that plug is pulled out the room smells of sewer. It can be pulled two ways. Self siphonage is an appliance emptying so fast that its own discharge drags its own trap seal after it. Induced siphonage is a different appliance discharging past the branch and pulling this one’s seal out. Pipe that is too long, too steep, too small or badly ventilated causes both — which is why every number on this page is a number.
What to wear, what the gas is, and how the bottle is stored
Read the lesson ▶
Copper work means a naked flame, a bottle of flammable gas, and a fitting that stays hot enough to burn you long after it has stopped glowing. This lesson comes before the soldering for that reason.
A naked flame, a bottle of flammable gas, and a fitting that stays hot long after it stops glowing.
What to wear
Goggles, gloves, boots, and overalls with the sleeves down: the difference between a scorch and a burn.
The PPE for copper fabrication is not the same list as general site PPE, because the hazards are different:
Goggles when soldering. Flux spits, and solder can flick.
Gloves for handling — cut copper is genuinely sharp, and so is the burr on the end.
Safety boots. Benders, stillsons and a full gas bottle are all heavy, and all of them get dropped.
Overalls, worn properly — sleeves down and done up. It keeps flux and solder off your skin, and it is the difference between a scorch and a burn.
Two more things that are not worn but belong on the list. A heatproof mat goes behind every joint made near timber, felt or insulation. And keep water or a damp cloth to hand to cool and clean the fitting afterwards — but wait a minute or so before you douse it, because quenching a joint too soon can crack the solder.
Clear the area of flammable material before you light up, not after. And if you are not confident with a tool, ask for training rather than working it out with a live flame in your hand.
The two gases
LPG is heavier than air. It does not drift away — it sinks, collects at low level and waits. Every storage rule follows from that.Propane is the red bottle and butane the blue. MAPP burns the hottest.
Propane and MAPP. Propane is the everyday one, in the red bottle — the blue bottle is butane. MAPP burns hotter and is what you reach for on 28 mm and above, or outdoors in the cold where propane struggles to bring a big joint up to temperature.
Both are LPG — Liquefied Petroleum Gas. That name explains most of the rules that follow. LPG is a gas at ordinary temperatures, but put under pressure it turns to liquid, which is how a bottle holds so much of it in so little space.
Two consequences matter, and both are worth understanding rather than memorising:
A small volume of liquid becomes a very large volume of gas. The liquid in a bottle expands enormously as it boils off, and even a small quantity mixed with air makes an explosive mixture. That is what makes a leak in a shed or a van serious rather than annoying.
LPG is heavier than air. A leak does not drift away and disperse the way natural gas does — it sinks, and it collects at low level and stays there. In an enclosed space it pools at floor level. In a trench or an excavation it fills the trench, which is exactly why extra care is taken with LPG below ground.
How a bottle is transported and stored
Four words, and each one has a reason. The reason is what makes them stick.
Four words, and each has a reason:
Upright. A bottle on its side can pass liquid gas rather than vapour into the regulator, and liquid gas leaving a torch does not behave like a flame.
Outside. Never in the van overnight, never in a cupboard, never in the house. Because LPG sinks, a leak in an enclosed space settles at floor level and waits.
Well ventilated. The same reason. Anything that does leak has somewhere to go.
Secure. Chained or strapped so it cannot fall, and locked so it cannot walk — normally a lockable cage, clearly signed. A falling bottle can shear its valve, and a bottle with no valve is a rocket.
When it is not in use the valve is closed and the protective dust cap is back on. When you are moving cylinders, do not drop them or let them bang into each other.
📚
Towards Level 2Carrying cylinders is regulated in its own right. Under the carriage of dangerous goods rules, a van carrying LPG cylinders in an enclosed load space must carry at least one fire extinguisher, and the load space must be ventilated. You will also meet flashback arrestors — fitted between the regulator and the hose to stop a flame travelling back down the hose towards the bottle, and to protect the regulator if it does.
The order it goes together in, and the three things you look at before you light it
Read the lesson ▶
A blowtorch set is four things: the bottle, the regulator, the hose, and the torch itself. Putting them together in the right order, and looking at them before the gas is on, is a two-minute habit that stops the thing that would otherwise go wrong.
Bottle, regulator, hose and torch, looked over before the gas goes on.
What each part does
One regulator per gas. If the thread does not fit the bottle, it is the wrong regulator: never force it.
The bottle holds the gas as a liquid under pressure.
The regulator screws into the bottle valve and gives an even, controlled flow of gas out of it — the pressure inside the bottle is far higher than the torch wants. There is a different regulator for each gas, and the threads differ deliberately. If the thread does not fit the bottle, it is the wrong regulator — never force it and never use an adaptor.
The hose carries the gas from the regulator to the torch.
The torch is where the gas leaves and the flame burns.
Assembling it, in order
Leak detector fluid on every joint, and watch for bubbles. Never use a flame to check for leaks.
Remove the dust cap and make a visual inspection of the main ON/OFF valve on the cylinder.
Insert the regulator into the ON/OFF valve and hand tighten.
Tighten firmly with a spanner, anti-clockwise, because it is a left hand thread.
Turn on the main ON/OFF valve and test for leaks using leak detector fluid on all joints.
The left hand thread is the part people get wrong, and it is deliberate: every fitting carrying fuel gas is left handed so it cannot be cross-connected to an air or oxygen line. Turning it the way that feels right loosens it.
And note what the last step is. Not a match — leak detector fluid, brushed on every joint and watched for bubbles. Never a flame, and never a sniff.
The visual inspection before you light up
The thread turns the way that feels wrong. That is deliberate - fuel gas fittings are left handed.
Three things:
The regulator — check there is no damage, by inspecting the thread.
The hose — check for damage and splits by running it through your hands along its whole length, inspecting all the connections. Running it through your hands is the right method as well as the wording: a split in a hose opens when the hose is flexed and closes when it is straight, so looking at it lying on the floor tells you very little.
The blowtorch — check there is no damage to it, and that the connections are adequately tightened.
Why it is worth doing every time
A hose that has been trodden on, kinked in a toolbox and dragged over a cut floorboard for two years is the most likely thing on the whole set to fail. It takes fifteen seconds to run through your hands, and it is done before the gas is on rather than after.
And the flame itself
You judge this one by eye. Blue, sharp and stable with a defined inner cone — anything else is telling you something.
Once it is lit, the flame picture is the last check. A good flame is blue, sharp and stable with a defined inner cone. A flame that is yellow, lazy and wandering is telling you something — a blocked jet, a nearly empty bottle, or air getting in where it should not.
Turn the gas off at the bottle at the end, and let the torch burn out what is left in the hose. That way the hose is not left full of gas overnight in a van.
Five tools, what goes wrong with each, and the five ideas behind all of them
Read the lesson ▶
For every tool, hold three things: what it is called, what it does, and what goes wrong with it. The last one is where people dry up, because a tool that works is a tool nobody thinks about.
For each tool: you will need to know what it is called, what it does, and what goes wrong with it.
Roller cutter
Every maintenance answer here is one of three ideas, and every safety answer is one of two.
Use: cutting copper pipe.
Maintenance: the cutting wheel must not be blunt, and the rollers and the adjustable handle must be free to rotate. Keep all moving parts lightly lubricated.
Safety: the cutting blade is sharp, and the cut leaves a burr on the inside of the pipe that will take the skin off a finger. Deburr it — and not only for your hands: a burr left inside restricts the bore and makes noise for the life of the system.
Scissor bender
Use: bending copper tube.
Maintenance: the arms free to open and close, the rollers free to rotate, no build up of dirt on the formers or guides, and everything lightly lubricated. Grit on a former prints itself into the pipe and can start a ripple.
Safety:jammed fingers. The arms close on themselves and there is real force behind them. Gloves should be worn.
Plumbers blowtorch
Use: soldering.
Maintenance and safety: ensure there is no gas leak; that it lights up correctly; test gas soundness with leak detection fluid; and check the flame picture is correct.
Adjustable spanner
Use: tightening compression joints.
Maintenance: the jaws must not be worn, and the adjusting wheel free to rotate. Lightly lubricated.
Safety: make sure it does not slip. A worn spanner rounds off a brass nut, and then the joint cannot be tightened or undone — and your knuckles go into whatever is behind it.
Junior hacksaw
Use: cutting pipes and tubes.
Maintenance: the blade facing the right way, not bent or twisted, and no teeth missing. A hacksaw blade cuts on the push stroke, so a blade in backwards rubs rather than cuts.
Safety: sharp blade, plus swarf and a sharp edge on the cut pipe. Gloves should be worn.
And when you do cut with a hacksaw rather than a cutter, keep it at right angles to the pipe and watch the cut as it goes, correcting as you need to. A cut that wanders is a joint that will not seal.
The pattern worth spotting
Five tools, and only five ideas behind all of them.
Every maintenance answer on this page is one of three things: keep it sharp, keep it moving, keep it clean. Every safety answer is one of two: it is sharp, or it can trap you. If a tool comes up that you have not revised, those five ideas will get you most of the way.
The three safety requirements behind all of it
Correct use, good condition and the right PPE: the three requirements behind every tool answer.
Whatever the tool, the standard names the same three: correct use of tools, tools maintained in good condition, and appropriate PPE. Every specific answer above is one of those three wearing a different hat.
The sizes, the three grades, and the fitting family
Read the lesson ▶
Copper does almost every plumbing job there is — hot and cold supply, heating, and in the past even waste. It is versatile, strong and highly resistant to corrosion. It is also expensive, and less flexible than plastic, which is why plastic wins on some jobs.
The sizes
15 mm and 22 mm are the two you will use most. 15 mm feeds taps, basins, WCs and radiators; 22 mm runs mains, bath feeds and the main heating flow and return.
The full domestic set is 10, 15, 22 and 28 mm. 10 mm is microbore, used for individual radiator drops; 28 mm turns up on larger heating mains.
Copper is measured on its outside diameter, which is why a 15 mm fitting slides over a 15 mm pipe. Copper, stainless steel and polybutylene all share those diameters, so they interchange with ordinary fittings. Low carbon steel and polyethylene do not — they are sized differently.
The three grades
R220 comes in coils and bends by hand. R250 comes in straight lengths and needs a bender or a spring.
Copper comes in three tempers, and the difference is whether it can be bent:
R220 — annealed, or soft. Supplied in coils, and it bends by hand. This is microbore and underground service pipe.
R250 — half hard. The general purpose copper, supplied in straight lengths, and the one you will handle every day. It must be bent with a machine or a bending spring, never by hand.
R290 — hard. It cannot be bent at all; every change of direction is made with a fitting. Rare in UK plumbing, and used for air conditioning.
The fittings
The whole family in one place — and the naming convention that tells you a tee's size before you open the box.
Couplings join two lengths in line. Elbows turn a corner — and there is more than one kind: a swept elbow turns 90° on a long radius for better flow, and a street elbow, or male-female elbow, has a male end on one side so it screws straight into another fitting without a short piece of pipe between them.
Tees take a branch off. An equal tee has all three legs the same size; a reducing tee has one or more legs smaller, and is described by its three sizes in order — a 22-22-15 tee is a 22 mm run with a 15 mm branch.
Reducers step one size down to another, straight or bent. Stop ends close an open end. Tap connectors join pipe to the tail of a tap or a valve.
The two soldered fittings
Different products, not preferences. Either way, capillary action pulls the solder in.
These are different products rather than preferences.
A solder ring fitting — also called integral ring — has lead free solder already built into a ring inside the socket. Heat it and it flows; no extra solder needed.
An end feed fitting has none, and you feed solder into the mouth of the joint yourself, where capillary action draws it in. End feed is cheaper and is what most people use once they can solder; solder ring is more forgiving.
One rule about all of them
Every fitting and every pipe used on a hot or cold water installation must be approved by the Water Regulations Advisory Scheme — WRAS, and approved products are listed in the Water Fittings and Materials Directory. It is not a formality: it is what says a fitting will not contaminate drinking water or fail under pressure, and using something that is not approved makes the installation non-compliant however well you fitted it.
📚
Towards Level 2A fourth jointing family you will meet on site before you meet it on a course: press fit. It looks like a solder ring fitting but contains a rubber O-ring instead of solder, and it is squeezed permanently onto the pipe with a powered crimping tool. No flame, which is why it has taken over on commercial work and anywhere a hot works permit would be needed. Push the pipe fully in, mark it so you can see it has not slipped, crimp it, and mark the fitting so you can check at a glance that every joint on the job has been crimped before the water goes on.
Four clips, three numbers, and the two patterns that hold for every material
Read the lesson ▶
Clipping is the part of a first fix that nobody looks at and everybody hears. Pipe that is not properly held ticks as it warms, knocks when a tap shuts, and sags into a belly that holds air.
Correctly installed clips are what stop the ticking, the knocking and the sag.
The clips
Four clips you should be able to pick out of a bag — and the rule the spacing table does not cover.
Plastic push on clips for copper — the pipe clicks in and out, which matters when you are working alone and need a third hand.
Brass school board clips — a brass saddle screwed through two lugs. This is the one to know by name, and it is what you use where the pipe is on show and expected to stay tidy for twenty years.
Plastic clips — the general family, screwed or plugged to the surface.
Nail clips — a saddle with a hardened masonry nail through it. Fast on a first fix, cheap, and awkward to remove afterwards.
The spacings
Pipe size
Horizontal
Vertical
15 mm
1200 mm (1.2 m)
1800 mm (1.8 m)
22 mm
1800 mm (1.8 m)
2400 mm (2.4 m)
Two patterns make this stick, and both hold for every pipe material you will ever clip.
Vertical spacing is always wider than horizontal. A vertical pipe carries its own weight down its own length; a horizontal one sags between supports. So vertical gets more room.
Bigger pipe needs fewer clips. A 22 mm tube is stiffer than a 15 mm one and holds itself straight over a longer span.
Notice too that 15 mm vertical and 22 mm horizontal are the same figure — 1800 mm. There are really only three numbers here: 1200, 1800 and 2400.
Where a clip goes as well as how far apart
Vertical is always wider than horizontal, and bigger pipe needs fewer clips.
The table is a maximum, not a target. On top of it:
A clip either side of every bend and every fitting, so a joint is never carrying the weight of the pipe.
A clip close to every appliance connection, so a tap being turned does not work the joint behind it.
Closer spacing on a run that will be seen, because the eye follows a sag long before it becomes a fault.
And leave copper room to move. A hot pipe grows along its length, and a run clipped rigidly at both ends with nowhere to go is what ticks in the ceiling at seven in the morning.
Soldered, compression and push fit — and what decides which
Read the lesson ▶
Three methods: soldered, compression and push fit. Most jobs use all three, chosen by what is around the joint rather than by preference.
One rule comes before all of them: every pipe is deburred before any jointing procedure, whichever method you are using.
Soldered
Flux stops the oxide forming as the joint heats, so the solder can flow into the gap between the fitting and pipe.
Capillary jointing. The fitting is a close fit over the pipe, and molten solder is drawn into the gap by capillary action — pulled in, not poured in, which is why the gap has to be small and clean.
Preparation is the whole job: cut square, deburr, clean the pipe end and the socket to bright metal with wire wool or an abrasive strip, and apply flux to both.
Flux earns a sentence of its own, because most people use it without knowing what it does. Heating bare copper makes it oxidise, and solder will not stick to an oxide layer. The flux stops the oxide forming while the joint heats, which lets the solder flow into the gap between the fitting and the pipe. That is why a joint that has been heated dry, or heated too long, will not take solder however much you offer it.
Then heat the fitting, not the solder, and let the joint melt it.
A cold joint is the classic failure and it looks fine. It is the one that weeps three weeks later, through a ceiling.
Compression
Tightening the nut squeezes the olive between pipe and fitting. Firm, then a fraction more, and no further.
A nut, an olive and a body. Tightening the nut squeezes the olive between the pipe and the fitting and makes the seal. No heat, which is why it is the answer near a bath panel, near joists, or anywhere a flame would be a problem.
Cut square and deburr, insert the pipe fully to the stop, and tighten with the adjustable spanner until it is firm and then a fraction more. Two spanners is better — one holding the body still, one turning the nut. Over-tightening cuts the olive into the pipe and the joint will never seal again.
This is a non-manipulative compression fitting, meaning the pipe end is not altered. It works on R220 and R250 copper. It is not used with R290, which is hard and would need the end opening up.
Push fit
The pipe pushes into the fitting and a stainless grab ring holds it while an O-ring seals it. Quickest of the three, no heat and no tools.
It still needs the pipe cut square and deburred, and it needs an insert in the pipe end where the run is plastic. The common failure is not pushing the pipe fully home — it grips and holds pressure at half depth and then lets go months later.
Choosing between them
Soldered, compression and push fit, and what makes each one seal.Soldered, compression and push fit: one is permanent, two undoable, with one the fastest.
Soldered is neat, cheap and permanent, and needs a flame — so it is wrong anywhere a flame is wrong, and wrong on a system you cannot drain properly, because solder will not take on a wet joint.
Compression is quick, needs no heat and can be undone, and is bulky where it shows.
Push fit is fastest and most forgiving, and costs the most per joint.
Plastic pressure pipe needs almost no tools, which is half of why it took over. Three of them do everything, and for each one hold what it is called, what it does, and what goes wrong with it.
Plastic pipe cutters
Three tools, and the reason a square cut matters more here than on copper: an oval presented to a round seal weeps rather than bursts.A blunt blade crushes the pipe instead of cutting it. The slice shown here is for plastic only.
Use: cutting plastic pressure pipe.
Maintenance: the movement is free and easy, lubricated if needed, and the blade is sharp and in good condition. A blunt blade crushes the pipe instead of slicing it, and a crushed end will not seat in a push fit fitting.
Safety: keep body parts away from the sharp blade, and store it safely with the blade closed. These are scissor-action cutters with a spring, and they close on their own if dropped in a bag.
Pressure pipe slice
Use: cutting plastic pressure pipe. The same job as the cutters, done by a different tool — a slice is a small body you push over the pipe and rotate.
Maintenance: check the cutting wheel for damage.
Safety:only to be used on plastic pressure pipe — never on copper, which ruins the wheel. Do not poke a finger in, and check the retaining screws are secure.
Adjustable spanner
Tight on the nut so it cannot slip. A rounded nut on a compression fitting means we need to buy a new nut or fitting.
Use: tightening compression fittings.
Maintenance: good condition and adjusts freely; lubricate the adjuster as required.
Safety: ensure the spanner is tight on the nut or fitting to avoid slipping. On plastic this matters twice over, because a slip that rounds a nut on a plastic fitting usually means replacing the fitting rather than just the nut.
Why a square cut matters more on plastic than on copper
Both push fit and compression rely on an O-ring sealing against the outside of the pipe. A cut that is even slightly out of square presents an oval to a round seal, and the leak is a weep rather than a burst — the kind that soaks a floor over a fortnight before anybody notices. Cut square, and use the cutters rather than a hacksaw.
The three safety requirements behind all of it
Whatever the tool, the standard names the same three: correct use of tools, tools maintained in good condition, and appropriate PPE. Every specific answer on this page is one of those three wearing a different hat, so if a tool comes up that you have not revised, name the three and describe what they mean for that tool.
What the pipe is, what it is good and bad at, and the fitting family
Read the lesson ▶
Plastic pressure pipe is polybutylene — usually shortened to PB, and sold under trade names you will hear far more often than the material. It does the same job as copper on hot and cold supply and on heating, and it is what most new houses are now piped in.
It does the same job as copper on hot, cold and heating, and most new houses are piped in it.
What it is good at
Every advantage it has is the reason it took over, and every disadvantage is a rule you have to work to.
No flame. Nothing about it needs heat, which means no hot works permit, no heatproof mat, and no risk of setting light to a floor void.
Fast. A push fit joint takes seconds.
It comes in coils. A long run through joists can be one continuous length with no joint buried under a floor — which is the biggest single advantage it has over copper.
It tolerates freezing far better. It gives a little where copper splits.
Cheaper, lighter to carry, and quieter in the fabric of a building.
What it is bad at
Floppy: it sags between supports unless it is clipped far more often than copper.
It is floppy, so it needs far more support than copper — which is the whole of the clip spacing lesson.
It cannot be bent to a neat angle the way copper can. It curves; it does not turn a crisp corner.
Heat. It must be kept away from heat sources, and the first stretch of pipe off a boiler is run in copper for exactly that reason.
Sunlight degrades it, so it is not used anywhere it will be exposed.
It is soft, so a careless drill or a screw finds it easily under a floor.
The fittings
The same family of shapes as copper, which is the point — if you know what an elbow and a tee do in one material you know it in the other.
Elbows turn a corner. Tees take a branch off. Couplings join two lengths in line. Reducers step 22 mm down to 15 mm. Tap connectors join the pipe to the tail of a tap or a valve.
They come in two forms: push fit, and compression type A. Type A is the non-manipulative compression fitting — nut, olive and body, with the pipe end left exactly as it was cut — and on plastic it comes with a liner and often a different olive from the copper version.
Plastic push fit fittings will take copper as well, which is what lets the two materials mix on one system. The reverse is not automatic: a copper compression fitting used on plastic pipe needs the insert and the right olive, or it crushes the pipe.
One rule about all of them
Every fitting and every pipe used on a hot or cold water installation must be WRAS approved — approved by the Water Regulations Advisory Scheme, and listed in the Water Fittings and Materials Directory. It is what says the fitting will not contaminate drinking water or fail under pressure, and it applies whatever the material.
Two methods, and the one part that is not optional
Read the lesson ▶
Two methods: push fit and compression. Both are worth understanding properly, because plastic behaves differently from copper and so do its failures.
Push fit and compression, and both need an insert in the pipe end.
Push fit
The pipe pushes into the fitting, a stainless grab ring bites into it, and an O-ring seals against it. No heat, no tools, no flame anywhere near a floor void.
Three things make it work:
Cut square, with the cutters rather than a hacksaw.
Fit an insert in the pipe end. This is not optional, and it is the single most common omission on site.
Push fully home, to the mark. A pipe at half depth grips and holds pressure on the day, which is exactly why the failure appears months later.
Why the insert is not optional
The single most common omission on site — and the failure shows up months later, not on the day.
Plastic pipe is flexible. The grab ring inside a push fit fitting has to bite into it hard enough to hold against mains pressure, and with nothing rigid inside the pipe to push against, it simply squeezes the pipe oval.
An oval pipe cannot seal against a round O-ring. The joint holds on the day because the grab ring is gripping; it weeps a fortnight or a year later, once the plastic has crept a little further. It is the classic hidden failure of plastic pipework, and it is caused by a part that costs pence.
Compression
The insert goes in first. It’s there to support the wall of the pipe, because plastic crushes long before copper would.
Nut, olive and body, the same idea as on copper — but a compression type A fitting, with its own liner and often a different olive. The pipe still needs an insert.
Tighten with the adjustable spanner until firm. Plastic is far softer than copper, so it takes much less to over-tighten, and an olive driven too hard into a plastic pipe crushes it — and then the only fix is to cut the end off and start again.
Which to use
Push fit almost everywhere, because it is faster and there is nothing to over-tighten. Compression where the joint has to be demountable, where it connects to something with a threaded tail, or where the two materials meet.
The two sizes, the clips, and why plastic needs more of them
Read the lesson ▶
The same two sizes as copper, a different set of clips, and a clip spacing table that looks nothing like the copper one. That table decides whether a plastic installation still looks like a professional job in five years.
The two sizes
15 mm and 22 mm, the same outside size as copper, so the two can be used on one system.
15 mm and 22 mm, matching copper so that the two can be mixed on one system with ordinary fittings.
Clip spacing — and why the numbers are so much tighter
Plastic at 15 mm needs four times as many clips as copper at 15 mm.
Pipe size
Horizontal spacing
Vertical spacing
15 mm
300 mm (0.3 m)
500 mm (0.5 m)
22 mm
500 mm (0.5 m)
800 mm (0.8 m)
Put that next to copper and the point makes itself. Copper at 15 mm gets a clip every 1200 mm horizontally; plastic at 15 mm needs one every 300 mm — four times as many. Plastic is flexible, so it sags between supports and, once warm, it stays sagged.
The two patterns are the same as before, which is what makes all three tables learnable rather than memorable: vertical is always wider than horizontal, and bigger pipe needs fewer clips.
On site this is the thing that separates a tidy plastic installation from a bad one. An underclipped run of plastic looks acceptable on the day and is a row of shallow bellies a year later, each one holding air and each one ticking as the system warms.
Three clips to know
Three names to know. Learn these and you will recognise the rest of the family.
Three names to know, and they cover the family.
Snap in clip — the pipe presses in past two jaws and snaps home. Comes out again if you need it to.
Hinged pipe clip — a saddle with a hinge on one side and a catch on the other, so it closes fully round the pipe. The most secure of the three, and the one for a run that will be seen or disturbed.
Nail clip — a plastic saddle with a hardened masonry nail through it. Fast, cheap, awkward to remove, and the one that goes in by the hundred on a first fix.
The Range also lists plastic push on clips and plastic clips, which are the same family under different names.
Where a clip goes, as well as how far apart
The table is a maximum, not a target — and on plastic that matters more than on copper. Put a clip either side of every fitting, close to every appliance connection, and closer than the maximum on anything that will be seen.
And support a change of direction properly. Plastic will curve round a gentle bend without a fitting, which is one of its advantages, but an unsupported curve slowly straightens itself out and drags on the joints either side of it.
Hand and power tools, used safely and kept working
Read the lesson ▶
Low carbon steel is heavy, rigid and hard, so the tools are bigger than anything else on the course and two of them are powered. For each one, hold what it is called, what it does, and what goes wrong with it.
Electric threading machine, hand held
Three tools, and what goes wrong with each. Every specific answer is one of the same three requirements wearing a different hat.Clamp first. If the pipe is not clamped, the machine stays still and the pipe spins.
Use:threading LCS pipe — cutting the male thread onto the pipe end that the fitting screws onto.
Maintenance: check and replace the cutting teeth as they dull; check the lead or flex is in good working order; check the switch operates correctly; and the PAT test is in date.
Safety: ensure the clamp is fixed in place before starting, and that eye protection is used. This is the tool on this unit that will genuinely hurt you: it turns a heavy pipe with a lot of torque, and if the pipe is not clamped it is the machine that stays still and the pipe that spins.
LCS pipe cutter
Use:cutting LCS pipe.
Maintenance:lubricate as required so that all moving parts move freely, and check and replace the cutting wheel.
Safety: ensure it is in good working order and correctly fitted to the pipe before cutting. It works like a copper cutter but far heavier, and it leaves a substantial internal burr — which is what the deburring tool in the Range is for.
Hydraulic pipe bender
Bending steel takes a great deal of energy, and the pipe moves through a wide arc. Keep clear.
Use:bending pipe.
Maintenance: ensure the moving parts are working correctly, and check the oil level is correct. It is a hydraulic ram, so low oil means it will not complete a bend and will stall part way.
Safety: keep body parts clear, and a safe working area is required whilst bending pipe. Bending steel takes a great deal of energy and the pipe moves through a wide arc.
The rest of the kit
A vice and some stillsons That is how a screwed joint is made up.
The Range also names the deburring tool, the stillson pipe wrench and hand stocks and dies. The stillson is the big toothed wrench that grips a round pipe by biting into it — two of them, one holding and one turning, is how a screwed joint is made up. Hand stocks and dies do the same job as the threading machine by hand, and are what you use where there is no power.
The three safety requirements behind all of it
Whatever the tool, the standard names the same three: correct use of tools, tools maintained in good condition, and appropriate PPE. Every specific answer on this page is one of those three wearing a different hat, so if a tool comes up that you have not revised, name the three and describe what they mean for that tool.
Two methods, the fittings, and the one fitting copper does not have
Read the lesson ▶
Two ways of joining steel: screwed and compression. The first is the traditional one and it is what makes steel different from every other material on this course.
Screwed joints are the traditional method, and no other material on this course is joined that way.
Screwed
The taper is what seals it. The thread makes the mechanical connection; the compound makes it watertight.
Also called screwing or threading. A tapered male thread is cut onto the pipe end, jointing compound and PTFE or hemp are wound onto it, and the fitting is wound up tight with a stillson.
The taper is what makes it seal: the thread gets very slightly fatter along its length, so the further the fitting goes on, the tighter the metal-to-metal grip becomes. That is also why a screwed joint only tightens one way and cannot be backed off a quarter turn to line something up — undo it at all and the seal is broken.
The compound and the PTFE or hemp fill the spiral gap that is left between the two threads. The thread makes the mechanical connection; the compound makes it watertight.
Compression
Nut, olive and body, working exactly as it does on copper. No heat, no threading, and it can be undone — which is why it is used where a joint has to come apart again, and where there is no room to swing two stillsons.
The fittings
Elbows turn a corner. Tees take a branch off. Couplings — also called sockets — join two lengths in line. Reducers step one size down to another.
Then the one copper does not have: the union.
Why the union exists
Every joint tightens one way, so without a union a screwed run cannot be taken apart.
Think about what a screwed run actually is. Every joint tightens clockwise, and every fitting is wound onto the pipe. So on a run with a fitting at each end, there is no way to take a middle section out — unwinding one end winds the other one up tighter.
A union is a three-part fitting: two halves that screw onto the pipes, and a large nut that pulls them together against a machined seat. Undo the nut and the run comes apart in the middle without turning either pipe. Every screwed run of any length has one, and putting one in the right place is the difference between a system that can be maintained and one that has to be cut.
The other consequence of the taper: steel is jointed in a fixed direction. You work from one end towards the other, and if you need to arrive at a fixed point at both ends, the union is what lets you close the gap.
Two sets of names, three grades with a colour code, and the widest clip spacings on the course
Read the lesson ▶
Steel is the odd one out on almost everything: how it is sized, how it is graded, and how rarely it needs holding up.
Sizes, in two languages
Half inch is 15 mm and three quarter inch is 20 mm, and steel is sized on its bore, not its outside.
The standard gives both the old and the new: ½ inch and ¾ inch, and 15 mm and 20 mm. Half inch is 15 mm and three quarter inch is 20 mm, and both sets of names are in daily use in merchants — which is why you need both.
And the trap: steel is sized on its bore, not its outside diameter — the opposite of copper. A 15 mm steel pipe is noticeably fatter than a 15 mm copper one, because the 15 mm is the hole down the middle rather than the outside.
The three grades and their colour codes
Grade
Colour code
Where it is used
Light
Brown
Light duty, low pressure
Medium
Blue
Domestic water and gas — the common one
Heavy
Red
Heavy duty and higher pressure
Learn them as pairs rather than as two lists, because reading two columns straight across gets all three wrong.
The one to anchor on is medium is blue. Medium is the grade used for domestic water and gas, so blue is the band you actually see on a length in the merchants. Light is brown and heavy is red, either side of it.
Clip spacing
Learn them as pairs. Reading the two printed columns straight across gets all three wrong.
Pipe size
Horizontal
Vertical
15 mm
1800 mm (1.8 m)
2400 mm (2.4 m)
20 mm
2400 mm (2.4 m)
3000 mm (3 m)
Steel needs the fewest clips of the three materials, because it is by far the most rigid. Line the three up and the whole idea becomes one fact rather than three tables: at 15 mm horizontal, plastic 300, copper 1200, steel 1800. The floppier the pipe, the more often it is held.
The two patterns hold here as well: vertical is wider than horizontal, and the bigger pipe gets the wider spacing.
The clips
Two parts, sold separately and ordered together. The plate goes on the wall, the ring goes round the pipe.A cast steel band in two pieces, joined by a screw at each side, with a threaded socket on top.
Cast steel school board clip — a cast saddle screwed to the wall, the heavy duty version of the brass one used on copper.
Munsen ring — a hinged ring that closes round the pipe and screws onto a threaded boss. It is the standard support for steel.
Munsen back plate — the plate the ring screws into, fixed to the wall or the structure. Written as one word, backplate, on most merchants' lists and in the standard.
The two are a pair and they are sold separately, so a Munsen fixing is always two parts ordered together. The plate goes on the wall; the ring goes round the pipe. Ordering rings and forgetting plates is a rite of passage.
Steel needs the fewest clips of any material, because it is by far the most rigid.
How stocks and dies work, and what a good thread looks like
Read the lesson ▶
This is the workshop skill behind the unit. It is assessed by doing rather than on paper, but understanding it makes the practical far easier.
How stocks and dies work
The die cuts a spiral groove as it turns. The stock holds it and gives you the leverage.
The die is a hardened ring with cutting teeth. As it is turned onto the pipe it cuts a spiral groove — the thread. The stock is the frame that holds the die and gives you the leverage to turn it.
The method
Clamp the pipe firmly in a pipe vice, with only a short length projecting.
Cut it square and deburr the end — a burr fouls the die.
Fit the correct die for the pipe size in the stock.
Start the die square onto the pipe end, pressing firmly until it bites. Getting it square at the start is what decides whether the thread is any good.
Apply plenty of cutting oil, and keep applying it.
Turn forward about a half turn, then back a quarter turn to break the swarf. Repeat.
Stop when the pipe end is flush with the outer face of the die. That gives the standard thread length.
Wind the die off, clean off the swarf, and check the thread.
What a good thread looks like
The start decides whether the thread is any good — and cutting oil is not optional.Clean, square to the pipe, slightly tapered, and the right length.
Clean and sharp, not torn or ragged.
Square to the pipe — a thread cut at an angle will never seal, and the fitting will point the wrong way.
Slightly tapered, so it tightens as it goes in.
The right length. Too short and the fitting will not reach; too long and bare thread is left showing, which rusts.
Sealing the joint
The thread makes the mechanical connection, but it does not seal on its own. Wrap PTFE tape in the direction the fitting turns, or use jointing compound with hemp, then tighten with two stillsons — one holding, one turning.
⚠️
Cutting oil is not optional. It cools and lubricates the die; threading dry blunts the die, tears the thread and produces a joint that cannot be sealed.
The origin of water, the five sources, and why some of it eats copper
Read the lesson ▶
There is no new water. What comes out of a tap in Manchester has been round the same loop more times than anyone can count, and the whole of the water industry exists to catch it at a useful point, clean it up and hand it on. That loop is what is meant by the origin of water.
There is no new water. The industry catches it at a useful point, cleans it and delivers it to our taps.
The cycle, in six stages
Learn the order and the names come with it.
Heat from the sun warms the sea.
Evaporation lifts the water off it.
It rises as water vapour.
The vapour cools and gathers into water saturated clouds.
It falls as rain or snow.
It gathers into a river running back to the sea to restart the process.
That last stage is worded oddly and it is worth keeping the wording, because the point of it is that the cycle closes. Nothing is added and nothing is used up. The water is only ever borrowed.
The five sources
Six stages going round in a circle. The last one is the point: the cycle closes, and no new water is made.
River, spring, upland surface, deep well, shallow well.
They divide neatly into two kinds, which is how to hold all five. Surface water — river, upland surface — has run over ground and picked up whatever was lying on it, so it arrives dirty and needs the most treatment. Underground water — deep well, shallow well, and a spring, which is groundwater finding its own way back out — has been filtered by the rock it came through, so it arrives cleaner.
But it does not arrive softer, and that is the next thing.
Hard water and soft water, and why a plumber cares
Hard water furs things up. Soft water eats them. Which you have depends on the rock the water came through.
Rain dissolves a little of the gas it forms around while it is still vapour, which leaves it very slightly acidic. Water that stays that way is soft water.
When water runs over or through certain rocks — limestone and chalk especially — it dissolves a little of the rock and turns slightly alkaline. That is hard water.
Both cause work, and they cause opposite work:
Soft water is slightly acidic, and over a long time it attacks copper. Not quickly — usually more than thirty years — and it shows up as tiny pinhole leaks in copper pipework, often several in the same run. If you are called to a house with three pinholes in a year, the pipe is not unlucky. The water is soft and the pipe is old.
Hard water drops what it picked up as soon as it is heated. The dissolved rock comes back out as limescale, and it comes out where the water is hottest: heat exchangers, immersion elements, hot pipework. Scale narrows the bore, wrecks the flow rate and forces the appliance to heat the scale before it can heat the water.
Which you have depends on where you work, and it is the first thing to know about an area. It decides why boilers fail there, why kettles fur, and what you are going to spend your Fridays doing.
📚
Towards Level 2Hardness is why water softeners and scale reducers exist, and why fitting one changes the plumbing around it: softened water is no longer classed as wholesome, so it needs backflow protection, and there is normally a hard drinking water tap left unsoftened at the kitchen sink. You will meet all of that properly in Level 2.
Treatment, the mains in the street, and who owns which pipe
Read the lesson ▶
Between the river and the kitchen tap the water is cleaned, stored, and handed through four different pipes with four different names — two of which are the water company’s problem and two of which are your customer’s. Knowing where that line falls is the difference between a repair somebody else pays for and one they do.
The meter and the external stop valve, out in the footpath. Where ownership changes decides who pays for a repair.
Treatment, in the order it happens
The process runs reservoir storage, treatment, sedimentation, filtration, sterilisation, distribution, and on a works you would see it as:
River — where the water is taken from.
Pump house — lifts it out and moves it on. Before it goes anywhere it passes through a screen, which catches the sticks, litter and anything else large enough to see.
Settlement tank — sedimentation. The water is held still and the heavy solids sink out of it.
Slow sand filter — filtration. The water passes down through sand and charcoal and the fine material is left behind.
Pumping and chlorinating house — sterilisation. Chlorine kills the bacteria that filtering cannot remove.
Service reservoir on a water tower — reservoir storage, held high so gravity does the distribution.
Water main — out to the street and to the property.
The order is not arbitrary: settle the big stuff out, filter the small stuff out, kill what is left, then store it high enough to push it round. Get that sentence and the diagram labels itself.
The tower matters more than it looks. There is no pump behind the water once it has left; the height of that tower is the pressure at your customer’s tap, which is why mains pressure varies with how far uphill a house sits, and why the top flat in a block is always the one that complains.
The mains in the street
Settle the big stuff out, filter the small stuff out, kill what is left, then store it high enough to push it round.
The main gets smaller as it gets closer, and each size has a name:
The trunk main is the big one out of the treatment works, often over 100 mm, carrying water across a district.
It splits into principal mains feeding parts of a town.
Those split again into the local main running along the street outside the house.
Into the property, and who owns what
Everything before the external stop valve is the water company. Everything after it is the householder, and they usually do not know that.
This is the part worth getting exactly right, because two of these pipes are not your customer’s.
The communication pipe runs from the local main to the boundary of the property. It belongs to the water supplier, and it is normally 25 mm MDPE — the blue plastic.
At the boundary sits the external stop valve, usually with the water meter beside it in a meter chamber under a small cover in the footpath. That valve is the point where the pipe changes hands.
From there the supply pipe — also called the service pipe — runs into the house, and it is the homeowner’s responsibility. Same 25 mm MDPE, and it must be buried between 750 mm and 1350 mm deep: deep enough not to freeze, shallow enough to dig up again.
Where it passes through the foundations it must be run in a protective sleeve, so the building can settle without crushing it.
Inside, the first thing fitted is the internal stop valve, immediately where the pipe comes through the floor, and a drain valve straight after it.
So a leak in the footpath before the external stop valve is the water company’s. A leak in the garden after it is the householder’s, and they very often do not know that until you tell them.
📚
Towards Level 2If you cannot achieve the minimum 750 mm depth — solid rock, or a route across a driveway — the pipe has to be protected against freezing another way, normally by insulating it and ducting it. The depths, the sleeving and the pipe materials are all in the Water Supply (Water Fittings) Regulations, which you will work to directly at Level 2.
Follow the cold water in from the street. The main comes in underground through the external stop valve and rises into the property as the rising main. The first valve inside is the internal stop valve, and the first tap after it is the kitchen sink — because that one has to be drinking water straight off the main.
The rising main comes up through the floor, and the first valve on it is the internal stop valve.
From there the route runs from the stop valve inside the dwelling to feed all downstairs appliances, rising to first floor and feeding all first floor appliances, rising to roof space to feed the storage cistern, and optionally a feed to a combination boiler.
Direct and indirect
This is the distinction the whole of Level 2 unit 205 is built on, so meet it properly now.
In a direct cold water system every cold outlet is fed straight off the rising main. Everything runs at mains pressure, everything is drinking water, and there may be no storage cistern at all. If a gravity hot water system is fitted alongside one, a cistern of at least 115 litres is fitted to feed the hot water only.
In an indirect cold water system only the kitchen sink is fed from the main. The main carries on up to a storage cistern in the roof, and everything else — bath, basin, WC — is fed down from that cistern. If that cistern feeds the hot water as well as the cold, it needs at least 230 litres.
The kitchen sink is the exception in an indirect system for one reason: there is a small risk of contamination in any stored water, and the kitchen is where food is prepared. So drinking water comes off the main, and the bath does not have to.
Supply, distribution and cold feedThe name tells you the pressure, and the pressure tells you the pipe size. — the words that matter
Plumbers do not call every pipe a pipe, and the naming is not fussiness. The name tells you the pressure, and the pressure tells you which valve to fit and what size to run.
A supply pipe is connected directly to the main. High pressure.
A distribution pipe comes from a cistern and feeds appliances. Low pressure — only the height of the water above it is pushing.
The one exception is the cold feed: the pipe from the cistern that fills the hot water cylinder. It comes from storage like a distribution pipe, but it has its own name because it does its own job.
Low pressure needs bigger pipe to get the same flow, which is why a cistern-fed bath tap is run in 22 mm where a mains-fed one manages on 15.
Which is better?
Direct on the left, indirect on the right. The kitchen sink is off the main in both.A cistern gives a stored reserve if the main fails. Mains pressure at every outlet is the other choice. Neither is better.
You will hear a direct cold water system called a pressurised system, because every outlet is at mains pressure rather than at the pressure a cistern gives it. Same system, two names.
Neither is better, and a customer will ask. Direct gives strong pressure at every outlet, drinking water everywhere, smaller and cheaper pipework and nothing in the loft. Indirect gives you a stored reserve if the main fails, lower pressure that is gentler on the fittings, and it protects the main because most of the house is not connected to it. Say that, rather than picking a side.
📚
Towards Level 2A cold water storage cistern has installation rules of its own, and they are all about keeping the stored water wholesome: a tight fitting lid with a screened vent, an overflow (warning pipe) at least 25 mm above the water level and screened against insects, the float valve 25 mm above the overflow, insulation and a cool position — ideally under 20 °C and never above 25 °C, because bacteria multiply in warm stored water. It sits on a board projecting 150 mm past its edges, with 350 mm clear above the float valve to work on it. And where a cistern feeds both hot and cold, the cold feed is connected higher than the cold distribution, so if the cistern empties the hot cuts off first and nobody is scalded in the shower.
Direct and indirect, gravity and combi, and why the temperature is what it is
Read the lesson ▶
Hot water systems are also described as direct and indirect — and here is the trap: those two words mean something completely different for hot water than they do for cold.
For cold water, direct and indirect describe where the water comes from. For hot water, they describe how the water is heated.
Direct hot water: the heat source touches the water
In a direct hot water system the heat source is in direct contact with the water that comes out of the taps. An immersion heater is the clearest example — the element sits in the cylinder and heats the water around it. A combination boiler is direct too: the water flows through the heat exchanger and out of the tap. So is a single point water heater over a basin.
Indirect hot water: a second heat exchanger
In an indirect system the boiler heats water that never comes out of a tap. That water flows to a coil inside the cylinder, and the coil heats the water around it. Two separate bodies of water, one heating the other through a wall of copper.
The two have names worth learning now:
Primary water is the water in the heating circuit — boiler, coil, radiators. It goes round and round and nobody drinks it.
Secondary water is the hot water that comes out of the taps.
That separation is the whole point of an indirect system: the water in the radiators is full of rust and inhibitor, and it never gets anywhere near the bath.
How the hot water gets round the house
For hot water these two words mean how it is HEATED. For cold water they mean where it comes FROM.
The route runs from the hot water cylinder to feed all first floor appliances, drop to ground floor to feed all ground floor appliances, or from a combination boiler to all appliances.
A gravity hot water system has a cylinder fed from a cistern above it. The height between the water level in that cistern and the outlet is what pushes the hot water out — so higher cistern, more pressure, and a shower on the same floor as the cistern has almost none. That is why gravity showers are so often disappointing, and it is not a fault.
A combination boiler has no cylinder and no cistern. It heats water as it flows through, on demand, straight from the main — so hot and cold are both at mains pressure and the roof space is empty.
Why hot water is stored at 60 to 65 °C
Gravity on the left, a combination boiler on the right. The head is what pushes a gravity system.
Not a rule of thumb. It is a compromise between four things pulling in different directions, and you should be able to give a customer the reasons:
Scalding. Water above 44 °C can scald, and it does it fastest to the very young and the elderly, whose skin is thinner.
Bacteria. Legionella multiplies in warm stored water and dies off above 60 °C. That is the floor, and it is not negotiable.
Scale and cost. The hotter the water, the faster limescale is deposited, and the more energy is wasted keeping it there. That is the ceiling.
Explosion. Water turning to steam expands about 1600 times. Water in a hot water system must never be allowed to reach 100 °C, which is why there is always a second safety device behind the thermostat.
Store it hot enough to kill the bacteria, no hotter than you must, and mix it down at the outlet if scalding is a risk.
📚
Towards Level 2A cylinder thermostat is strapped to the cylinder one third of the way up from the base, so the whole cylinder reaches temperature rather than just the top. An immersion heater is around 3 kW, wired on its own circuit with a fused switched spur and heat resisting flex because the cupboard is warm, and it has a safety cut out that trips at about 85–90 °C if the thermostat fails. On an open vented cylinder the open vent pipe rises from the top of the cylinder to over the cistern and must never have a valve on it; on a sealed system the equivalent safety device is a temperature and pressure relief valve. Heated from cold to the 60–65 °C of a cylinder, water expands by about 2% (the 4% figure is for heating it from cold, about 4 °C, all the way to 100 °C), and every one of those arrangements exists to give that expansion somewhere to go.
Three working principles, and the symbols they are drawn with
Read the lesson ▶
A valve stops water. Which valve you reach for depends on what you are trying to stop and at what pressure — and getting that wrong does not just look amateur, it can reduce the flow to the whole system.
The wrong valve does not just look amateur. It can reduce flow to the system.
The three working principles
High pressure. On the mains, a valve has to seal against real pressure, so it works by winding a washer down onto a seat, across the flow. That is a stop valve. It has an arrow on the body and it only seals one way round, so it goes in the direction of flow.
Low pressure. On a cistern-fed pipe the push is only the height of the water above it. A stop valve here would strangle what little flow there is, so you use a gate valve: a flat gate that winds up out of the way and leaves the bore clear. No arrow, because it works either way round.
Appliance isolation. A small service valve on the tail of a tap, a WC or a washing machine, turned with a screwdriver or a lever. It lets somebody work on one appliance without draining the house, and fitting them is the single kindest thing you can do for whoever comes after you.
That is the whole idea: stop valve for high pressure, gate valve for low pressure, service valve to isolate one appliance.
Reading the symbols
Stop valve for high pressure, gate valve for low pressure, service valve to isolate one appliance.
Valves are not drawn on a plan, they are symbolised, and the symbols are close enough to each other to be worth learning deliberately. Every one of them is built out of two triangles meeting point to point — a bowtie.
Stop valve — the bowtie with a solid dot in the middle. High pressure.
Gate valve — the bowtie with a capital T rising out of the middle, for the wheel head. Low pressure.
Service or isolation valve — the plain bowtie, nothing added.
Drain valve — the bowtie with two short lines coming out of one corner, for the hose nozzle.
Float operated valve — drawn as a little picture of itself: the arm and the ball.
Once you can read those five, you can read a domestic drawing, and that is the skill the rest of the qualification assumes you have.
Ball valves, and a name that trips everybody
Five variations on a bowtie. Read these and you can read a domestic drawing.
Most service valves are ball valves — a ball with a hole through it that lines up with the pipe when open and turns across it when shut. A quarter turn and it is off, which is why they are quick to use.
Be careful with the words. In the trade, older plumbers often call a float operated valve a “ball valve”, because it has a ball floating on the water. They are two different things and the drawings treat them as two different things. If somebody says ball valve, work out which they mean before you fetch one.
📚
Towards Level 2Four more valves you will meet, all of which have symbols of their own. A single check valve lets water pass one way only and stops it coming back — used to stop softened or heated water finding its way into the cold supply. A double check valve is two of those in one body, recognisable by the hexagonal nut in the middle, and every outside tap must have one. A full bore lever valve is a service valve with a handle and a clear bore, used either side of a pump. And a pressure reducing valve drops mains pressure to something a system can live with — worth remembering if you ever meet a house where the tap washers keep failing.
The valves on a real house, where they are, and the order you close them
Read the lesson ▶
Every job on this unit starts the same way: get the water off, and know what is still live above you — a cistern in the loft stays full and keeps feeding everything it supplies after the stop valve is shut. This is the lesson that stops you flooding somebody’s kitchen in your first month.
Water off at the stop valve first. Then find out what is still live above you.
The cold water valves
Where every valve is, and the order you close them. The stop valve does not touch the cistern above your head.
External stop valve — outside, in the footpath, in a small chamber with the meter. It belongs to the water company and it is turned with a long key. Use it when there is nothing working inside, and be aware that an old one may not close, or may not open again.
Internal stop valve — the first valve inside the property, usually under the kitchen sink. This is the one you find before you start work, and the one you show the customer at handover, because they will need it one day at two in the morning.
Service valves — the small isolators at each appliance. If one of these will do the job, use it and leave the rest of the house in water.
Drain valve — at the lowest point, so the system can be emptied. A hose goes on the nozzle and a square key turns it. There should be one immediately after the internal stop valve.
The hot water valves
Gate valve — on the cistern-fed side, because that is low pressure. On a gravity system there is one on the cold feed just below the cistern, and it is what lets you drain the cylinder without emptying the loft.
Appliance service valve — the same small isolators, on the hot tails.
Drain valve — at the bottom of the cylinder, or the lowest point of the hot run.
The order, on a real job
Ask whether you need the house off at all. A service valve on the tail of the tap you are working on is quicker, kinder and reversible.
If you do, close the internal stop valve and open the lowest cold tap in the house to drain the rising main. Water runs downhill; opening a tap upstairs achieves very little.
Remember the cistern. On an indirect or gravity system there is a cistern full of water above you that the stop valve has not touched. Close its gate valve, or drain it down, before you open anything it feeds.
Leave a note if the valve you closed is not in the room you are working in. Somebody else will find it closed and open it, and they will do that at exactly the wrong moment.
And before the water goes back on: close what you opened, then reinstate slowly. Filling a system fast pushes air ahead of it and drives dirt into every washer you have just fitted.
The types, the locations, and what is going on inside them
Read the lesson ▶
Every tap does the same job — deliver water to one place without letting anything come back the other way. The names are precise, and they describe two different things at once: the shape of the tap, and the mechanism inside it.
Pillar taps. The name gives the shape; what is inside is a separate question.
The shapes, and where each is used
Pillar taps stand on the appliance, one for hot and one for cold, with the water connected underneath. The tail sizes are worth knowing because they decide what tap connector you buy:
Pillar taps for basins and bidets — 15 mm diameter tails.
Pillar taps for baths — 22 mm diameter tails.
A bath tap is bigger because a bath wants filling in a reasonable time — the same logic as the 40 mm bath waste against the 32 mm basin waste.
High necked pillar taps are for kitchen sinks. Same tap, taller spout, so a bucket, a kettle or a saucepan will go underneath.
Bi-flow mixer taps have one spout and two handles, for baths, basins and kitchen sinks. Bi-flow means the hot and the cold stay in separate channels the whole way through the tap and only meet in the air below the spout. That is not styling — mixing stored hot water with mains cold inside a fitting is exactly what the Water Regulations exist to prevent, and the bi-flow tap is the answer to it. It matters most at a kitchen sink, where the cold is straight off the main.
Bib taps are for cleaners sinks and Belfast sinks. A bib tap comes out of the wall on a threaded back plate rather than standing on the appliance, and it is the same shape you see as an outside tap. Belfast and cleaners sinks are deep and heavy and fed from a wall, so the tap comes to them — and the gap under a wall-mounted tap is what lets you get a bucket in.
What is inside: three mechanisms
Four shapes and four locations. Learn them as pairings — the picture will not tell you where it goes.
Any of those shapes can have any of these inside, and you want to know which before you take it apart:
Rising spindle — open the tap and the head rises away from the body; close it and the head comes back down. Also called a screwdown tap. A washer is being wound onto a seat.
Non rising spindle — the head stays where it is as you open and close it. Still a washer on a seat, just with the thread hidden inside.
Ceramic disc — opens fully in a quarter turn, and usually has a lever. No washer at all: two close-fitting ceramic discs slide across each other to make the seal.
Test it before you get the spanners out. Turn it on and watch the head: rising, staying put, or a quarter turn and full flow.
Two details that catch people out
Turn it on and watch the head. That tells you which it is, before you take anything apart.
A pillar tap fitted through a thin or flexible surface — a stainless steel or plastic kitchen sink — needs a top hat washer underneath. It spreads the load and stops the sink flexing every time the tap is turned.
An outside tap, or a bath tap with a shower hose that could drop below the rim, needs a double check valve on it. The reason is the hose: it can end up in a pond, a bucket or a drain, and without a check valve that water has a route back into the main.
📚
Towards Level 2What both of those are really about is backflow — contaminated water flowing backwards into the pipework. The main defence is the simplest one: an air gap, an unobstructed gap between the tap outlet and the highest the water can reach in the appliance. It has no moving parts, so nothing in it can fail. That is why almost every tap in a house needs no other protection, and why the two exceptions above are exceptions: a mixed supply inside the fitting, and a hose that could be dragged below the spillover level.
Four patterns, four part numbers, and where each one may be fitted
Read the lesson ▶
A float operated valve fills a cistern and shuts off when it is full. Four patterns, and they are numbered by the British Standard they are made to, BS 1212. The part numbers are not decoration — they are how the valves are sold, so “a part 3” is what you ask for at the merchants.
The four, by part
The Portsmouth, part 1: a piston pushed sideways onto the seat, and no longer fitted new.
Portsmouth pattern FOV — part 1. The old brass one, arm pivoting horizontally, piston pushed sideways onto the seat. No longer fitted new.
Diaphragm pattern FOV, brass — part 2. A rubber diaphragm replaces the sideways piston, so the working parts never sit in the water.
Diaphragm pattern FOV, plastic — part 3. The same valve in plastic. Parts 2 and 3 work identically inside; the difference is only what the body and arm are made from.
Diaphragm pattern equilibrium FOV — part 4. Water is fed to both sides of the diaphragm through a small hole, so the pressure balances out and the float only has to overcome a spring. It closes cleanly on high or fluctuating pressure, where an ordinary valve would chatter and bounce.
Where each one may go
Two locations exist: WC cisterns and the storage cistern. Not every valve may go in both, and the reasons are worth having.
The portsmouth float valve (part 1) is for a storage cistern, and for replacement only of an existing part 1. Its outlet is below the water line, which gives it no proper protection against water being drawn back out of the cistern, and it has no means of adjusting the water level. That is why it fails modern standards and is not fitted new.
The diaphragm float valve (parts 2 and 3) may be used in either a storage cistern or a WC. Part 2 in brass is the usual choice for a storage cistern; part 3 in plastic is what is in most modern WCs.
The equilibrium float valve (part 4) goes in a WC cistern. It is comparatively small and delicate, and it is designed for mains pressure, which is exactly the situation a WC filling off the rising main presents.
Telling them apart on site
Four patterns and four part numbers. Only the Portsmouth works below the water line, and that is why it is going.
Brass body, arm on a horizontal pin, a cap on the end you unscrew to reach the washer — Portsmouth. A body that splits vertically with a rubber diaphragm inside — part 2 or 3, and the material tells you which. A diaphragm valve with a small hole through the piston and water fed to both sides — equilibrium.
The orifice, and why the colour matters
Inside a part 2, 3 or 4 valve the water passes through a small removable nozzle called the orifice, and it is supplied in more than one size, colour coded.
A small hole is for high pressure. It restricts the flow so the valve can still shut against the main.
A larger hole is for low pressure, so a cistern-fed valve still fills at a sensible rate.
Fitting the wrong one is the most common installation fault on these valves. Too small on a low pressure feed and the cistern takes an age to fill; too large on the main and the valve is noisy, or will not shut off cleanly at all.
One rule to carry away, and it is the reason the next lesson is possible: a service valve is fitted on the pipe immediately before every float operated valve. These valves need maintenance more often than almost anything else in a house, and without that isolator every washer change means draining a cistern.
Where the water is coming from tells you which repair it is
Read the lesson ▶
These are the jobs you will be sent to in your first year, on your own, in somebody’s house. They are small, they are quick when you know them, and every one of them starts the same way: check with the customer, then isolate the appliance.
Every job on this list starts the same way: check with the customer then isolate the appliance.
Before anything else
Isolate. Service valve if there is one, stop valve if there is not, and leave a note if the valve is not in the room you are working in. Open the tap to drain what is left in the pipe. Put the plug in the basin before you take a tap apart — every plumber has watched a jumper plate disappear down a waste exactly once.
Reading the fault
Where the water comes from tells you which fault it is — and which part to arrive with.
Two different faults look like “the tap is leaking”, and where the water appears tells you which:
Drips from the spout when the tap is closed — a worn washer, or a worn seat under it.
Weeps around the spindle when the tap is open — a worn or loose packing gland.
Get that right on the doorstep and you arrive with the right part.
Re-washer a pillar tap or stop valve
Six parts, in the order they come off. And the plug goes in the basin before any of it starts.
The commonest repair there is. Water off, tap open to drain, pop off the decorative cap and remove the screw under it, lift the head, unscrew the valve body out of the tap, take the old washer off the jumper plate — some pop off a lug, some are held by a small nut — and fit a new one of the right size. Rebuild, reinstate the water slowly, and check for leaks.
If it still drips afterwards, the seat is scored. Reseating grinds the seat flat again with a reseating tool: choose the right size cutter, wind it in and push down as you turn. Rebuild with the tap in the open position, so you are not driving filings into the new washer as you tighten it.
Re-pack the packing gland
Water rising up the spindle is loose or worn packing. Sometimes nipping up the gland nut is enough. If not: remove the gland nut, scrape out the old packing, wrap PTFE tape or gland packing round the spindle, push the nut down onto it to squash it in, and tighten — firmly, but not so tight the tap will not turn.
The rest of the list
A quarter turn tap has no washer. When it drips, the whole cartridge is replaced.
Re-grease the spindle with silicone grease. A stiff tap is not a broken one. Silicone, because it does not attack rubber and it is approved for use on drinking water.
Check the rubber O ring on the tap head. Another leak that looks like a gland fault and is not.
Replace the ceramic disc. A quarter turn tap has no washer — when it drips, the whole cartridge is replaced. There is a different cartridge for the hot side and the cold, and dozens of sizes, so take the old one to the merchants rather than guessing.
Replace the gate in a gate valve. Gate valves fail by the gate corroding off the spindle, so the handle turns and nothing happens. Often the honest answer is a new valve.
Replace the washer in a drain valve. Same principle as a tap, same washer and seat.
What cannot be repaired
Worth knowing so you do not waste an hour. Check valves, single and double, and most ball type service valves have no serviceable parts. When they pass or leak, they are changed, not stripped.
The rule underneath all of this: anything with a washer and a seat, or a packing gland, can be maintained. That covers taps, stop valves, drain valves and float valves — which is why one set of skills does the whole list.
Why a cistern will not shut off, and the three things that fix it
Read the lesson ▶
An overflow running down an outside wall, or a WC that never stops trickling, is caused by a failed float operated valve. It is one of the most frequent call-outs in the trade and one of the cheapest to put right — which is a good combination for somebody in their first year.
Water from the overflow is caused by a failed float operated valve.
Turn off the service valve before you start. There is one immediately before the float valve for exactly this job. If there is not, fit one while you are there.
The three repairs
A seized Portsmouth replaced, with a servicing valve on its supply.
They apply to all four patterns.
Re-washer the valve. The usual cause of a cistern that will not shut off. On a Portsmouth it is a washer on the end of the piston, reached by unscrewing the end cap and taking out the split pin to free the arm. On a part 2 or 3 it is the rubber diaphragm, reached by splitting the body.
Renew the valve entirely. Often quicker, and it is the honest answer for a seized Portsmouth: replace it like for like, or, usually better, upgrade to a part 2 or 3, whose outlet sits well clear of the water and which has a proper screw to set the water level.
Renew the float. A float with a pinhole slowly fills with water, stops floating, and the valve never shuts. A float half full of water is a satisfying fault to find, because it explains everything at once and costs almost nothing.
Reading the symptom
The symptom names the fault. Check the float first, because it takes five seconds and it costs nothing.
Continuous flow, overflow running. A worn or split washer or diaphragm, or a waterlogged float. Check the float first — it takes five seconds and it is free.
Fills very slowly. A blocked orifice, or the wrong orifice for the pressure. Clean it or change it for the right one.
Noisy while filling, or hammering as it closes. A split washer, or an orifice too large for the pressure it is on.
Water level wrong. Adjust it. Parts 2, 3 and 4 all have a means of adjustment; a part 1 has none, which is another reason it is on its way out.
What to check before you leave
Reinstate the water and watch the valve fill and shut off at least once, all the way. Check that the level has stopped at least 25 mm below the overflow, so the cistern has somewhere to go if the valve ever fails again. On a WC, check it fills to the marked line and no higher — too high and every flush wastes water down the overflow, which on a modern WC is inside the pan where nobody will notice it for a year.
And a habit worth forming now: while you have the cistern lid off, look at the rest of it. A gritty cistern, a perished lid seal or a missing screened vent are all two minutes to put right at that moment and a separate call-out otherwise.
Customers describe plumbing noises badly, and they almost always report them from the wrong room. So the skill is not identifying a noise you can hear — it is asking the right question over the phone. Learn these as three complete stories rather than as nine separate facts.
The customer rings. The skill is asking the right question on the phone.
Humming or squealing when a tap is opened
Cause: a worn or split tap washer. Correction:renew the tap washer.
The noise is the loose edge of the washer vibrating in the flow, thousands of times a second. It happens as the tap opens because that is when the water moves fastest past a washer no longer held flat. Rising and non rising spindle taps both do it; a ceramic disc tap cannot, because it has no washer.
Loud hum in the pipework
Cause: a worn or split washer in the float operated valve. Correction:renew the FOV washer.
The same vibration, but in a valve that is filling a cistern — so it runs for a minute or two after every flush and travels down the pipework into the fabric of the house. Customers describe this one as the pipes singing, and they report it from wherever they can hear it, which is rarely the bathroom.
The question that finds it: does it happen after you flush the toilet?
Loud or violent banging within the system
Cause:loose or incorrectly supported pipework. Correction:identify the loose pipework and fix in place.
This is water hammer. A tap or a valve closes fast, the moving column of water stops dead, and the shock travels back along the pipe. Properly clipped pipe absorbs it; a loose run under a floor bangs against the joist and the whole house hears it.
Note what the fix is not. It is not a new tap and it is not adjusting the pressure — it is to identify the loose pipework and fix in place. Which is why clip spacing, from a unit that looks like it has nothing to do with this one, matters here.
Telling them apart
Ask when the noise happens and the fault names itself.
Ask when the noise happens and the fault names itself.
When a tap is opened — tap washer.
After a WC is flushed, for a minute or so — float valve washer.
A single bang the instant something shuts — loose pipework.
📚
Towards Level 2Where hammer keeps coming back after the pipework has been properly clipped, the cause is usually pressure: quarter turn appliance valves shut almost instantly, and high mains pressure gives the water column more energy to lose. The two answers are a pressure reducing valve to bring the mains down to something the system can live with, and a water hammer arrestor — a small sealed air cushion near the valve that gives the shock somewhere soft to land.
Planned and unplanned work, why speed matters, and finishing properly
Read the lesson ▶
There are two kinds of maintenance, and the difference is not what the work is — it is when the work was decided.
Planned preventive maintenance
Nearly all of it is valves. A stop valve that will not turn is otherwise found in an emergency.The schedule says what is to be done. The records say what was done and what was found.
Work scheduled in advance and carried out on a system that is not broken, to stop it breaking. Regular checking of taps, valves and appliances is what it amounts to in practice.
It is usually done on larger installations, and it ensures systems equipment and appliances are checked at regular intervals for optimum performance. A school, a care home, a block of flats — because that is where a failure costs enough to justify the visits.
It includes checking: float operated valves, appliance taps, stop valves, gate valves, isolation valves. Notice they are nearly all valves. Valves are what seize, and a stop valve that will not turn is only ever discovered in an emergency, which is precisely the wrong moment to find out.
Two pieces of paperwork go with it. A maintenance schedule says what is to be done and when. Maintenance records say what was done and what was found, so the next person — who may not be you — can see the history. Records earn their keep when a pattern shows up: if the tap washers on one building keep failing early, the water pressure is probably too high, and the answer is a pressure reducing valve rather than another year of washers.
Unplanned maintenance
The difference is when the work was decided, not what the work is.Water wasted, water contaminated, and damage spreading by the minute. That is why unplanned work is urgent.
Work you did not know about this morning. It is usually classed as breakdowns, repairs and emergencies — in short, working on breakdowns and emergencies.
It includes: burst pipes, running overflows, dripping taps, blockages. Every one of those is something you now know how to fix, and planned maintenance is the same list caught early.
Why speed matters
The short answer is to get the system working as soon as possible. The reasons behind it are worth having, because they are not all about the customer:
Cost to the environment in wastage of water. A dripping tap is litres a day; a running overflow is far more, day and night, and nobody hears it.
Damage to the environment in contamination of water.
Cost to owners due to possible damage to property.
Cost to owners due to possible damage to other property — flats and apartments, where your leak becomes somebody else’s ceiling.
Inconvenience of having no services — water, electricity, heating. A family with no water is not inconvenienced, they are stuck.
That fourth one is why emergency work in a block is treated so differently from a house. One leak on the third floor can damage every flat beneath it, and the cost stops being about plumbing very quickly.
📚
Towards Level 2Finishing an installation properly has a name and an order: commissioning. Visual inspection first — is it clipped, is it undamaged, are there open ends. Then soundness testing: fill with wholesome water, leave it thirty minutes for the temperature to settle, pressurise to 1.5 times working pressure and leave it on test for an hour, watching for any drop. Then flushing and disinfecting to clear debris and flux — clean water will do in a house. Then performance testing: pressure with a gauge and flow rate with a weir cup, with the system under full demand. Then handover: the paperwork, the warranties, showing the customer where the stop valve is and how the system works. Commissioning is the part most often rushed, and it is the part that decides whether you get called back.
The SI units you will use, and the prefixes that scale all of them
Read the lesson ▶
Every trade that measures anything agrees on the same units, and the agreement has a name: SI, the international system. It matters because a drawing produced in one office is built by somebody who has never met the person who drew it.
The units this unit names
Quantity
Unit
Symbol
Length
metre, millimetre
m, mm
Time
second
s
Temperature
kelvin
K
Area
square metre
m²
Volume of water
litre
L
Reading them properly
Length: the metre and the millimetre. Construction drawings are dimensioned in millimetres, almost without exception, and there are a thousand in a metre. A radiator shown as 1200 is 1200 mm, or 1.2 m. Getting this wrong by a factor of a thousand is the classic apprentice error, and it is always obvious afterwards.
Time: the second. Flow rate is where you meet it — litres per second, or litres per minute. A bath tap wants around 0.3 litres per second to fill in a reasonable time.
Temperature: the kelvin. The SI unit is the kelvin, not the degree Celsius, even though every thermometer on site is marked in Celsius. Both scales step in the same size of degree; they start in different places.
Area: the square metre. Heat loss is worked out per square metre of wall, floor, roof and window, so this is the unit that decides what size radiator a room gets.
Volume of water: the litre. A cylinder is 210 litres, a bath run for a soak about 80 (a full tub holds more), a WC flush six.
Prefixes
One system, and three prefixes that scale all of it.
The prefix does the scaling, and it is the same prefix on every unit. Learn three and you can read units you have never seen.
Kilo means a thousand. A kilometre is 1000 metres, a kilowatt is 1000 watts, a kilogram is 1000 grams.
Centi means a hundredth. A centimetre is a hundredth of a metre, so there are 100 in a metre.
Milli means a thousandth. A millimetre is a thousandth of a metre, so there are 1000 in a metre.
So the arithmetic is always the same shape: to go to a bigger unit you divide, to go to a smaller one you multiply. 2400 mm ÷ 1000 = 2.4 m. 0.75 m × 1000 = 750 mm.
Be careful writing them. One missing letter changes an answer by a factor of a thousand, and it is the difference between a 15 mm pipe and a 15 m one.
The one that connects mass to volume
Worth carrying from the start: one litre of water weighs one kilogram. So a 210 litre cylinder holds 210 kg of water — getting on for a quarter of a tonne, sitting on somebody’s floor. That is why a cylinder or a cistern needs its support thinking about, and why a full storage cistern is never something to be casual with in a loft.
📚
Towards Level 2Level 2 uses these units to work things out rather than to name them. Area is length × width for a rectangle and πr² for a circle, and it is how you size a radiator from the wall, window and floor areas of a room. Volume is the area of the base × the height, giving cubic metres — and 1 m³ of water is 1000 litres and weighs 1000 kg. You will also add the units of pressure (the pascal, and the bar — 1 bar = 100,000 Pa), of electricity (volt, ampere, ohm, watt — the ampere is an SI base unit like the metre), and of energy, the kilowatt hour, which is what the meter on the wall counts. Same system, same prefixes.
Solid, liquid and gas, and the temperatures that separate them
Read the lesson ▶
Water is the only common substance found in all three states at temperatures that occur naturally on earth. That is not a curiosity — it is the reason a plumbing system can freeze in January and explode in July, and the reason this unit exists.
Ice, water and vapour on one wall, on one morning.
The three states
Solid, liquid, gas. Ice, water and steam are the same substance with the molecules held at different distances and moving at different speeds.
Water flows through pipes because it is a liquid. It sounds too obvious to be worth saying, which is exactly why it is worth saying: a liquid takes the shape of whatever contains it but keeps its volume, and everything a plumbing system does depends on that.
The temperatures
Temperature
What happens
0°C and below
Solid — freezing point
4°C
Maximum density
0°C to 100°C
Liquid
100°C and above
Gas — boiling point
Freezing is water changing from liquid to solid. Boiling is water changing from liquid to gas. Both happen at a fixed temperature, and the Celsius scale is built on them: zero at one, a hundred at the other.
Maximum density at 4 °C
Three states, and the turn at 4 degrees that makes ice float.
This is the odd one, and the one worth understanding rather than memorising.
Almost everything gets denser as it cools — the molecules slow down and pack closer. Water does that too, down to 4 °C. Then it turns round and gets lighter again on the way to freezing.
That single fact is why ice floats, why a pond freezes from the top down rather than the bottom up, and why the fish are still there in spring. It is also, less romantically, why the burst in a frozen pipe is usually somewhere you cannot see.
📚
Towards Level 2Heat a pan of ice and the temperature climbs to 0 °C and then stops, even though you are still putting heat in, until all the ice has melted. The heat going in is changing the state rather than the temperature, and it has a name: latent heat. Heat that does change the temperature is sensible heat. The same thing happens at 100 °C, and it is why a kettle takes so long to boil dry after it reaches the boil. Level 2 puts numbers on both.
Water expands whether you heat it or freeze it, and both directions break something
Read the lesson ▶
Water is one of very few substances that expands in both directions — heat it and it expands, freeze it and it expands. Every safety device on a hot water system, and every lagged pipe in a loft, exists because of one of those two numbers.
Water to steam: 1600 times
A temperature and pressure relief valve: the way out for water that would otherwise turn to steam in a sealed cylinder.
Heat water to 100 °C and it becomes steam, occupying 1600 times the volume it had as a liquid.
Sixteen hundred times. In a sealed system with nowhere for it to go, that is not a leak — it is an explosion, and a hot water cylinder that fails this way takes the building with it. It is the reason every hot water system has a way out: an open vent pipe, or a temperature and pressure relief valve, or both, and never a valve fitted anywhere that could shut that route off.
Water to ice: 10%
The ice seals the split it made. Nothing shows until it thaws.
Freeze water and it expands by 10% — a tenth.
A tenth sounds modest until you remember the pipe cannot stretch. The ice takes the room it needs and the pipe splits along its length. That is what causes burst pipes, and the cruel part is the timing: the split is sealed by the ice that made it, so nothing happens until it thaws, which is usually the mild morning after the cold snap, and usually while the house is empty.
Which is why pipework in a loft, a garage or an unheated void is lagged, why a cold water storage cistern is insulated, and why an empty property in winter gets drained down rather than left hoping.
And 4% in between
Three numbers, and each one has a component attached to it.
Between freezing and boiling, water expands by about 4% as it is heated. No explosion, no split — but the water in a cylinder has to go somewhere as it warms up, and it does: it rises up the cold feed and back towards the cistern, which is why the level in a cistern is set with room above it and why the overflow sits higher still.
Three numbers, then, and each has a device attached to it: 1600 to steam gives you the vent and the relief valve, 10% to ice gives you lagging, and 4% when heated gives you the space above the water in a cistern.
📚
Towards Level 2Level 2 turns the 4% into arithmetic: how much a given volume grows over a given temperature rise, which is what sizes an expansion vessel on a sealed system or a feed and expansion cistern on an open vented one. Same fact, now with a calculation attached and a component chosen from the answer.
Wholesome, soluble, hard, soft, acidic, alkaline — and the scale that measures it
Read the lesson ▶
This lesson is vocabulary, and the words are worth getting exactly right, because each one is a claim about what the water will do to a system.
Wholesome
Wholesome: fit to drink, and meeting a legal standard. Not pure.
Water from a kitchen tap is described as wholesome. Not pure, and not simply drinking water.
The distinction is real. Pure water is H₂O and nothing else — you would not want to drink it and you could not get it out of a tap. Wholesome means fit for human consumption: it has dissolved minerals in it, and it meets a legal standard for what may and may not be in it. That legal meaning is why it is the word the trade uses, and why anything that changes the water — heating it, softening it, storing it badly — means it is no longer wholesome.
Solubility
Water dissolves more than any other common liquid. Tea is one harmless example.
Solubility is the ability to dissolve things, and water is extraordinarily good at it — better than any other common liquid. That is why a cup of tea works, and it is also why water picks up minerals from every rock it passes through and why it will attack a pipe given thirty years and the chance.
Everything else on this page follows from solubility. What the water dissolved on the way to the tap decides everything about what it does when it gets there.
Hard and soft
Temporary hard water leaves this behind. Which you have depends on the ground it came through.
Hard water has dissolved a lot of calcium and magnesium, usually from limestone or chalk. Soft water has dissolved very little — it has run off moorland or over sandstone, which give up nothing, and what it has dissolved instead is carbon dioxide out of the air.
Which you have depends entirely on the ground the water came through, and it changes from one town to the next.
Acidic and alkaline, and the scale
Soft water is acidic. Hard water is alkaline. Those two sentences link every word on the page.
The scale for acidity and alkalinity is pH. It runs from 0 to 14:
Acidic — below 7.
Neutral — 7 exactly, which is where pure distilled water sits.
Alkaline — above 7.
Dissolved carbon dioxide makes water slightly acidic, so soft water is acidic. Dissolved limestone makes it alkaline, so hard water is alkaline. Those two sentences link every word on this page, and they explain the whole of the next lesson.
📚
Towards Level 2Hardness comes in two kinds, and the difference decides the treatment. Temporary hardness is dissolved calcium carbonate, and it is temporary because heating the water drops it back out — as limescale. Permanent hardness is dissolved calcium sulphate, which stays in solution however hot the water gets. Level 2 covers the treatments: base exchange softeners, scale reducers and inhibitors, and which of them touches which kind.
Limescale and corrosion — the two effects, and which water causes which
Read the lesson ▶
The two named effects of water on plumbing systems are lime-scale and corrosion, and they are opposites caused by opposite water. Hold them as one sentence: hard water furs things up, soft water eats them.
Limescale
Hard water furs things up. Soft water eats them. Opposite effects, caused by opposite water.Limescale conducts heat badly, so a scaled element heats the scale before it heats the water.
Limescale forms when hard water is heated. The dissolved calcium comes back out of solution and sticks to whatever is hottest — the element in a kettle, the coil in a cylinder, the heat exchanger in a boiler.
Two things make it expensive. Limescale is a very poor conductor of heat, so a scaled heat exchanger has to heat the scale before it can heat the water, and the customer pays for that every day the appliance runs. And it builds inwards, narrowing the bore, which kills the flow rate through a combi and eventually blocks it altogether.
It also gets worse the hotter you run the system, which is one of the reasons hot water is stored at 60 to 65 °C and not at 80.
Corrosion
Pinholes in the middle of straight runs, with the joints fine: soft water corrosion.
Corrosion is the soft water problem. Slightly acidic water attacks metal, slowly, from the inside.
It is slow enough to be invisible for decades and then arrive all at once: pinhole leaks in copper, several in the same house within a year or two, in the middle of straight runs rather than at the joints. When you meet that pattern the pipe is not unlucky, it has reached the end of its life in that water.
The three you should be able to match
A tidemark on the bath means hard water: it reacts with soap instead of lathering.
Situation
Type of water
Difficult to lather
Hard water
Can corrode pipework and materials
Soft water
Limescale deposit build up
Temporary hard water
Difficult to lather is the everyday test, and it is the one a customer will describe to you without knowing what they are telling you. Hard water reacts with soap instead of foaming with it — which is why a soft water area feels slippery in the shower and a hard water one leaves a tidemark on the bath.
Notice that the third row says temporary hard water specifically. That is the kind that gives up what it is carrying when it is heated, which is exactly what limescale is.
Density and gravity circulation, and capillary attraction in a solder fitting
Read the lesson ▶
Two effects that move water without a pump. Both look like magic the first time you see them, both are ordinary once you know why, and both are working in every system you will touch.
Density, and gravity circulation
Warm water is less dense than cool water, so it rises. Cool water is denser, so it falls. That is the whole mechanism.
Put a heat source at the bottom of a circuit and the water above it warms, becomes lighter, and rises. Cooler water falls in behind to replace it, warms in its turn, and rises. Round it goes, with nothing driving it but the difference in density. That is gravity circulation, and old hot water systems ran entirely on it — which is why they used large bore pipe on gentle rises, because there is very little push behind it.
The same effect stacks the water in a cylinder into layers, hottest at the top. That is called stratification, and it is the reason for a piece of design you will see every day:
Position
Temperature
Top
65°C
Middle
60°C
Base
55°C
The top is the hottest. So the coil goes in at the bottom of a cylinder and the draw-off comes from the top: heat is put in where the water is coolest and taken out where it is hottest. Not a curiosity — the design.
Gravity circulation also happens when nobody wants it. Heat creeping up into a cylinder or a towel rail overnight with the pump off is the same effect, running where the pipework let it.
Capillary attraction
Heat goes in where the water is coolest and comes out where it is hottest. That is the design, not a curiosity.Gravity pulls down. Across a gap that small, the solder goes up anyway.
Put a very narrow gap between two surfaces and a liquid will be drawn into it — upwards, against gravity, with nothing pushing it. That is capillary attraction.
The closer the two surfaces, the further the liquid climbs. You have seen it in a paper towel and in a plant drawing water up a stem, and it is what makes a solder fitting work.
A solder fitting is a socket that is a close sliding fit over the pipe. Heat it, touch solder to the mouth of the joint, and the molten solder is pulled right round the gap and up into it. Nobody pours solder into a joint, and a joint made on the underside of a pipe fills just as completely as one made on top, because across a gap that small the effect is stronger than gravity.
Explaining the two together
No pump, and the water still climbs the kitchen roll: capillary attraction in its narrow gaps.
Both are the same idea seen twice: water moves on its own when something about it is uneven. Uneven temperature makes it circulate; an uneven gap makes it climb. Neither needs a pump, and neither can be switched off.
It also explains two rules you will be given without explanation: the fit has to be close, and the surfaces have to be clean. Widen the gap or leave oxide in it and capillary attraction simply stops working — which is what a joint that will not take solder is telling you.
📚
Towards Level 2Capillary attraction is one of three related effects. Water molecules stick to each other — that is cohesion, and it is what pulls a drip into a bead and gives a full glass its slightly domed surface, called surface tension. Water molecules also stick to other things — that is adhesion, which is why a windscreen holds raindrops. Capillary attraction is adhesion winning over the weight of the liquid across a narrow gap.
Metals, alloys, plastics and ceramics — and the split inside each
Read the lesson ▶
Four groups, and two of them split in half. The splits are the part worth learning, because they are what decides where a material may be used.
Metals: ferrous and non-ferrous
The magnet sticks to the steel and not to the copper: ferrous and non-ferrous, tested in a second.
Ferrous metals contain iron. They rust, and they stick to a magnet — low carbon steel pipe, cast iron, malleable iron fittings.
Non-ferrous metals contain no iron: copper, lead, aluminium, zinc. They do not rust, though they corrode in their own ways.
The magnet is the test, and it is a genuinely useful one on site. It is also why a magnetic filter on a heating system catches steel debris out of a system that is mostly copper.
The consequence matters: iron and steel are strong and cheap, but rust would contaminate the water supply, so steel pipe is used for heating and drainage rather than for drinking water.
Alloys
Brass is copper and zinc. It machines and threads far better than copper.
An alloy is two or more metals mixed to get properties that neither has alone.
Copper mixed with zinc is brass, which machines and threads far better than copper and keeps copper’s resistance to corrosion — which is why every fitting, valve body and tap you handle is brass. Copper mixed with tin is bronze, and gunmetal is another of the family. Solder is an alloy too.
Stainless steel is the interesting one. It contains iron, but the chromium alloyed with it forms a tight protective skin, so it does not rust and is barely magnetic — which is why it can be used for water supply where ordinary steel cannot.
Plastics: thermoplastic and thermosetting
This is the split that catches people, and the difference is what heat does to them.
Thermoplastics soften every time they are heated, and can be reshaped and recycled. Polybutylene, polythene, PVC, MDPE, ABS — the pipe and the waste fittings.
Thermosetting plastics set once, permanently. Heat them again and they burn or char rather than soften. WC seats, cistern lids, electrical fittings, handles.
The practical consequence is one you will meet in your first month: because plastic pipe is thermoplastic, it deforms if it gets hot. Solder a joint too close to it and the pipe goes soft and leaks. Use a heat mat, or better, make the joint out of position and let it cool before you connect it to the plastic.
Plastics also break down in sunlight unless they are treated for it — ultraviolet degradation. PVC, polybutylene, MDPE and ABS all suffer from it, and ABS is the worst.
Ceramics
Four groups, and two of them split in half. The splits are the part that decides where a material may be used.
Ceramics are fired clay. Basins, WCs, tiles. Hard, completely resistant to water and to chemicals, easy to clean, and brittle — drop a tool in a basin and you find out which.
Fire clay looks similar but is much heavier and tougher, which is what a Belfast sink and most shower trays are made of.
Strength, hardness, ductility, malleability, insulation — and why each item is what it is
Read the lesson ▶
Naming the material is one question. Naming the property that makes it right for the job is a different one, and it is the one that transfers — because when you meet a material you have never seen, the property is what tells you what to do with it.
Name the property of the material, not just the material, and you can reason about one you have never seen.
The properties
Ductile is drawn OUT. Malleable is squashed DOWN. That is the pair everybody swaps.
Strength — how much load it takes before it fails.
Tensile strength — the same idea for pulling specifically: how hard you can stretch it before it breaks. A tensile force is two forces pulling directly away from each other.
Hardness — resistance to being scratched, cut or worn. It is the property of the thing doing the cutting rather than the thing being cut.
Ductility — it can be drawn out into a wire or a tube without breaking. This is why copper exists as pipe at all: the tube is drawn from a solid billet.
Malleability — it can be hammered or pressed into shape without cracking. Lead is the most malleable metal you will handle, which is why it was used for weathering roofs for centuries and still is.
Insulation — it resists the flow of heat, or of electricity, through it.
Ductile and malleable are the pair everybody swaps. Ductile is drawn out; malleable is squashed down.
Four items, four properties
Lagging is an insulator: it reduces heat loss but can’t stop it. Keep it butted tight and sealed, so there is no gap.
Item
Property
Lagging
Insulator
Steel fittings
Malleable
Diamond tipped core drill
Hard
Copper tube
Ductile
Every pairing has a reason, and the reason is the thing worth carrying:
Lagging works because it passes very little heat. That is what makes it an insulator: it slows the heat loss, and it cannot stop it.
Malleable iron fittings are cast, then annealed — heat treated until the brittleness is gone — so they can take the strain of a tapered thread being wound into them without cracking.
A core drill is tipped with the hardest substance there is, because it has to cut brick, stone and concrete without wearing away.
Copper tube is drawn out into a tube, which takes ductility — and the same property is why you can bend it cold without it snapping.
📚
Towards Level 2Two more properties join the list. Shear strength is resistance to two forces pushing or pulling past each other rather than directly apart — it is what a fixing into a wall is really being asked for. And corrosion resistance is treated as a property in its own right, which is why copper is chosen for pipework and why the choice of material stops being description and starts being a decision.
What causes it, why rust is worse than it looks, and how it is stopped
Read the lesson ▶
Corrosion is metal returning to the state it was dug up in. You cannot argue with it, but you can starve it, and the whole of corrosion prevention comes from knowing what it needs.
Rust lifts and flakes, and exposes clean steel underneath to rust in its turn.
What atmospheric corrosion needs
Oxygen and moisture, together. Take either one away and it stops. That is the entire principle in a line, and everything below is a way of applying it.
Why rust is worse than it looks
On copper the oxide stays put and protects the metal. Outdoors for years, it turns green.
On a ferrous metal — steel, cast iron — corrosion is rust, and rust has a nasty property: it takes up more space than the steel it came from. So it lifts, it flakes off, and it exposes clean metal underneath, which promptly rusts in its turn.
That is why rust does not stop at the surface the way you might expect. It eats inwards until there is nothing left, and a steel pipe rusting from the outside in a damp duct will eventually go through.
Non-ferrous metals corrode too, but differently, and this is the useful contrast. Copper, lead and aluminium form an oxide layer that is tight and stays put, sealing the metal underneath. The dull dark brown or black on old copper pipe indoors is not damage — it is a coat protecting what is beneath it. Left outdoors for years instead, copper weathers all the way to the green patina of an old copper roof.
Stopping it
Same reaction, opposite consequences - and the whole of prevention follows from the difference.Galvanising: the zinc corrodes instead of the steel, so it protects even where it is scratched.Black sludge is corrosion from inside the system. Refill with inhibitor after a drain down.
Every method is one of the two ingredients removed, or the metal kept away from both:
Paint — a barrier against moisture and air.
Galvanising — a coat of zinc over steel. The zinc corrodes in preference to the steel underneath, so it protects even where it is scratched.
Plastic coating, or plastic-sleeving a pipe buried in a wall or a floor.
Keeping it dry — ventilating a duct, or not burying steel in a damp screed in the first place.
Choosing a material that does not care — copper, plastic, stainless steel.
And inside a heating system, where the water cannot be got rid of, a chemical corrosion inhibitor is added instead. It is why a system that has been drained down should be refilled with inhibitor in it, and why a system full of black sludge has usually not seen any for years.
📚
Towards Level 2A second mechanism, and a more interesting one. Electrolytic corrosion — also called galvanic corrosion — happens when two different metals sit in the same water, because water is an electrolyte and will carry a current between them. The more reactive metal (the anode) is eaten away to protect the more stable one (the cathode), and how fast depends on how far apart the two metals sit in the electromotive series. It is the same process a battery uses on purpose. Practically: it is why aluminium radiators and copper pipe need an inhibitor between them, and why connecting copper to galvanised steel destroys the zinc coating first. Level 2 also covers erosion corrosion, caused by water moving too fast through a pipe, which is a sizing fault rather than a chemical one.
Conduction, convection and radiation — and what a surface finish does
Read the lesson ▶
Three methods, and every appliance you install uses at least two of them. Learn which is which and you can explain to a customer why the radiator goes under the window.
Conduction
Conduction: heat passing along a solid, molecule to molecule.
Through a solid, molecule to molecule. The handle of a spoon left in a hot pan.
Metals conduct well, which is why pipework, cylinders and heat exchangers are metal. Insulators conduct badly, which is why lagging is not. Conduction is also why a copper pipe through an uninsulated wall gives its heat away all the way along.
Convection
This is the answer to the question every customer asks. The coldest air is falling down the glass, so the heat goes underneath it.
Through a moving fluid — a liquid or a gas. Warmed water or air becomes less dense, rises, and carries its heat with it; cooler fluid falls in behind to take its place.
This is the same density effect as gravity circulation and cylinder stratification, and it is how a radiator actually heats a room. Despite the name, most of what a panel radiator gives out is convection — the fins welded to the back are there to increase it, by giving the air more hot surface to pass over.
It is also why a radiator goes under a window: the coldest air in the room is falling down the glass, and putting the heat source underneath it sets the whole room circulating instead of leaving a cold pool at one end.
Radiation
Radiation: heat straight through space, felt directly on your hands and face.
Straight through space, needing nothing in between. The warmth on your face from a fire, and from the sun across ninety-three million miles of nothing at all.
Radiation is what you feel directly, which is why standing in front of a fire is warm and standing behind it is not, and why an underfloor heated floor feels warm to bare feet.
Surfaces and finishes
Conduction through a solid, convection through a moving fluid, radiation straight through space.
Two facts, and both are used deliberately in this trade:
A shiny surface reflects heat. A dull surface absorbs it — and radiates it back out better as well.
Reflective foil goes behind a radiator, shiny side in, so heat that would have gone into the wall is bounced back into the room.
A cylinder jacket has a reflective outer face for the same reason.
A solar thermal collector is matt black precisely so that it absorbs as much as it can. A shiny one would reflect the sun straight back off.
Same physics, used two opposite ways, depending on whether you are trying to keep heat somewhere or collect it.
The devices, the two scales, and what insulation is actually doing
Read the lesson ▶
Three devices, two scales, and the reason for every jacket and every length of lagging on a job.
Temperature measuring devices
Thermostatic radiator valve. Senses the air temperature at the radiator and throttles the flow through it, so one room can be cooler than another. It measures and acts in the same fitting.
Stem thermometer. A probe you put into water, a pocket or a flow to read an actual temperature. This is what proves a cylinder really is at 60 °C rather than set to it.
Room thermostat, also called an air thermostat. Senses the temperature of a room and switches the heat source on and off.
The pairing to keep straight: the TRV controls one radiator; the room thermostat controls the system. A house with TRVs on every radiator and no room thermostat has no way of ever telling the boiler to stop.
The two scales
0 °C is 273 K, and there is still heat in that air for a heat pump to collect.
K is kelvin.°C is centigrade, which is also called celsius.
The degrees are the same size on both scales, and that is the useful part: a rise of 1 K is a rise of 1 °C, so any temperature difference is the same number in either. They differ only in where zero sits.
Celsius puts zero at the freezing point of water and 100 at its boiling point.
Kelvin puts zero at absolute zero — the coldest anything can be — which is −273 °C.
So K = °C + 273. Freezing is 273 K, boiling is 373 K, and both scales climb 100 degrees between them.
Same size of degree. They differ only in where zero sits - which is why 0 degrees C is not "no heat".
Which explains something that sounds like nonsense otherwise: an outdoor temperature of 0 °C is not “no heat”. It is 273 kelvin, and there is a great deal of heat in it. That is the whole reason an air source heat pump works in the middle of winter.
Insulation
Insulation traps STILL air. Squash it or wet it and it stops working.Insulation traps still air. Squashed or wet, it stops working.
The two benefits are prevention of heat loss and energy efficiency — or put together, insulating a hot water cylinder is done to prevent heat loss and save energy.
Insulation works by trapping still air. Air is a very poor conductor, so a material full of tiny air pockets — foam, mineral wool, a cylinder jacket — passes very little heat through it.
The word still is doing the work. Air that can move carries heat by convection, which is why insulation that has been squashed flat, or has got wet, stops insulating. Fit it so it is not compressed, and keep it dry.
Lag the pipework as well as the cylinder. A run of uninsulated 22 mm through a cold loft gives away far more than anybody expects, and lagging it is the cheapest useful job on any property. Cold pipework in a loft gets lagged too, for the opposite reason — not to keep heat in, but to keep the frost out.
📚
Towards Level 2Level 2 turns heat into numbers. Specific heat capacity is how much energy it takes to raise one kilogram of a substance by one degree — 4.186 kJ for water, which is unusually high, and is the reason water is what we use to carry heat around a building in the first place. From that you calculate how long a cylinder takes to reheat and what output a boiler needs. The insulation figures get numbers too, as U-values, which is how a building’s heat loss is worked out room by room.